Instruction manual
Cat.-No. 60.2513
Radio-controlled alarm clock
Thank you for choosing this instrument from TFA.
1. Before you use this product
• Please make sure you read the instruction manual carefully.
• Following and respecting the instructions in your manual will
prevent damage to your instrument and loss of your statutory
rights arising from defects due to incorrect use.
• We shall not be liable for any damage occurring as a result of
non-following of these instructions.
• Please pay particular attention to the safety notices!
• Please keep this instruction manual safe for future reference.
2. Delivery contents
• Radio-controlled alarm clock
• Instruction manual
3. Field of operation and all of the benefits of your new instru-
ment at a glance
• Radio-controlled clock with highest precision and manual setting
option
• Time zone
• Alarm with snooze function
• Indication of the weekday in 8 languages and date
• Backlight
4. For your safety
• The product is exclusively intended for the field of application
described above. It should only be used as described within this
instruction.
• Unauthorised repairs, modifications or changes to the product are
prohibited.
Caution!
Risk of injury!
• Keep this device and the batteries out of reach of children.
• Small parts can be swallowed by children (under three years old).
• Batteries contain harmful acids and may be hazardous if swal-
lowed. If a battery is swallowed, this can lead to serious internal
burns and death within two hours. If you suspect a battery could
have been swallowed or otherwise caught in the body, seek med-
ical help immediately.
• Batteries must not be thrown into a fire, short-circuited, taken
apart or recharged. Risk of explosion!
• Low batteries should be changed as soon as possible to prevent
damage caused by leaking.
• Never use a combination of old and new batteries together, nor
batteries of different types.
• Avoid contact with skin, eyes and mucous membranes when han-
dling leaking batteries. In case of contact, immediately rinse the
affected areas with water and consult a doctor.
Important information on product safety!
• Do not expose the device to extreme temperatures, vibrations or
shocks.
• Protect it from moisture.
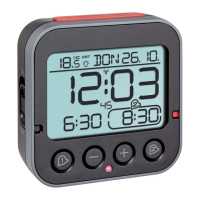
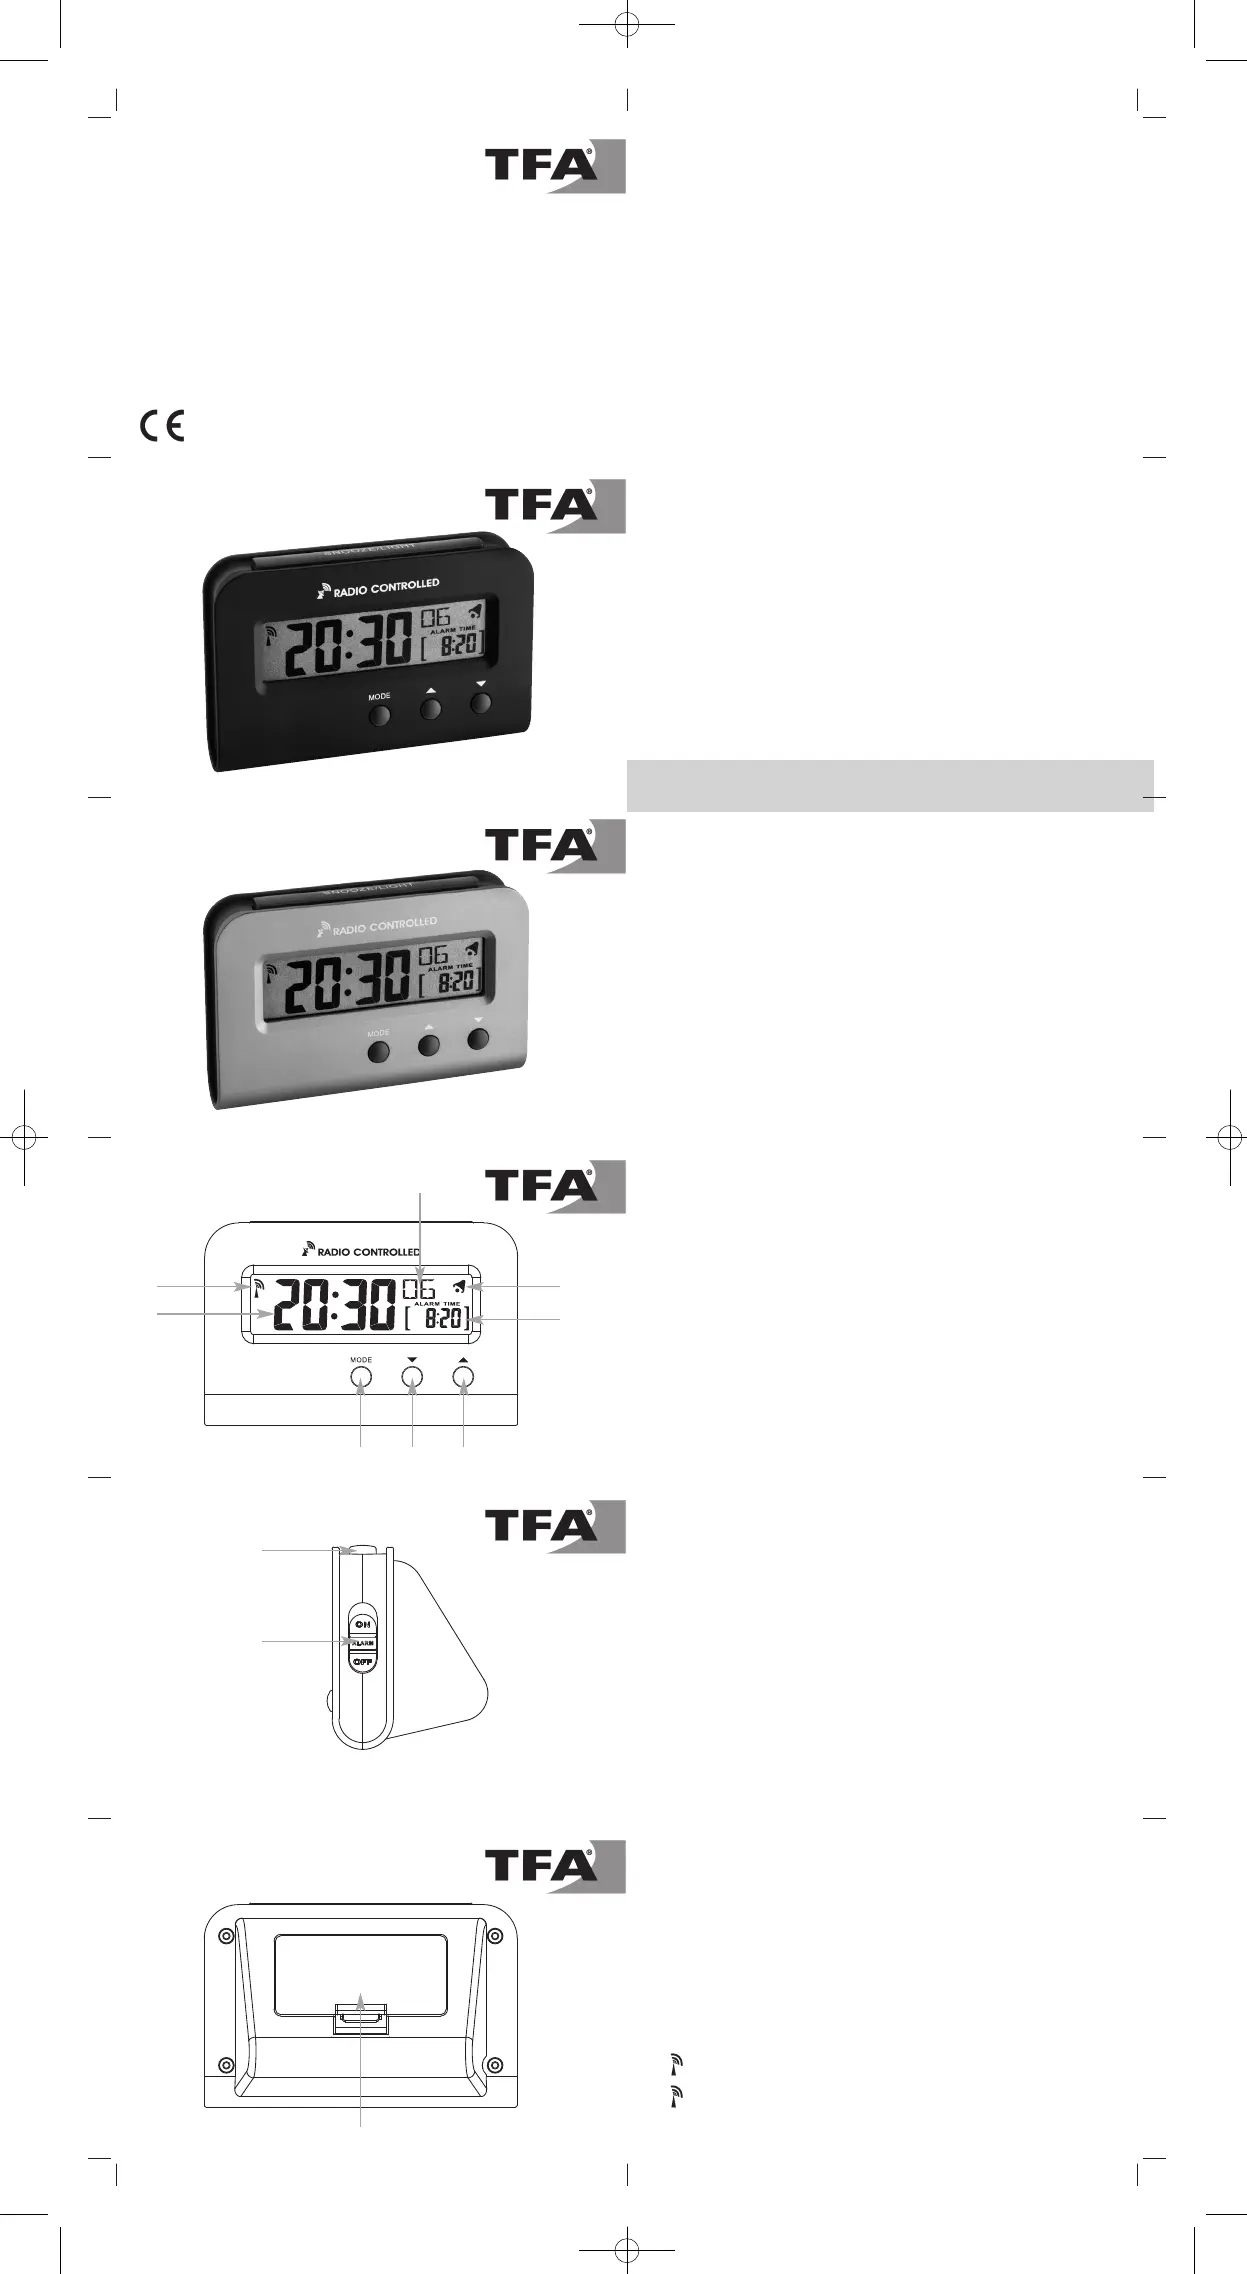
5. Elements
LCD display
A: DCF reception symbol
B: Time/date
C: Alarm symbol
D: Seconds/weekday
E: Alarm time
Buttons
F: SNOOZE/LIGHT button
G: MODE button
H: ▼ button
I: ▲ button
J: ON/OFF switch
Housing
K: Battery compartment
6. Getting started
• Open the battery compartment and insert two new batteries 1,5 V
AAA, polarity as illustrated.
• Close the battery compartment again.
• A short beep tone will sound and all LCD segments will light up for
a short moment.
• The clock will now scan the DCF frequency signal and the DCF
symbol will be flashing. When the time code is received success-
fully after 3-5 minutes, the radio-controlled time, the date and the
DCF symbol are displayed steadily on the display.
• During Daylight Saving Time on the display appears DST.
• If scanning fails, manual initialization can be helpful.
• Press and hold the ▲ and ▼ buttons simultaneously for 3 se-
conds.
• A short beep tone will sound and the DCF signal will be flashing.
• Interrupt the reception by holding again the ▲ and ▼ buttons
simultaneously for three seconds. The DCF signal symbol disap-
pears. The DCF signal reception will be held twice daily at 2:00
and 3:00 clock in the morning. Is not the reception at 3:00 clock
successful, the reception will be repeated until 5:00 o'clock until
the reception is successful.
• The manually set time will be overwritten by the DCF time when
the signal is received successfully.
• During the reception is a button operation not possible.
There are 3 different reception icons:
– flashing – reception is activ
– stays – reception is very good
– no symbol – no reception
Cat.-No. 60.2513.01
Cat.-No. 60.2513.54
G
K
A
F
J
B
H
D
I
C
E
 Loading...