2726
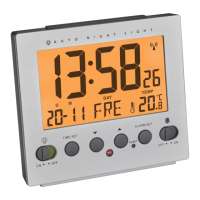
Radio-controlled alarm clock
• If the alarm is not stopped manually, the increasing alarm will automatically
turn off after certain minutes.
• The alarm symbol rests on the display and the alarm time will be reactivated at
the same time.
• When the alarm rings, press the SNOOZE/LIGHT button and the snooze function
will be activated.
• Once the snooze function is activated, zZ will be flashing on the display.
• The alarm will be interrupted for 5 minutes.
• Slide the AL 1 ON/OFF switch downwards (OFF) to deactivate the alarm function.
• The alarm symbol and the color mark disappear on the display.
8.2 Setting of the second alarm time
• Press the SET 2 button in normal mode.
• 7:00 (default) or the last adjusted alarm time appear on the display.
• Set the alarm time for the second alarm in the same way.
• To activate/deactivate the second alarm function, move the switch AL 2 ON/OFF
up (ON)/down (OFF).
9. Backlight
• Press the SNOOZE/LIGHT button.
• The backlight turns on for 5 seconds.
• The device is provided with a light sensor to turn on the light automatically at
dark.
• Use the AUTO LIGHT ON/OFF switch at the back to activate or deactivate the
backlight.
Radio-controlled alarm clock
• appears or disappears on the display.
• Note: During a DCF signal reception, the lighting is temporarily disabled or
cannot be activated
10. Care and maintenance
• Clean your instrument with a soft damp cloth. Do not use solvents or scouring
agents.
• Remove the batteries if you do not use the product for a long period of time.
• Keep the instrument in a dry place.
10.1 Battery replacement
• Change the batteries when the battery symbol appears on the display.
• Open the battery compartment and insert the two new batteries 1,5 V AA.
Ensure that the battery polarity is correct
• Close the battery compartment again.
11. Troubleshooting
Problem Solution
No display ➜ Ensure that the batteries’ polarity is correct
➜ Change the batteries
No DCF reception ➜ Press the – button for 3 seconds and start
the reception manually
TFA_No. 60.2539_Anleitung_06_24 12.06.2024 9:11 Uhr Seite 14