25 24
CASA – Wireless weather station
CASA – Wireless weather station
• Press the RESET button you can restart the outdoor transmitter manually
(e.g. for testing or in case of loss of transmitter signal).
• After successful installation close the battery compartment of the outdoor
transmitter carefully.
• The channel number appears on the display.
• The outdoor temperature and humidity appear in the display in sequence.
8.1 Additional outdoor transmitters
• For having more than one outdoor transmitter select with the CH1/2/3 switch
in the battery compartment of the transmitter for each single outdoor trans-
mitter a different channel (CH1, CH2 or CH3). Insert two new batteries 1,5 V
AA as indicated by the polarity. Take the base station then in operation or
press the SENSOR button on the base station.
• The outdoor values and the channel number will be shown on the display of
the base station. If you have installed more than one outdoor transmitter,
press the CH/+ button on the base station to change between the channels 1
to 3.
• You can also choose an alternating channel display.
• Press and hold the CH/+ button to activate the alternating channel automati-
cally.
• Press the CH/+ button again briefly, to deactivate the alternating channel and
the desired outdoor transmitter will be shown permanently.
9. Positioning and fixing of base station and the outdoor transmitter
• Choose a shady and dry position for the outdoor transmitter. (Direct sunshine
falsifies the measurement and continuous humidity strains the electronic
components needlessly).
• Place the base station at the final position. Avoid the vicinity of any interfer-
ing field like computer monitors or TV sets and solid metal objects.
• Check the transmission of the signal from the outdoor transmitter to the base
station (transmission range of up to 50 m free field). Within ferro-concrete
rooms (basements, superstructures), the received signal is naturally weak-
ened.
• If necessary choose another position for the outdoor transmitter and/or base
station.
• Is the transmission successfully, you can wall mount the outdoor transmitter
or place it onto a flat surface.
7. Temperature and humidity
7.1 Maximum and minimum values
• Press the MEM/- button.
• MAX appears on the display.
• The highest temperature and humidity for indoor and outdoor are displayed
since the last reset.
• Press the MEM/- button again.
• MIN appears on the display.
• The lowest temperature and humidity for indoor and outdoor are displayed
since the last reset.
• Press the MEM/- button once more, to go back to the present values display.
• The device will automatically quit the MAX/MIN mode if the MEM/-
button is not pressed.
• Press and hold the MEM/- button, when the maximum or minimum
values are displayed to set the maximum and minimum values to the current
values.
• When replacing batteries the maximum and minimum values are deleted
automatically.
7.2 Frost alarm
• On the display appears the symbol for frost, when the outdoor transmitter
shows an outdoor temperature between -2°C...3°C (28°F...37°F).
• The symbol for frost will be flashing in the display for the outdoor
values.
• Once the outdoor temperature rises above the mentioned measuring range,
the symbol for frost will disappear.
7.3 Setting of the temperature unit
• Press the °C/°F switch to change between °C (Celsius) or °F (Fahrenheit) as
temperature unit.
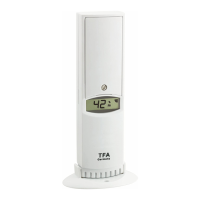
8. Outdoor transmitter
• After inserting the batteries into the outdoor transmitter the transmitter will
automatically transmit the outdoor values to the base station on channel 1.
TFA_No. 35.1135_Anleit_04_20 22.04.2020 11:19 Uhr Seite 13
 Loading...