2120
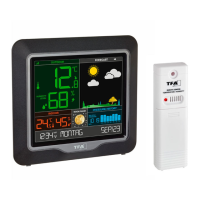
HORIZON – Wireless weather station
A 9: Comfort level indicator of indoor climate A 10: Indoor humidity
A 11: Moon phase A 12: Moonrise/moonset time
A 13: Location A 14: Sunrise/Sunset time
A 15: Daylight Saving Time symbol A 16: DCF reception icon
A 17: Alarm symbol 1+2 A 18: Date and weekday
A 19: Time with seconds A 20: History values of atmospheric pressure
A 21: Absolute or relative atmospheric pressure A 22: Outdoor temperature tendency
A 23: Circle symbol for the alternating channel A 24: Symbol for MAX/MIN
A 25: Channel number
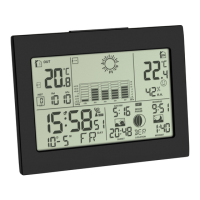
B: Buttons (Fig. 1+2):
B 1: SNOOZE/LIGHT button B 2: +/12/24 button
B 3: Relative/Absolute button B 4: –/ button
B 5: MAX/MIN/– button B 6: MODE button
B 7: °C/°F/+ button B 8: ALARM ON/OFF button
B 9: HISTORY/WEATHER button B 10: SUN MOON button
B 11: CHANNEL button B 12: RESET button
C: Housing (Fig. 2):
C 1: Wall mounting holes C 2: Battery compartment
C 3: Stand (fold out)
D: Transmitter (Fig. 3):
D 1: °C/°F button D 2: TX button
D 3: Wall mounting hole D 4: 1 2 3 switch for channel selection
D 5: Battery compartment D 6: Stand
D 7: Radio symbol channel 1,2,3 D 8: Outdoor temperature display
D 9: Transmission indication LED D 10: Battery symbol for the transmitter
D 11: Transmission signal
HORIZON – Wireless weather station
6. Getting started
6.1 Insert the batteries
• Remove the protective films from the display of the base station and the transmitter.
• Open the battery compartment of the transmitter and receiver and place both instruments on a desk with a dis-
tance of approximately 1.5 meter. Avoid being close to possible sources of interference such as electronic devices
and radio equipment.
• Insert at first two new batteries 1,5 V AAA in the battery compartment of the transmitter and immediately after-
wards three new batteries 1,5 V AAA in the battery compartment of the base station. Make sure the polarities are
correct.
• After a successful installation close the battery compartments carefully.
6.2 Weather symbol setting
• The device will alert you with a beep and all segments will be displayed for a short moment.
• After batteries were inserted or when holding HISTORY/WEATHER button in normal mode for 3 seconds, the
weather symbol will be flashing for 20 seconds. Enter the actual weather during this time by pressing the
MAX/MIN/– or °C/°F/+ button.
• Press the HISTORY/WEATHER button to confirm the setting.
6.3 Reception of outdoor temperature
• After the batteries are inserted, the outdoor values will be transmitted to the base station. The reception symbol
for the transmitter flashes.
• If the reception of the outdoor values fails, “- -” appears on the base station display. Check the batteries and try it
again. Check if there is any source of interference.
• You can also start the outdoor transmitter search manually later on (for example when the outdoor transmitter is
lost or the batteries are changed). Press and hold the CHANNEL button for three seconds. The last registered
transmitter (channel) will be canceled.
• Press the TX button on the outdoor transmitter. The transmission of the outdoor data takes place immediately and
a successful reception will be confirmed by a beep tone of the base station.
TFA_No. 35.1155_Anleitung 28.06.2019 14:44 Uhr Seite 11
 Loading...