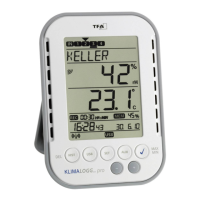
40
Transmitter search for a certain channel
•
Press + or - button during CH 1-8 appears in the display.
•
You can select now any channel.
•
The chosen channel number starts flashing.
•
After the desired channel is selected, CH x appears on the
display.
•
---- appears on the display if no transmitter is found, or the
serial number of a transmitter appears if a transmitter is
already entered on that channel.
•
Press the OK/MAX/MIN button to start a transmitter search
for that channel.
•
LEARNING and the channel numbers appear on the display
with a black bar.
•
The KlimaLogg Pro searches for transmitter signals for three
minutes.
Delete transmitter:
•
Press HIST/DEL button during CH1-8 appears in the display.
•
All entered transmitters will be deleted.
•
DELETED appears in the display.
•
You can also delete single transmitters with the HIST/DEL
button.
RECORDING INTERVAL SETTING:
•
Press SET button twice in normal mode.
•
INTERVAL appears on the text display.
•
The recording interval indication next to symbol REC starts
flashing.
•
Default interval 0:15 HR:MIN correspond 15 minutes.
•
The “+” or the “-” button allows you to select the recording
intervals listed below:
1 min, 5 min, 10 min, 15 min, 30 min, 1 hr, 2 hrs, 3 hrs und 6 hrs
Note:
This function allows you to set the interval in which the KlimaLogg Pro
records the data sets. The KlimaLogg Pro automatically creates a data
set in the corresponding interval. A data record is a snapshot of all
temperature and humidity values of all channels as well as the current
time and date.