14. Battery Condition Indicator
Battery Condition IndicatorBattery Condition Indicator
Battery Condition Indicator
–
––
–
Consists of 8 individual segments and is
located on the LCD Display (fig 4.6). All 8 segments lit shows a fully charged
battery. When you reach 3 segments you should be thinking of recharging
and when you get down to the last 2 lit is important to get it on charge as
soon as possible. At this point there will be limited mileage left. It is
impossible to be more specific than this as every rider and different types of
terrain will achieve different results. It is important to only use Breeze on
short runs to start with to explore the sort of range you will be achieving.
When you are confident about range you can start going on longer journeys
15. Speed Indicator Display
Speed Indicator Display Speed Indicator Display
Speed Indicator Display –
––
–
Located on the LCD display (fig 4.3) the Speed indicator shows the speed the Breeze is
travelling in either mph or kph (fig4.9).
16. Mode & Reset Button
Mode & Reset Button Mode & Reset Button
Mode & Reset Button –
––
–
The Mode and Reset button
(fig 4.8) will change the digital reading (fig 4.3) from speed to
distance or time travelled. The distance travelled can be shown in either miles of km and the time travelled is measured
in hours (fig 4.9). To reset the travel time or distance simply press Mode until the time or distance is showing and then
hold mode for 7 seconds. This button can also change the digital reading to a clock.
17. Set
Set Set
Set up
upup
up
Button
Button Button
Button –
––
–
The Set Up button is used to set up the time and date. To set up or change the time and/or date
indicated on the clock simply press the Mode button until the clock is showing and then hold the Mode button for 7
seconds and you will enter set up mode of the clock. In set up mode use the Mode button to select each unit of time
(hours or minutes) the selected unit will flash. Then use the Set Up button to increase the selected unit by 1 unit. Once
you have set the desired unit press the Mode button to move on to the next.
5
55
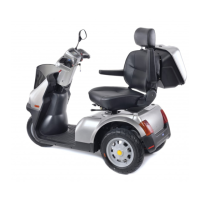
5. SEAT ADJUSTMENT
. SEAT ADJUSTMENT. SEAT ADJUSTMENT
. SEAT ADJUSTMENT
1. For ease of entry and exit to Breeze the seat will swivel to
the left or right with two lock in positions each side at 45°
and 90°. The lever is located at the front of the seat (fig 5.1).
Make sure the seat locks in before either getting on or off, or
driving.
2. The seat adjustment lever located at the front of seat
allows the seat to be adjusted forward or backward (fig 5.2).
3. Armrests can be raised or lowered allowing easier entry
and exit.
4. Backrest can be adjusted by releasing the lever on left
hand side of backrest.
5. Headrest can be made higher simply by pulling gently
upward. To lower there is a small lever located on the top of
the seat at the base of the left hand headrest support.
Simply press the lever and adjust to preferred height.
6. The seat height is adjustable by altering the position of the seat stem. Remove the seat and rear cover and you will
see the seat stem is held in its location by a single bolt. Remove the bolt and the seat stem can be adjusted up or
down to any one of its fixing holes. Adjust to your preferred position and tighten bolt. Refit cover and seat.
 Loading...