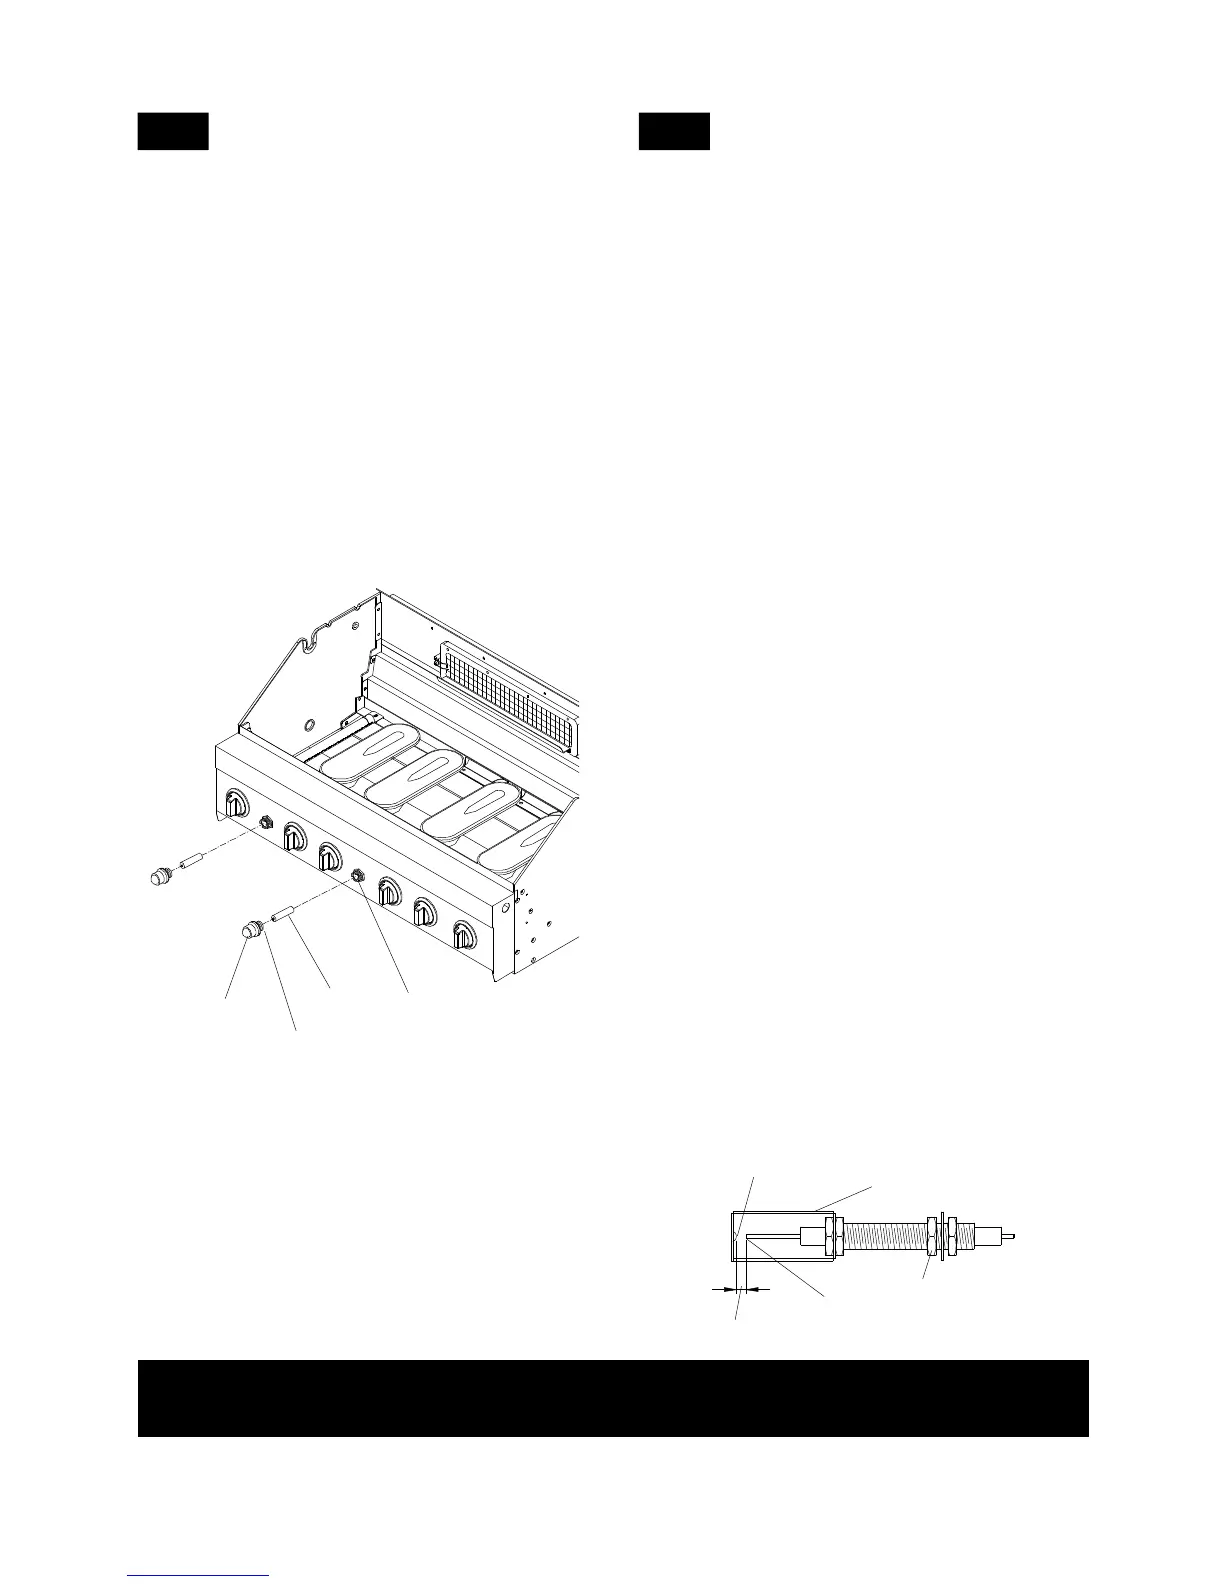
GAS COLLECTOR BOX
SPARK RECEIVER
3/16" SPARK GAP
SPARK ELECTRODE TIP
INSIDE NUT
12
Electrode Check - Requires an
Assistant
•
•
If the gap is wider than 3/16" use a pair of long
nose pliers and gently squeeze the Gas Collector
Box until the gap is correct.
Return the Gas Collector Box to its original
horizontal position, secure the Inside Nut and try
the Electrode Check again.
If no "clicking" sound is heard check the
following common causes. If you need
assistance call the Grill Information Center
at 1-877-934-7455.
Ignitor AA battery not installed properly.
Electric wires may be loose. Remove the AA
battery, inspect the Ignitor Junction Box found
behind the Control Panel, and connect any loose
wires.
5.
•
•
•
•
Using an adjustable wrench, loosen the Inside Nut
just until the Gas Collector Box can be maneuvered
and turned upward.
The gap between the Spark Electrode Tip and
Spark receiver should be approximately 3/16".
Before placing the cooking components into your
grill, ensure that the Spark Electrode Tip is properly
positioned within each Gas Collector Box (a stain-
less mechanism found at the front between each
set of Burners). The easiest way to ensure this is
to perform this Electrode Check:
1.
2.
Be sure all Control Knobs are set to "OFF"
and open the Grill Lid.
Have an assistant stand behind to the right of
the grill and look down at each Gas Collector
Box. NEVER put your face inside Grill Head.
Press the Ignitor Cap. You should hear a
"clicking" sound and your assistant should see
a small blue spark within each Gas Collector
Box. If a spark is present the Electrode Tips
are properly positioned.
3.
4.If no spark is seen, the Spark Gap, as shown
below, needs to be adjusted as follows:
IMPORTANT: Remove any protective film
from outside and inside of Grill Head.
Before use of this grill please refer to
Cleaning Exterior Stainless Steel Surfaces
found on page 31 of this Owner's Manual.
Remove the Ignitor Cap located on the grill
Control Panel.
Place the supplied AA battery into the Ignitor
Slot. Be sure to place the positive pole facing
toward you.
Place the Cap and Spring over the AA battery
then tighten the Ignitor Cap onto the grill
Control Panel.
1.
2.
3.
11
Ignitor Battery Installation
Grill Information Center: If you have questions about assembly or grill operation, or
if there are damaged or missing parts when you unpack this unit from the shipping box, call us
8:00 am - 4:30 pm CST, Monday through Friday at: 1-877-934-7455
22
AA
BATTERY
IGNITOR
CAP
SPRING
IGNITOR
SLOT
+
-