Operating Instructions
UK
Introduction
The Quicks
et is the beginner model in the class of fully
automatic rotation lasers with visible beam for all horizontal
applications. The instrument makes no compromise with
respect to accuracy and performance.
Its functional control panel guarantees easy handling
measuring tasks at indoor and outdoor applications.
Prior to shipment all instruments are carefully checked.
Read the complete Operating Instructions including the
Technical Data and the Safety Requirements prior to using the
equipment the fi
rst time.
We recommend you to observe the following items so that your
laser is ready for use at all times:
1.
Never
place the instrument in its case when
wet
.
2.
Check the accuracy each time before using the instrument,
as we cannot assume any responsibility
for adjustment
errors.
3.
Follow the instructions for handling the accu.
4. Treat the laser beam window and sensor window of the
receiver (option) with
care.
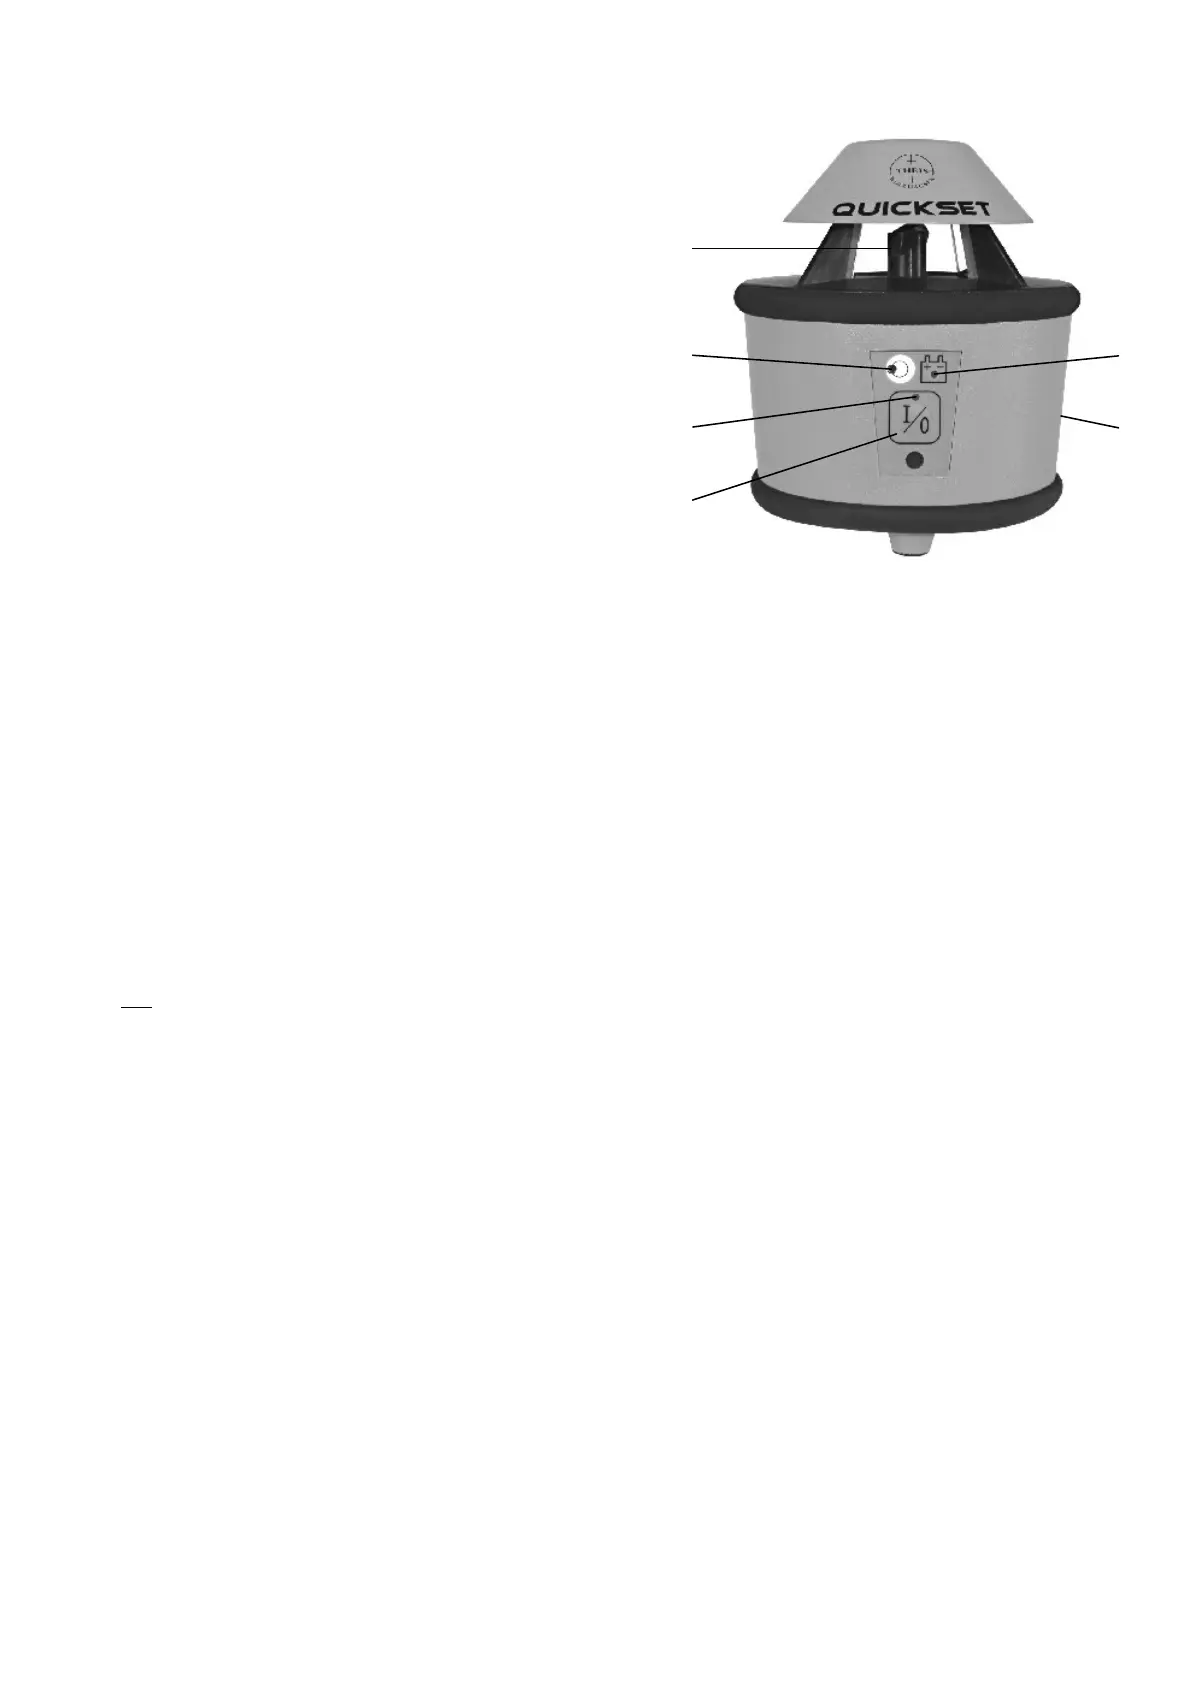
1.
Operating elements /
Display
(1)
Laser exit
(2)
Out of level indicator
(3)
O
peration indicator
(4)
Button On/Off
(5)
Accu condition indicator
(6)
Accu compartment with charging socket on the back
11
12
2.
Preparations for measurement
Set up the Quickset on a solid, even ground or screw it on tight on a tripod.
Align the tripod wit
hin the range of < 5° and
p
ress key (
4
) to activate the
instrument.
The
operating indicator (3) lights up and the out of level indicator (2)
is blinking.
If the tripod head was tilted more than 5°, this will be indicated after a brief period
of time by
rap
id
flashing of the laser beam and the
out of level indicator
(
2
).
Should this occur, shut off the instrument and align the tripod more carefully.
As soon as the laser levelling process has been finished, the laser beam starts
rotating
and the out of leve
l indicator expires.
3
.
TILT function
Should major height changes occur (e.g. an inadvertent jerk of the tripod leg), a so
called
Tilt function
effects a shutdown of the laser beam even within the
automatic levelling range, and this occurrence is signa
lled by rapid flashing of the
laser beam and the
out of level indicator
(
2
).
The instrument has to be readjusted and switched on.
4. Power supply
4.1 Laser
As soon as the
accu condition indicator
(5)
blinks, the capacity of the
accumulator is exh
austed and the accu has to be recharged immediately. If the
indicator is ignored, t
he instrument switches off automatically a short time later.
Recharging of the accumulator only with THEIS standard
-
charger via charging
socket (6) at the accu compartment
of the laser level. The accu can also be
charged, if the accu compartment is
separated
from the laser level.
Overloading is not possible
, if charging is not repeated
successive
several times.
If possible the accu should be charged
at
room temperature. Char
ging under
+5°C can cause the damage of the accu.
Never operate charger in damp rooms!
Please charge the instrument at least every 6 weeks, even it is not
used!!!
4.2 Receiver
When the battery symbol (18) appears on the LCD-display, change the battery
(9V, E-Block), otherwise the range may be reduced.
Press sliding cover of battery section slightly, then push it sideways open.
Dispose old batteries properly. Watch for the right polarity when inserting the
new batteries. (Pay attention to symbols at the receiver case)
13
14
(3)
(2)
(4)
(5)
(6)
(1)
 Loading...