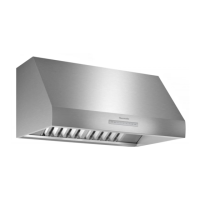
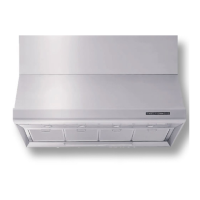
This document describes the Thermador PHE Professional Wall Hoods, including models PHE 30, 36, 42, 48, and 60. It serves as both a care and use guide and an installation manual, with the installation instructions located by turning the book over.
Function Description:
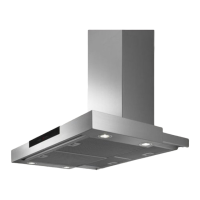
The Thermador PHE Professional Wall Hoods are designed for ventilation in residential kitchens, specifically for use with cooktops and ranges. Their primary function is to exhaust heat, smoke, moisture, grease, and cooking odors from the kitchen to the outside, preventing them from drifting into other rooms. The hood can be installed either on a wall or suspended from a cabinet, and supports both vertical and horizontal discharge configurations. It is designed to work with Thermador's VTR600R, VTR1000Q, and VTR1400Q remote blowers, or with an integral VTN1000Q blower for certain models.
Important Technical Specifications:
- Models: PHE 30, 36, 42, 48, 60.
- Electrical Requirements: 120 V AC, 60 Hz, 15 or 20 A circuit.
- Light Bulbs: 12 Volt, 20 Watt (maximum) halogen light with a G-4 base.
- Ducting: Designed for standard 10" round duct. Metal ductwork is recommended to reduce the risk of fire.
- Installation Height: Approved for installations from 24" to 36" above the cooktop. Thermador recommends 30"-36" above the countertop.
- Mounting: Can be wall-mounted using a wooden bracket or installed under a cabinet.
- Filter Type: Anodized aluminum metal grease filters.
- Wiring: Requires five #16 AWG wires for remote blower installations and black, white, and green #16 AWG wires for power supply.
- Safety Certifications: UL listed (FILE # E21958).
Usage Features:
- Electronic Touch Control: The hood features a PHE Electronic Touch Control panel with dedicated buttons for motor OFF, ON/speed selection (1, 2, 3), Timer, Light ON/OFF, and Dim Light ON/OFF.
- Motor Speed Control: Three motor speeds are available, indicated by LED lights (Speed 1 LED, Speed 2 LED, Speed 3 LED).
- Timer Function:
- If the motor is off and the timer is pressed, the motor will run at speed 3 for 20 minutes and then stop.
- If the motor is running and the timer key is pressed, the motor will continue to run for 10 minutes and then stop.
- Pressing the timer or a speed button while the Timer LED is on will disable the timed mode.
- Lighting Control: Separate buttons for turning lights ON/OFF and dimming the lights.
- Grease Filter Saturation LED: A flashing LED (marked D) reminds the user to clean the grease filter after 40 hours of use. This reminder can be reset by pressing button A for approximately 3 seconds until a beep is heard.
- Circuit Self-test: The control panel allows for a self-test to check the hood's functions. This is activated by simultaneously pressing keys A and B for 3 seconds, initiating a sequence of LED and blower tests, followed by light tests, and ending with a beep.
- Optimal Operation: The blower should be turned on about 5 minutes before cooking to establish upward air currents. Low speeds are for normal use, while higher speeds are for strong odors or fumes. Preventing drafts across the range or cooktop is advised to maintain effectiveness.
Maintenance Features:
- Filter Cleaning: The metal grease filters should be washed at least once a month. They can be washed by hand or in a dishwasher. After washing, water should be drained through edge holes, and filters should be thoroughly dried before reinstallation.
- Filter Removal/Replacement: Filters are removed by pushing each handle towards the back and pulling downwards. Replacement is the reverse procedure.
- Hood Surface Cleaning: For general care, the stainless steel surface should be wiped with sudsy water or household cleaners (e.g., Fantastic® or Formula 409®), rinsed well, and dried with a clean, soft cloth to prevent water marks. Brushed stainless steel should be wiped and dried in the direction of the grain. Abrasive products should not be used. Spray cleaners like Stainless Steel Magic® and Shimmer® can be used to remove fingerprints and add shine.
- Light Replacement:
- Turn off lights and fan, and allow lights to cool before handling.
- Pry loose the lens cover using a flat-edged screwdriver or similar tool.
- Remove the damaged 12 Volt, 20 Watt (maximum) halogen light (G-4 base) and replace it with a new one, following package directions and avoiding touching the new light with bare hands.
- Reinstall the light cover.
- Power Disconnection for Service/Cleaning: Before servicing or cleaning, power must be switched off at the service panel, and the service panel locked to prevent accidental power-on. If locking is not possible, a tag should be attached to indicate power is off for maintenance.
- Safety Guidelines: Emphasizes keeping the fan, filters, and grease-accumulating surfaces clean to reduce the risk of range top grease fires. Recommends turning the hood fan ON when cooking on high heat, using high range settings only when necessary, heating oil slowly on medium-low settings, and never leaving the range unattended while cooking.