Fig 4. Please plug in the at cable of display board to the main power board, then Fix
the front cover on the appliance and screw to x the front cover.
Fig 5. Then x the appliance with screw in another hole, to make sure the whole
appliance is installed rmly onto the wall.
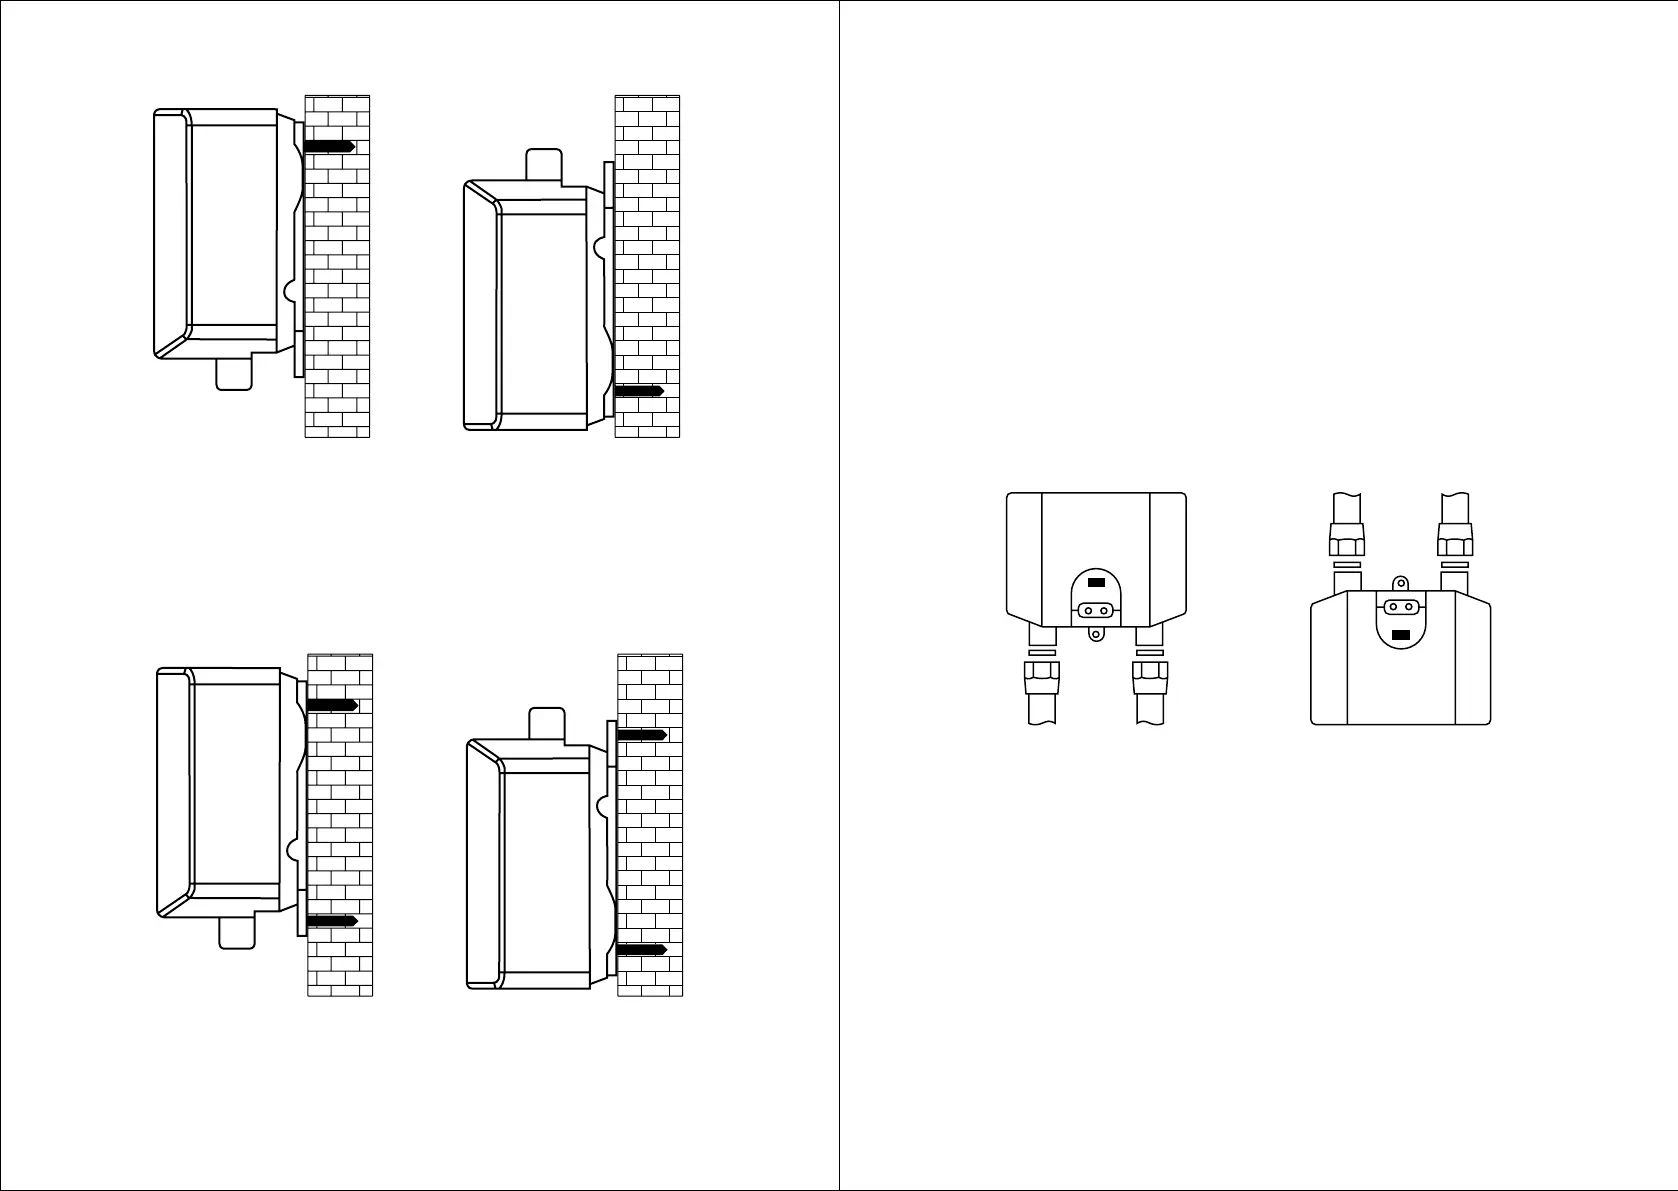
A. For Upright Installation. B. For Downward Installation.
WATER CONNECTIONS
1. All water pipework must comply with national regulations and local water piping
codes.
2. No matter whether installing the appliance upright or upside down, Please connect
the inlet connection (blue nozzle on the unit) to the cold water inlet pipe; connect
the outlet connection (red nozzle on the unit) to the hot water outlet pipe.
3. The unit should be connected directly to the mains water supply. Flush pipes rst
with water to remove any debris or loose particles.
4. It is required that one uses G1/2” water connections to t the appliance. Please
connect the inlet and outlet pipe in the correct perspective mentioned above.
5. Please remember to install rubber seal O-rings at the connections. When all water
connections are completed, check for leaks and take corrective action before
proceeding to turn the unit on.
ELECTRICAL CONNECTION
1. All electrical work must comply with national regulations and local electrical codes
2. The unit must be connected to a properly grounded dedicated branch circuit of
proper voltage rating.
3. While feeding the cable to terminal blocks/Circuit Breaker, please make sure the
metal wire ends and the terminal blocks touch and can be sealed completely. Then
tighten the screws up to make sure the full current can go through.
4. Before beginning any work on the electric installation, be sure that main breaker
panel switch is OFF to avoid any danger of electric shock, all mounting and
plumbing must be completed before proceeding with electrical hook-up.
A
A
B
B
ET INLET
Excellence in Hot Water Technology.
8
9
ThermaQ Specification Hotline 01924 270847