Installation Guideline
The installation must be in compliance with the National Electrical
Guidelines, as well as your local electrical and plumbing regulations.
1. Make sure the appliance is intact, and the ttings are complete.
2. Please make sure the mains power supply, incoming water pressure and the
grounding conditions are adequate, and the ammeter and wire are at the correct
standard required for installation.
3. The appliance must be properly grounded due to the dedicated branch circuits of
high voltage within the unit. Ground wires must be brought to the 'ground' at the
circuit breaker panel.
4. This appliance MUST be permanently connected to the xed circuit breaker. If you
don’t use the heater, please switch o the circuit breaker.
5. Do NOT install this appliance on timber or in the presence of a strong magnetic
eld. The appliance can be installed above or under the sink, and must only be
mounted in a VERTICAL position near by the water ttings.
Installation Method
INSTALLING THE UNIT
Locate an appropriate place on a section of wall as shown in guidelines opposite.
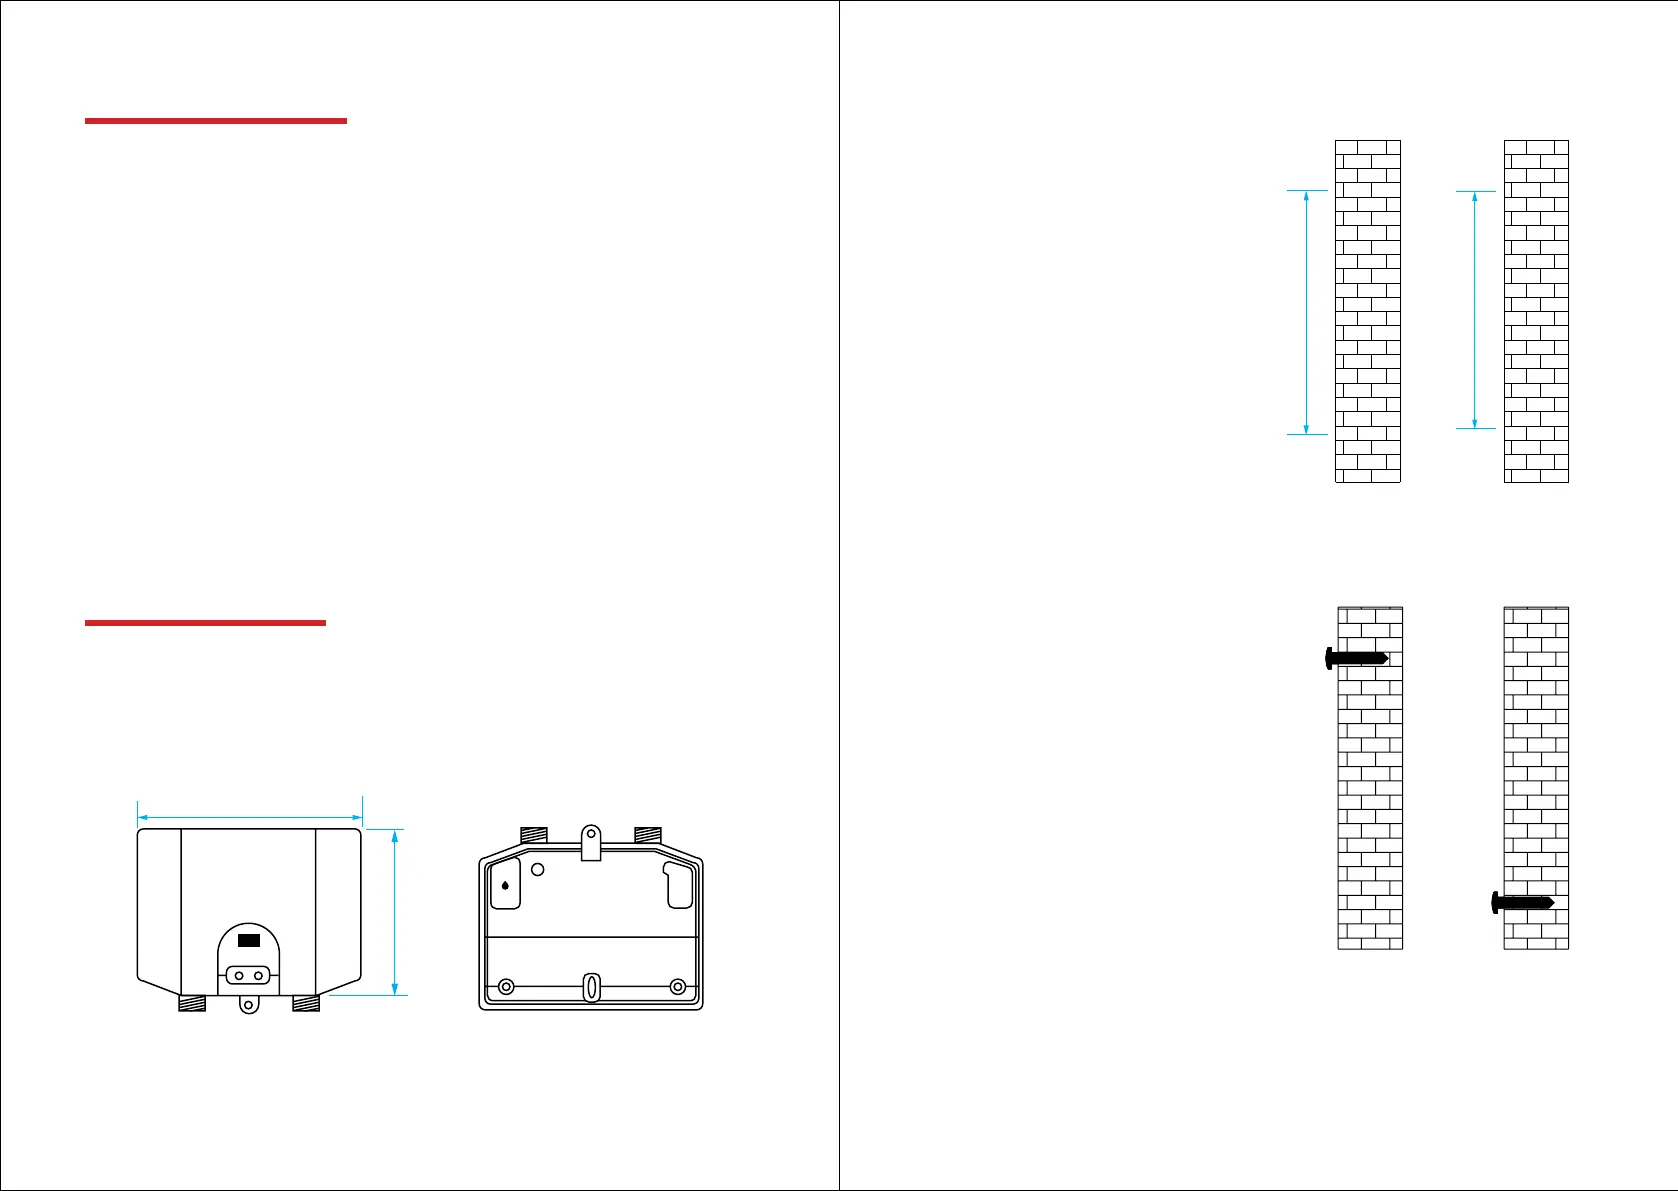
Fig 1. Front and back of the appliance.
Fig 2. Drill two holes of 6mm
diameter: if you install the heater
upright above the sink, the
distance between every two
holes is 146mm; if you install the
heater upside down under the
sink, the distance between every
two holes is 139mm. Put plastic
rawplugs in the holes.
Fig 3. For Upright Installation, drill a
screw into the upper hole (Fig3-A),
For Downward Installation, drill a
screw into the lower hole (Fig3-B).
A. For Upright Installation.
B. For Downward Installation.
A
A
B
B
Excellence in Hot Water Technology.
6
7
ThermaQ Specification Hotline 01924 270847
198mm
160mm
139mm