Manuale Uso Installazione
In particular, it is necessary to register by giving your email.
During the installation operations, the SmartPhone must be connected to the home WiFi and the BlueTooth must be activated.
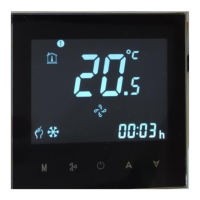
Remaining at a distance of no more than one meter from the thermostat, when it is powered and switched OFF, you must first
connect the thermostat to the WiFi by holding down the "arrow down" button (image 1 below) for 5 seconds, until the WiFi icon starts
flashing on the display (image 2). If an icon other than the WiFi icon appears, repeat the operation. Then start the APP and press the +
button at the top right, select the "Add Device" item.
Select the indication "Small Appliance" on the left column and the wording "Thermostat (Wi-Fi)" on the right column.
When is request to select the home network, enter the password and press the "slow flash" or "fast flash" button depending on what
appears on the thermostat display.
Press the "Next" button on the SmartPhone and wait for the device to be added.
Once inserted in the network, each thermostat can be renamed with a specific name, such as the name of the room (once the
thermostat has been selected, press the key with the three lines at the top right and the screen will appear as in the image 3).
In the same way, it is possible to add other devices and always control them with the APP.
Below some screenshots of the working APP.
Insbesondere ist eine Anmeldung unter Angabe Ihrer E-Mail-Adresse erforderlich.
Während der Installationsvorgänge muss das SmartPhone mit dem heimischen WLAN verbunden und BlueTooth aktiviert sein. Halten
Sie einen Abstand von nicht mehr als einem Meter zum Thermostat ein, wenn dieser mit Strom versorgt und ausgeschaltet ist. Sie
müssen den Thermostat zunächst mit dem WLAN verbinden, indem Sie die „Pfeil-nach-unten“-Taste (Bild 1 unten) 5 Sekunden lang
gedrückt halten, bis Das WLAN-Symbol beginnt auf dem Display zu blinken (Bild 2).
Wenn ein anderes Symbol als das WLAN-Symbol angezeigt wird, wiederholen Sie den Vorgang. Starten Sie dann die APP und drücken
Sie oben rechts den +-Button, wählen Sie den Punkt „Gerät hinzufügen“. Wählen Sie in der linken Spalte die Angabe “Kleingerät“ und
in der rechten Spalte den Wortlaut „Thermostat (WLAN)“.
Wenn Sie aufgefordert werden, das Heimnetzwerk auszuwählen, geben Sie das Passwort ein und drücken Sie die Taste “langsames
Blinken“ oder „schnelles Blinken“, je nachdem, was auf dem Display des Thermostats angezeigt wird.
Drücken Sie auf dem SmartPhone die Schaltfläche „Weiter“ und warten Sie, bis das Gerät hinzugefügt wurde.
Sobald der Thermostat in das Netzwerk eingebunden ist, kann er mit einem bestimmten Namen umbenannt werden, beispielsweise
mit dem Namen des Raums (nachdem der Thermostat ausgewählt wurde, drücken Sie die Taste mit den drei Strichen oben rechts und
der Bildschirm wird wie im angezeigt Bild 3).
Ebenso ist es möglich, weitere Geräte hinzuzufügen und diese jederzeit über die APP zu steuern.
Nachfolgend einige Screenshots der funktionierenden APP.
Il faut notamment s'inscrire en donnant son email.
Lors des opérations d'installation, le SmartPhone doit être connecté au WiFi de la maison et le BlueTooth doit être activé.
En restant à une distance maximale d'un mètre du thermostat, lorsqu'il est alimenté et éteint, vous devez d'abord connecter le
thermostat au WiFi en maintenant enfoncé le bouton « flèche vers le bas » (image 1 ci-dessous) pendant 5 secondes, jusqu'à ce que
l'icône WiFi commence à clignoter sur l'écran (image 2).
Si une icône autre que l'icône WiFi apparaît, répétez l'opération. Ensuite, démarrez l'APP et appuyez sur le bouton + en haut à droite,
sélectionnez l'élément « Ajouter un appareil ». Sélectionnez l'indication « Petit électroménager » dans la colonne de gauche et la
mention « Thermostat (Wi-Fi) » dans la colonne de droite.
Lors de la demande de sélection du réseau domestique, saisissez le mot de passe et appuyez sur le bouton « flash lent » ou « flash
rapide » selon ce qui apparaît sur l'écran du thermostat.
Appuyez sur le bouton « Suivant » du smartphone et attendez que l'appareil soit ajouté. Une fois inséré dans le réseau, chaque
thermostat peut être renommé avec un nom spécifique, comme le nom de la pièce (une fois le thermostat sélectionné, appuyez sur la
touche avec les trois lignes en haut à droite et l'écran apparaîtra comme dans image 3).
De la même manière, il est possible d'ajouter d'autres appareils et de toujours les contrôler avec l'APP.
Ci-dessous quelques captures d'écran de l'application fonctionnell
En particular, es necesario registrarse indicando su correo electrónico.
Durante las operaciones de instalación, el SmartPhone debe estar conectado al WiFi de casa y el BlueTooth debe estar activado.
Permaneciendo a una distancia no superior a un metro del termostato, cuando esté encendido y apagado, primero deberá conectar el
termostato al WiFi manteniendo pulsado el botón "flecha hacia abajo" (imagen 1 a continuación) durante 5 segundos, hasta que El
icono de WiFi comienza a parpadear en la pantalla (imagen 2).
Si aparece un ícono distinto al de WiFi, repita la operación.
Luego inicie la APLICACIÓN y presione el botón + en la parte superior derecha, seleccione el elemento "Agregar dispositivo".
Seleccione la indicación "Pequeño electrodoméstico" en la columna de la izquierda y la inscripción "Termostato (Wi-Fi)" en la columna
de la derecha. Cuando se le solicite seleccionar la red doméstica, ingrese la contraseña y presione el botón "destello lento" o "destello
rápido" según lo que aparezca en la pantalla del termostato.
Presione el botón "Siguiente" en el SmartPhone y espere a que se agregue el dispositivo.
Una vez insertado en la red, a cada termostato se le puede renombrar con un nombre específico, como por ejemplo el nombre de la
habitación (una vez seleccionado el termostato, pulsa la tecla de las tres líneas arriba a la derecha y aparecerá la pantalla como en la
imagen 3).
De igual forma es posible agregar otros dispositivos y controlarlos siempre con la APP.
A continuación algunas capturas de pantalla de la aplicación en funcionamiento.
 Loading...