This document outlines troubleshooting procedures and maintenance features for Thetford C400 series toilets, specifically addressing models C402C, C402X, and C403L. The primary function of these toilets is to provide a sanitary waste disposal system, often found in recreational vehicles (RVs) or caravans. The manual focuses on common issues such as "No flush," "No level indication," and "Leakages," providing a systematic approach to diagnose and resolve these problems.
Function Description
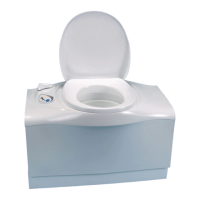
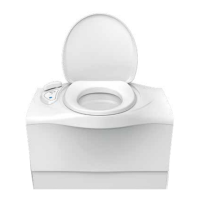
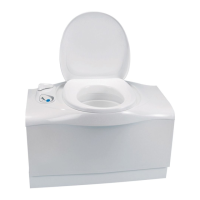
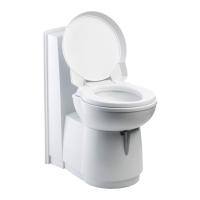
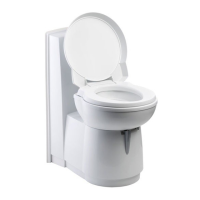
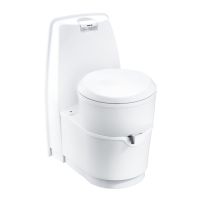
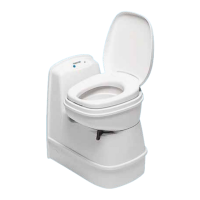
The Thetford C400 series toilets are designed for convenience and hygiene in mobile environments. They typically consist of a bowl, a holding tank, a flush mechanism, and a control panel. The flush mechanism is responsible for delivering water to the bowl to rinse waste into the holding tank. The holding tank stores the waste until it can be emptied. A level indication system monitors the fill level of the holding tank, alerting the user when it needs to be emptied. The control panel provides the interface for operating the toilet, including initiating flushes and monitoring the holding tank level.
Usage Features
The usage of these toilets is straightforward, with a focus on ease of operation and maintenance.
- Flushing Operation: The user initiates a flush via the control panel. This activates the pump (either a dedicated toilet pump or the vehicle's pump, depending on the model) to draw water and rinse the bowl. The waste is then directed into the holding tank.
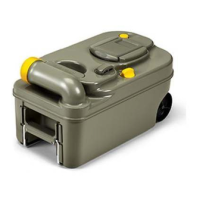
- Holding Tank Management: The holding tank is designed to be removable for easy emptying. The level indication system is a crucial usage feature, preventing overfilling and potential spills. For models C402C and C402X, the level indication relies on a reed switch and a float arm with magnets within the holding tank. For the C402X Water tank, a separate float box and reed switch monitor the water level.
- Control Panel Interface: The control panel typically includes buttons for flushing and LED indicators for the holding tank level. Some models might have additional indicators or controls.
- Fuse Protection: The electrical components of the toilet are protected by a fuse, which is a standard safety feature. If the toilet experiences an electrical issue, the fuse is designed to blow, preventing damage to the system.
Maintenance Features
The manual emphasizes a structured approach to troubleshooting and maintenance, allowing users to identify and resolve common issues without necessarily requiring professional assistance.
-
"No Flush" Troubleshooting:
- Fuse Check: The first step in diagnosing a "no flush" issue is to check the fuse. If the fuse is blown, it needs to be replaced (part 21766). This is a basic electrical safety and maintenance check.
- Cable Connection Verification: Users are instructed to remove the handle and control panel to check if the cables are well connected. Loose connections can interrupt power or signal flow, preventing the flush mechanism from operating.
- Pump Functionality Check: The manual guides users to listen for the pump running. If no sound is heard, it suggests a potential pump failure, requiring replacement (part 16374). This helps isolate the problem to the pump itself.
- Control Panel Verification: If the pump is running but there's still no flush, the control panel's functionality is checked. A malfunctioning control panel might need replacement (part 32320-62 for C402C, part 32322-62 for C402X, part 32313-62 for C403L).
- Flush Tube Connection: Finally, the flush tube connection is checked. A disconnected or improperly seated flush tube can prevent water from reaching the bowl, even if the pump is working.
- Relay Check (C403L specific): For the C403L model, an additional step involves checking the relay (part 20106). This indicates a slightly different electrical control system for this specific model.
- Electric Valve Check (C403L specific): The C403L also includes an electric valve (part 23709) that needs to be checked if the vehicle pump is running but there's no flush. This suggests the C403L might integrate more directly with the vehicle's water system.
-
"No Level Indication" Troubleshooting:
- Cable Connection Verification: Similar to the "no flush" issue, checking the cable connections behind the handle and control panel is the initial step.
- Reed Switch Functionality: The level indication system relies on a reed switch. Users are advised to check the LED functions by placing a magnet in front of the reed switch. If the LEDs don't respond, the reed switch might be faulty and requires replacement. Different reed switch part numbers are provided for C402C (32316-62), C402X (32317-62), and C403L (32317-62).
- Control Panel Check: If the reed switch appears functional, the control panel itself is checked for proper operation, as it processes the signal from the reed switch.
- Float Arm/Float Box Position: The physical components responsible for triggering the reed switch – the float arm (part 32304) for the holding tank or the float box (part 32330-62) for the C402X water tank – must be correctly placed and have their magnets intact. Repositioning or replacement is suggested if they are out of place or damaged.
- Holding Tank Positioning: The overall positioning of the holding tank is also a factor, as improper seating can affect the float arm's ability to interact with the reed switch.
-
"Leakages" Troubleshooting:
- Leakage between Bowl and Holding Tank:
- Holding Tank Positioning: The first step is to ensure the holding tank is correctly positioned. An improperly seated tank can lead to leaks.
- Lipseal Check: The lipseal (part 23721) is a critical component for preventing leaks between the bowl and the holding tank. If it's damaged or worn, it needs replacement.
- Blade Mechanism Check: The blade mechanism controls the opening and closing of the waste passage. If it's faulty, it can cause leaks. Different part numbers are provided for left (32332-06) and right (32331-06) versions, indicating potential variations in toilet design.
- Leakage at the Water Tank:
- Drain Tubes Check: For leaks specifically from the water tank, the drain tubes are inspected. If they are leaking, they need to be replaced (part 51804-74).
- Leakage at the Holding Tank (General):
- Vent Button Leakage: If the vent button is leaking, it should be replaced (part 32307-16).
- Pour Out Spout Leakage: Leaks from the pour out spout indicate a faulty spout that needs replacement (part 32306-06).
- Vent Lid Leakage: The vent lid and its actuator are checked. If the actuator is not well placed or if there is liquid under the vent lid, the vent actuator or the automatic vent (part 32305) may need replacement.
The manual consistently directs users to "Contact Thetford customer service" if the troubleshooting steps do not resolve the issue, indicating that some problems may require specialized knowledge or tools beyond basic user maintenance. The inclusion of part numbers throughout the document is a key maintenance feature, simplifying the process of ordering and replacing specific components. Furthermore, the reference to "Repair instructions you can find in the repair instructions chapter and/or on our website www.thetford.eu" highlights Thetford's commitment to providing comprehensive support and resources for maintaining their products.