8
Disassembly
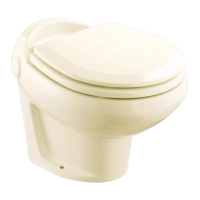
RV and Marine Models
1. Fuse Replacement
A. Remove two (2) #03923 cover mounting screws and
#03924 Motor Cover Assembly.
B. The fuse is now readily accessible for checking or
changing.
2. Switch Removal
A. Disconnect lead wires from power source.
B. Remove two (2) #03923 cover mounting screws and
#03924 Motor Cover Assembly.
C. Remove switch retaining nut and remove wires from
switch terminals.
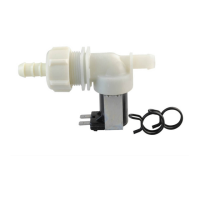
3. Slide-EZ Valve Removal
A. Disconnect lead wires from power source.
B. Completely evacuate unit.
Note: If you have a #24320 extension handle unit, cotter pin
and extension handle must be removed at this point.
C. Remove two (2) #03915 moulding mounting screws and
remove two (2) base mouldings (See Pg. 6).
D. Remove slides by catching tabs with a hooked instrument
and pulling forward (Pg. 5).
E. Lift toilet from closet ange and invert unit.
F.
Remove four (4) #08737 screws; remove valve (Pg. 5).
4. Sump Removal
A. Disconnect lead wires from power source.
B. Completely evacuate unit.
C. Remove two (2) #03915 moulding mounting screws and
remove two (2) base mouldings (Pg. 6).
D. Remove slides by catching tabs with a hooked instrument
and pulling forward (Pg. 5).
E. Remove exible hose from sump and invert unit.
F.
Remove four (4) #01663 screws; remove sump (Pg. 7).
5. Pump Removal
A. Complete steps 2A and 2B above.
B. Completely evacuate
unit.
C. Remove cover and bowl assembly screws two (2) #03979
in rear from top side and two (2) #03943 in front from
bottom side and remove #03912 cover and bowl assembly
(Pg. 6).
D. Remove four (4) #03925 pump mounting screws.
E. Disconnect #03946 inlet tube from pump outlet.
F. Remove #03950 pump assembly (Pg. 6).

 Loading...