WiPro III + safe.lock Installation Manual – Fiat Ducato X250, Euro 4
2
Aids/tools/material:
• Ducato assembly kit
• Combination pliers
• Phillips screwdriver
• 10mm box spanner
• 3mm Allen key
• Cordless screwdriver with 8mm drill bit
for status LED
Teach-in of wireless magnetic contacts
and other transmitters
(before installation!)
1. Press the button to the right of the
connector and hold it down until the
system beeps. The status LED is con-
tinuously lit.
2. Now activate each contact and gas
alarm or radio cable loop to be stored
several (2–3) times. Successful storing
is acknowledged through a beep and
the LED goes out briefly.
Setting the CAN bus interface for vehicle
type Ducato:
1. Remove the power supply and open the
housing.
2. On the 8-way DIP switch on the circuit
board, set switch 2 and 6 to the ‘on’
position.
1
↑
on
42 5 73 6 8
3. Close the housing again and continue
with the installation.
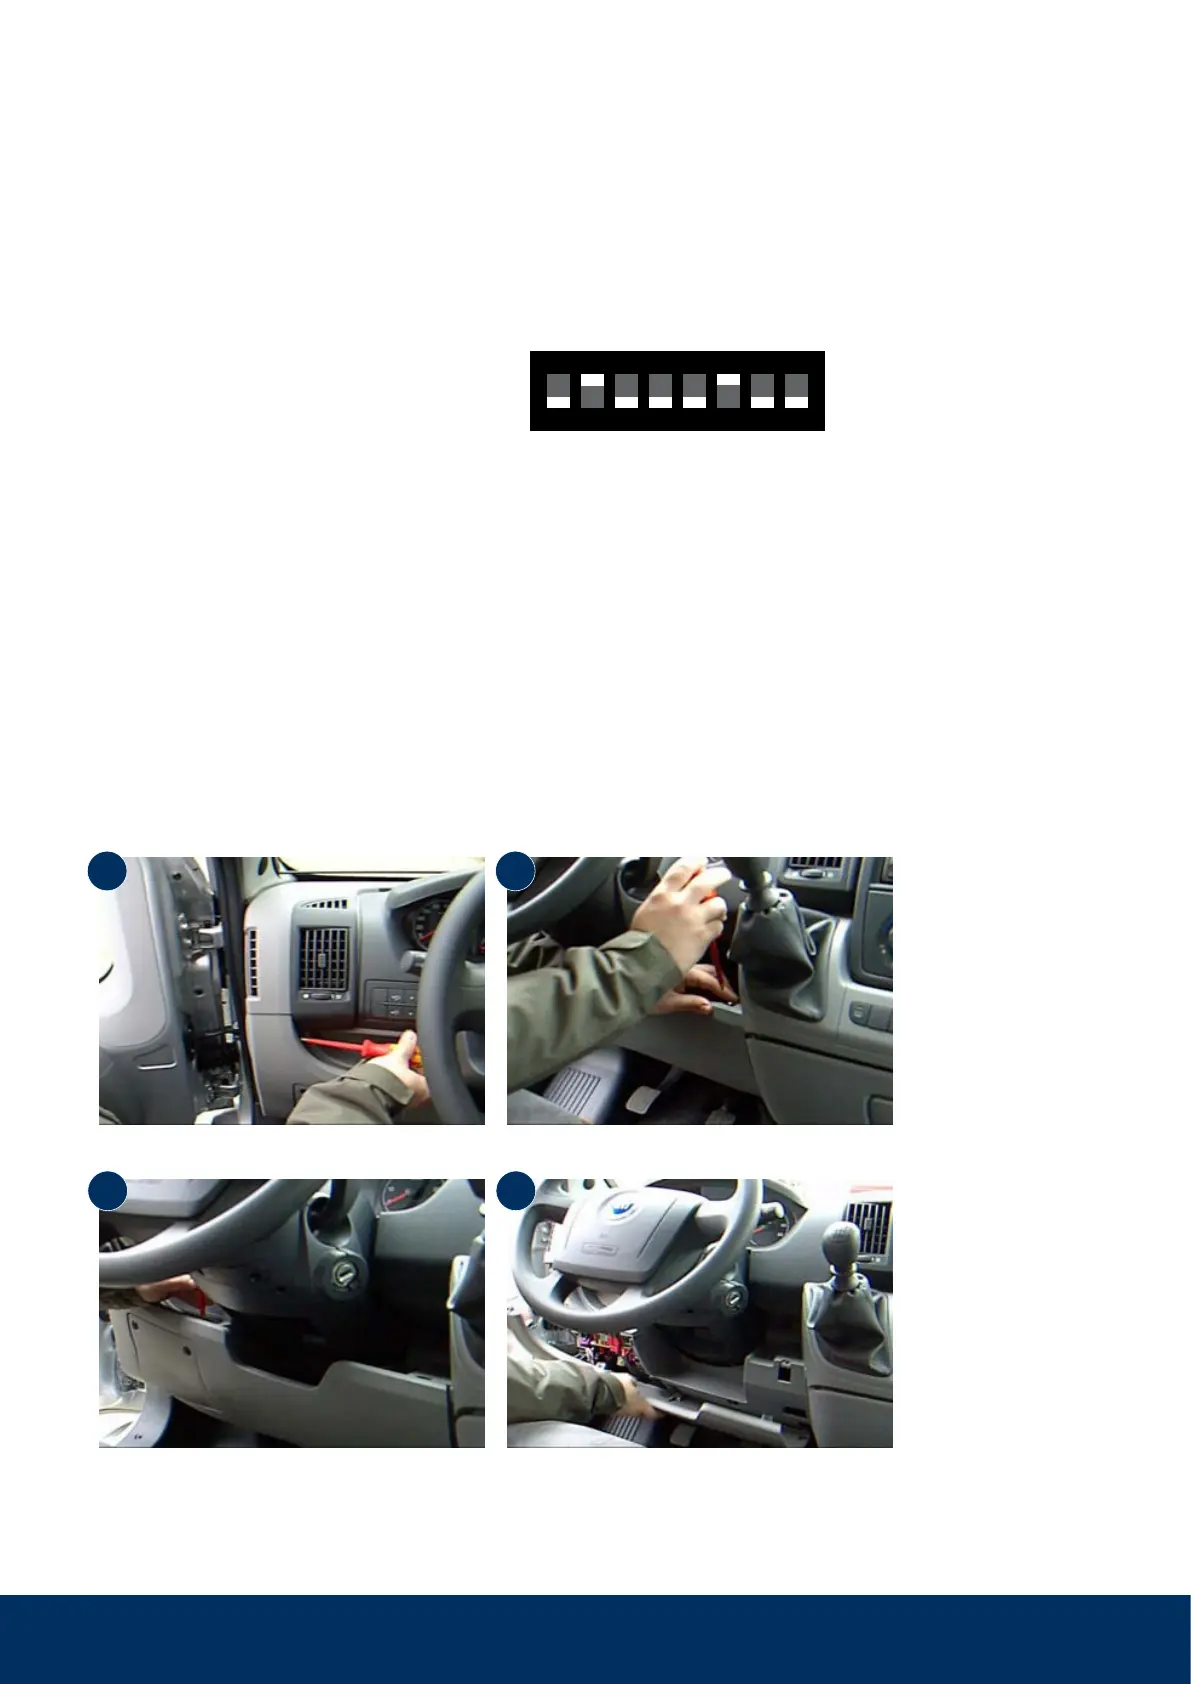
Step 1: Remove the dashboard panelling
Remove the three Phillips-head screws as shown in the following photos.
Undo the second screw next to the steering
wheel on the left.
Remove the panel.
Undo the screws next to the steering wheel on the left and right.
1
3
2
4