GB
Open the casing as already described under 1.7.
Now plug in the 20-pin plug again.
On the printed circuit board (Diagram 2 on Page 6) hold down the button “A” until the
central unit gives a beep and the red LED (“C”) on the printed circuit board lights up.
Now activate each magnetic contact to be stored as shown on Diagram 4
(keepingbothpartsawayfromeachotheruntiltheLED(“C”)lightsupbriey)
orpressoneofthebuttons“A”or“B”onthehandheldtransmitterasshownon
Diagram 5. The wireless gas alarms must be switched on to store them and cable
loops must be removed from the holder.
After each storing procedure has been successfully carried out,
ashortbeepwillsoundandtheredLEDwillashbriey.
When all the transmitters have been stored, the system will be in Normal mode
afterabout30seconds.ToterminateAssignmodemanually,brieypressthe
button “A” on the printed circuit board. The LED goes out.
1.9 Disconnecting contacts or other transmitters
Transmitters can only be deleted by erasing the memory.
Hold down the button “A” on the printed circuit board (Diagram 2 on Page 6)
while unplugging the 20-pin plug until the central unit gives a long beep.
All the transmitters are now erased.
WiPro „all in one“ Installation manual Page 5
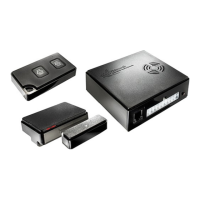
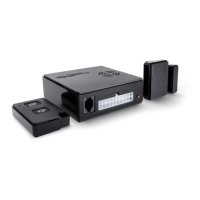
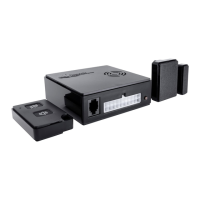
1.8 Storing remote controls, magnetic contacts, etc.
!! As supplied, no remote control, magnetic contacts, etc. are stored!!
If the instructions in this chapter are not carried out, the alarm system can
not be controlled by the remote control provided and the wireless components
cannot trigger an alarm.
Important!
The procedure for subsequently adding wireless components, without access
to the main unit, is described in Chapter 2 of the Operating Instructions.
 Loading...