WiPro „all in one“ Installation manual Page 4
GB
1.6 Preparing for installation
Make sure you have the tools and materials listed below:
- Cross-head screwdriver
- Crimping pliers
- Voltmeter
- Cordless screwdriver
- 8 mm drill bit
- Socket set
- Insulating tape
-Buttconnectors
- Ring terminals
- Cable ties
- Shrink sleeve if necessary
- Cleaning cloth for degreasing
- Cleaning agent or degreaser
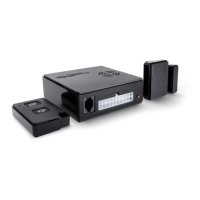
Choose a suitable place for installing the central unit, siren,
wireless magnetic contact(s) and other accessories.
All accessories such as handheld transmitters, further contacts, wireless gas
alarms and cable loops should be stored before they are installed. (see 1.8)
1.7 Adjusting WiPro to the vehicle type
Open the casing of the central unit (A) by removing the two
crossheadscrews(B,C)asshownonDiagram1onPage6.
Setthedipswitches(B)onDiagram2,Page6accordingtoTable1.Ifyour
vehicle is not on the list or is older, connect it in the usual way (see universal
connection diagram, Page 11) and make sure that all the switches are in
the off position.
The settings must be made with the circuit de-energised. Make sure that
neither the 20-pin plug nor the plug for the GSM module are plugged in.
Table 1
Vehicles from 2006 and later Switch 1 Switch 2 Switch 3 Switch 4
Fiat Ducato
CitroënJumper
PeugeotBoxer
off on off off
Ford Transit on on off off
Mercedes Sprinter
VW Crafter
on off off off
Iveco Daily off off off on
Renault Master
Opel Movano
Nissan Interstar
on on on off
VW T5 on off on off
 Loading...