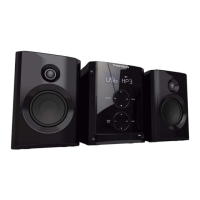
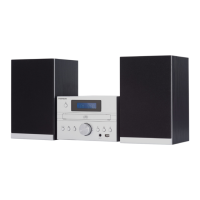
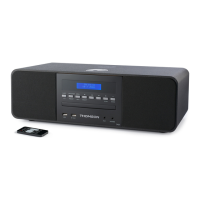
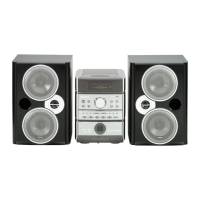
This document is a user manual for the Thomson MS3300 audio system, providing comprehensive instructions for its operation, maintenance, and safety.
Function Description
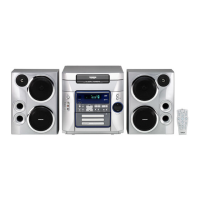
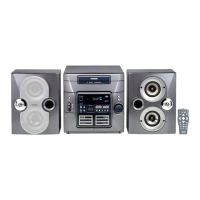
The Thomson MS3300 is a versatile audio system designed for entertainment, featuring a CD player, radio tuner, and tape player. It supports playback of standard audio CDs and MP3 CDs, offering a wide range of music options. The integrated radio tuner allows access to FM, MW, and LW bands, with RDS functionality for enhanced FM listening. A tape player is included for playing and recording cassette tapes. The system also features an auxiliary input (AUX) for connecting external audio devices.
Usage Features
The MS3300 offers a user-friendly interface with controls on both the main unit and a remote control.
Getting Started:
- Unpacking: The manual details the components included in the package: the main unit with two speakers, a remote control, FM and AM antennas, and the user's guide.
- Speaker Connection: Clear instructions are provided for connecting the main speakers, emphasizing matching red wires to red terminals and black wires to black terminals for correct left (L) and right (R) speaker setup.
- Antenna Setup: Guidance is given on positioning and connecting the FM and AM loop antennas for optimal radio reception. The FM antenna should be uncoiled and extended, while the AM loop antenna should be rotated for better reception.
- Installation: To ensure proper ventilation, specific minimum distances from other surfaces are recommended for the front and side views of the unit.
General Controls:
- Main Unit and Remote Control: The manual provides a detailed overview of all buttons and their functions on both the main unit and the remote control.
- Source Selection: Users can switch between CD player, tuner, tape player, and AUX modes using the "SOURCE" button on the main unit or dedicated buttons on the remote.
- Power Management: The "ON/ECO" button allows users to turn the unit on/off and enter an ECO (power saving) mode, which disables the clock display.
- Volume Control: Volume can be adjusted using the "VOLUME" knob on the main unit or the "VOL" buttons on the remote.
- Headphone Jack: A headphone jack is located on the top of the unit for private listening.
Display:
- The display provides visual feedback on the current mode (CD, TUNER, TAPE, AUX), activated features (Timer, Sleep, Random Playback, MP3, Intro, Repeat), radio band and frequency, RDS signal, program mode, recording status, equalizer settings, bass boost, and disc loading status. Disc icons light up to indicate loaded discs, and the current playing disc icon flashes.
Settings:
- Demonstration Mode: The "DEMO" button activates or deactivates a demonstration mode that cycles through all display operations.
- Clock Setting: Instructions are provided to set the hour and minute using the "CLOCK" and "PRESET" buttons. The clock can be briefly displayed when the system is on.
- Timer Setting: Users can set an ON and OFF time for the timer, select the audio source (CD, TUNER, TAPE, REC TU), and adjust the desired volume level. The timer icon appears on the display when activated.
- Sleep Mode: The "SLEEP" button on the remote allows users to set a time interval (5 to 120 minutes) after which the unit will automatically turn off. The "SLEEP" icon lights up when activated, and the remaining sleep time can be viewed.
- Sound Features:
- X-Bass (Bass Boost): The "B.BOOST" button on the remote enhances bass frequencies, indicated by the "BASS BOOST" icon.
- Muting Audio: The "× MUTE" button on the remote instantly mutes the audio output.
- Preset Equalizer Curves: The "EQ" button on the remote cycles through preset equalizer settings: FLAT, ROCK, POP, JAZZ, CLASSIC, and CUSTOM. A black bar indicates the active EQ setting.
- Custom Equalizer: In CUSTOM mode, users can adjust bass (BAS) and treble (TRE) gain levels between -10 and +10 using the "PRESET" and "VOLUME" controls.
CD Player:
- Disc Compatibility: The unit is compatible with CD-R/RW discs and simple MP3 CDs.
- Loading Discs: Discs are loaded into a 5-disc changer with labels facing up. The "OPEN/CLOSE" button opens and closes the disc compartment. Disc tray icons indicate loaded discs, and the MP3 icon lights up for MP3 CDs.
- Playback: "PLAY/PAUSE" initiates or pauses playback. Discs can be loaded or changed simultaneously while another CD is playing.
- Stopping Playback: "STOP" halts playback. For MP3 CDs, pressing "STOP" again in completely stopped mode returns to the first track and displays the total number of tracks.
- Selecting Discs: Individual discs can be selected using dedicated "DISC 1-5" buttons on the main unit or the "DISC SKIP" button on the remote.
- Selecting Folders (MP3 CDs Only): In stop mode, "BAND/AUTO PROG/CD INFO" enters folder mode, allowing navigation through folders using "PRESET FOLDER" buttons.
- Searching Tracks: "SKIP BACKWARD" and "SKIP FORWARD" buttons allow skipping between tracks or searching backward/forward through a CD during playback.
- Sampling Tracks (Intro Play): "INTRO CT" plays the first 10 seconds of each track on the current disc or all discs in the tray.
- Repeat Playback: "REPEAT RDS" cycles through repeat options: repeat current track (REPEAT 1), repeat current disc (REPEAT 1 DISC), repeat all discs (REPEAT ALL DISC), or turn repeat mode off (ALL DISC).
- Random Playback: "PTY" activates or deactivates random playback, shuffling tracks on one disc before moving to the next.
- CD Information Display: "BAND/AUTO PROG/CD INFO" repeatedly displays elapsed track time, current track number, current folder number (for MP3 CDs), and total track time. In stop mode for MP3 CDs, it shows total tracks and total folders.
- Setting Up a CD Program: Up to 32 tracks can be programmed. Users select a disc and track, then save it to a program location.
- Playing/Displaying/Editing/Clearing a Program List: Instructions are provided for playing, viewing, modifying, and clearing programmed track lists.
Radio:
- Selecting Tuner Band: "SOURCE" or "TUNER" selects tuner mode, and "BAND/AUTO PROG/CD INFO" cycles through MW, LW, and FM bands. The system supports 32 preset stations.
- Tuning to a Station: "SKIP BACKWARD" and "SKIP FORWARD" adjust the radio frequency.
- Using Presets: "TUNE/PRESET" toggles between TUNE and PRESET modes. "PRESET" buttons or "PRESET FOLDER" buttons navigate through preset stations.
- Auto Preset Programming (FM Only): Holding "BAND/AUTO PROG/CD INFO" for 2 seconds automatically scans and stores FM stations as presets. This process overwrites existing presets.
- Manually Setting Presets: Users can manually tune to a desired frequency and then save it to a specific preset number using "PROG/SET" and "PRESET" buttons.
- Suppressing Stereo Signal: "FM ST." (remote only) toggles between FM mono and stereo modes, with "ST" displayed for stereo.
- Tuning to an RDS Station: The tuner automatically detects and displays RDS signals (station name, type, clock time, radio text) on FM.
- Displaying RDS Station Information: "REPEAT RDS" cycles through various RDS information, and "INTRO•CT" displays RDS station time.
- Searching by Program Type (PTY) (Remote Only): "PTY" allows users to select a program type (e.g., NEWS, POP M, JAZZ) and then search for stations broadcasting that type.
Tape Player:
- Selecting Tape Player: "SOURCE" or "TAPE" selects tape mode.
- Playing a Tape: Open the cassette door, insert a tape, close the door, position the tape using "SKIP BACKWARD" / "SKIP FORWARD," then press "PLAY" to start or "PAUSE" to pause.
- Tape Counter: The tape counter tracks tape position and can be reset with "PROG/SET."
- Recording:
- From Tuner: Insert a tape, select tuner mode, tune to a station, then press "RECORD" to start and "STOP" to end recording.
- From CD: Insert a tape, select CD mode, choose a disc and track, then press "RECORD" to start and "STOP" to end recording. Programmed tracks can also be recorded.
- From AUX: Insert a tape, connect an auxiliary device, start playback on the auxiliary device, then press "RECORD" to start and "STOP" to end recording.
Maintenance Features
The manual emphasizes regular maintenance to ensure the longevity and optimal performance of the audio system.
- General Cleaning: The exterior of the unit should be cleaned with a soft dust cloth.
- CD Player Care:
- Handling CDs: Users are advised to hold CDs by the edges or one edge and the hole, avoid touching signal surfaces, and refrain from affixing labels or adhesive tapes. Damaged (cracked or warped) CDs should not be used.
- Cleaning CDs: Dirty CDs should be gently wiped with a soft, damp cloth from the inner edge to the outer perimeter, then dried. Record cleaning sprays, antistatic agents, benzene, thinner, or other volatile solvents should not be used.
- CD Lens Care: A CD lens cleaner is recommended to maintain sound quality when the CD lens becomes dirty.
- Tape Player Care:
- Periodic Cleaning: Regularly open each tape deck and clean the magnetic heads, pinch roller, and capstan with a cotton bud dipped in alcohol.
- Demagnetization: The tape head should be demagnetized periodically using a demagnetizing cassette.
- Tape Protection: To protect recordings, remove the corresponding tab on the tape. If recording is desired later, a piece of adhesive tape can be placed over the hole.
- Preventing Tape Slack: Any slack in tapes should be tightened with a pencil before insertion to prevent scratches or breakage.
- General Safety: Never open the cabinet; repairs should only be done by trained technicians. Avoid operating the unit with the cabinet removed. Allow the system to acclimate after transport from cold to warm environments to prevent condensation. Keep the unit away from humid or abnormally hot places. Do not touch the player with wet hands.
- Laser Safety: The CD player uses a laser. It is a Class 1 laser product and is safe when operated as directed. Do not open the system except by qualified technicians. Avoid exposure to the laser beam.
- Disc Usage: Do not use damaged, warped, or cracked discs. Avoid touching the pick-up lens inside the disc compartment. Keep the compartment door closed when not in use to prevent dust accumulation. Clean the lens with a soft brush or air blower if it becomes dirty.
- Environmental Considerations: The apparatus should not be exposed to dripping or splashing liquids, and no objects filled with liquids (e.g., vases) should be placed on it. Ensure sufficient ventilation by maintaining minimum distances around the apparatus and not obstructing ventilation openings. No naked flame sources (e.g., lighted candles) should be placed on the apparatus. Attention is drawn to the environmental aspects of battery disposal.
- Battery Information: Remove batteries if the remote control is not used for more than a month to prevent leakage. Dispose of leaky batteries immediately and properly. Avoid mixing battery types, inserting them incorrectly, or attempting to recharge non-rechargeable batteries.
- Headset Safety: Avoid playing headsets at high volume for extended periods. Reduce volume or discontinue use if ringing in the ears occurs. Exercise caution in hazardous situations. Even with open-air headsets, ensure the volume is not so high that it prevents hearing surrounding sounds.
Troubleshooting Tips:
The manual includes a troubleshooting section to address common issues such as the system not turning on, no sound, poor radio reception, CD not playing, CD sound skips, CD button not responding, remote control not working, and MP3 playback sequence being out of order. Solutions typically involve checking connections, power, settings, or cleaning components. For MP3 playback issues, it emphasizes creating discs with a single folder structure and provides a diagram illustrating playback sequence.
Copyright:
The product is intended for entertainment purposes only and should not be used to violate copyright law.