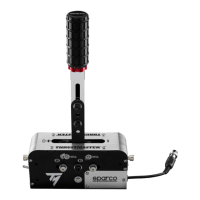
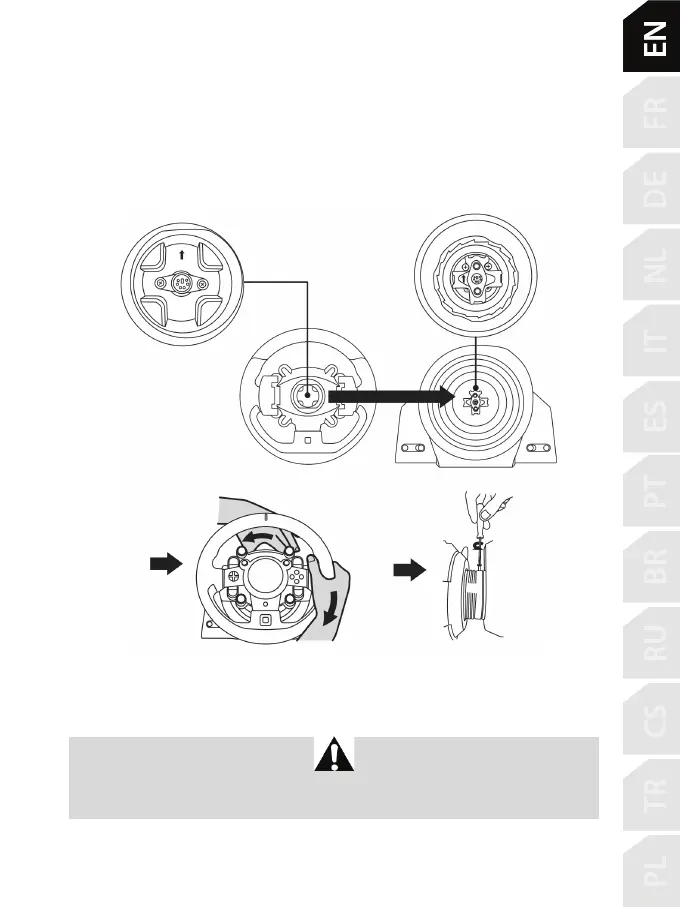
INSTALLING THE WHEEL ON ITS BASE
Align the connector positions using the arrows:
Base (1) connector: Arrow pointing upwards
Racing wheel (2) connector: Arrow pointing upwards
Once the connectors are correctly positioned, simply rotate the Thrustmaster Quick Release (15)
device’s ring anticlockwise, while holding the racing wheel (2) in position.
Then, tighten the ring as much as you can: to do so, hold the ring in position and rotate the racing
wheel clockwise.
Once you have installed the wheel, rotate it 180° (when facing the wheel, the GT logo should be
upside down) to access the small attachment screw located on the ring of the Thrustmaster Quick
Release (15) device. Use a large Phillips screwdriver to tighten the small attachment screw (do not use
excessive force), turning it clockwise.
When using a Philips screwdriver, ensure NOT to use excessive force
when tightening the small attachment screw!
Stop turning the screw as soon as you feel some resistance.