EasyManua.ls Logo

Thule Transport T2 User Manual

Thule Transport T2
12 pages
To Next Page IconTo Next Page
Page #1 background imageLoading...
Page #1 background image
9490-A T2 Instruction Manual
Page 1 of 12
Transport T
2
Hitch Mount Bicycle Rack
Assembl
y
&
Use
Key Features
Fits 20”-29” wheels
Carries up to 60lbs per tray with a 2” hitch and 160lbs total with a 3
rd
& 4
th
bike add-on
Carries up to 60lbs per tray with a 1-¼” hitch and 100lbs total (2 Bike Max)
Carries bikes with wheelbases up to 48”
**Please read and understand the warnings on page 9 before use.
For customer service contact
Thule at 800-238-2388
Congratulations on your purchase of a truly
innovative and quick-loading bike rack!
2” or 1 ¼” Hitch Base
(
Includes two anti-wobble
bolts for maximum stability
Only one bolt on 1 ¼”
)
RQL Support Arm
(
Provides maximum security)
Adjustable brackets
(
Reduces bike interference
by allowing adjustment of
pitch and offset)
Innovative Rear Wheel
Lock Down
(
Securely holds any size
tires)
Front Wheel Cradle
(Easily accommodates
20”-29” wheels
and any tire size.)
4-Bar linkage Folding
Mechanism
(Solid mechanism
prevents rack sway )
1
s
t
Position
Bike Tray
Figure A.
Support Arm
Wingnuts
(Easily adjustable
support arm resistance
)
Backbone
(Main frame for the
rack)
Handle
(Used to fold the rack up
and fold the rack down)
2
n
d
Position
Bike Tray
Question and Answer IconNeed help?

Do you have a question about the Thule Transport T2 and is the answer not in the manual?

Thule Transport T2 Specifications

General IconGeneral
Bike Capacity2 bikes
Tilt FeatureYes
Integrated LockYes
Wheel Size Compatibility20 - 29"
FoldableYes
MaterialSteel
Security FeaturesIntegrated cable lock

Summary

Assembly Instructions

Step 1: Hitch Base Installation

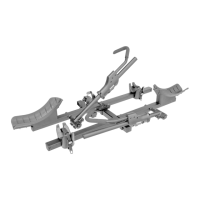
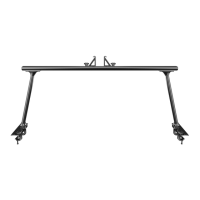
Install hitch base into vehicle hitch receiver and tighten bolts securely.

Step 2: Mounting Bike Trays

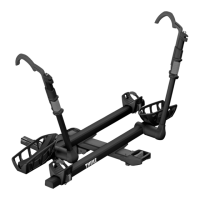
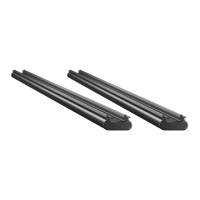
Slide bike trays onto backbone, align with markings, and tighten bolts.

Step 3: Securing Spar Tube Caps

Insert plastic caps into spar tube ends to prevent water ingress.

Loading Your Bicycle

Step 1: Prepare Support Arm

Rotate support arm forward, depress trigger, and slide hook to end.

Step 2: Place Bike and Secure Arm

Position bike in tray, raise arm to tire/brake, ratchet securely.

Step 3: Secure Rear Wheel Strap

Position rear wheel lock down, thread strap through spokes, tighten firmly.

Step 4: Confirm Support Arm Seating

Shake bike to ensure support arm is correctly seated against tire/brake/fork.

Folding Your Bike Rack

Step 1: Folding Rack Upwards

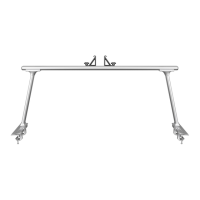
Pull latch handle, lift rack, and secure latch bar into place.

Step 2: Dropping Rack Down

Remove safety pin, release latch handle, and lower rack for access.

Rack Maintenance and Care

4-Bar Link Folding Mechanism Maintenance

Periodically tighten 4-bar link bolts for stable connection.

Hitch Receiver Connection Tightening

Check and tighten anti-wobble hitch bolts periodically.

Support Arm Rotation Friction Adjustment

Check and tighten plastic wingnuts for proper arm rotation.

Rack Cleaning Procedure

Clean rack of dirt/grime, especially road salt, to prevent rust.

Fit Tips

Adjusting Bike Pitch and Offset

Loosen bracket bolts to adjust tray pitch (in/out) or offset (side-to-side).

Retrofitting Hitch Size

Swap hitch base to convert between 1-1/4" and 2" hitch sizes.

Instructions and Warnings

Critical Safety and Usage Guidelines

Read and understand all instructions, warnings, and load limits before installation and use.

Warranty Information

Related product manuals