ㅣ
1110
ㅣ
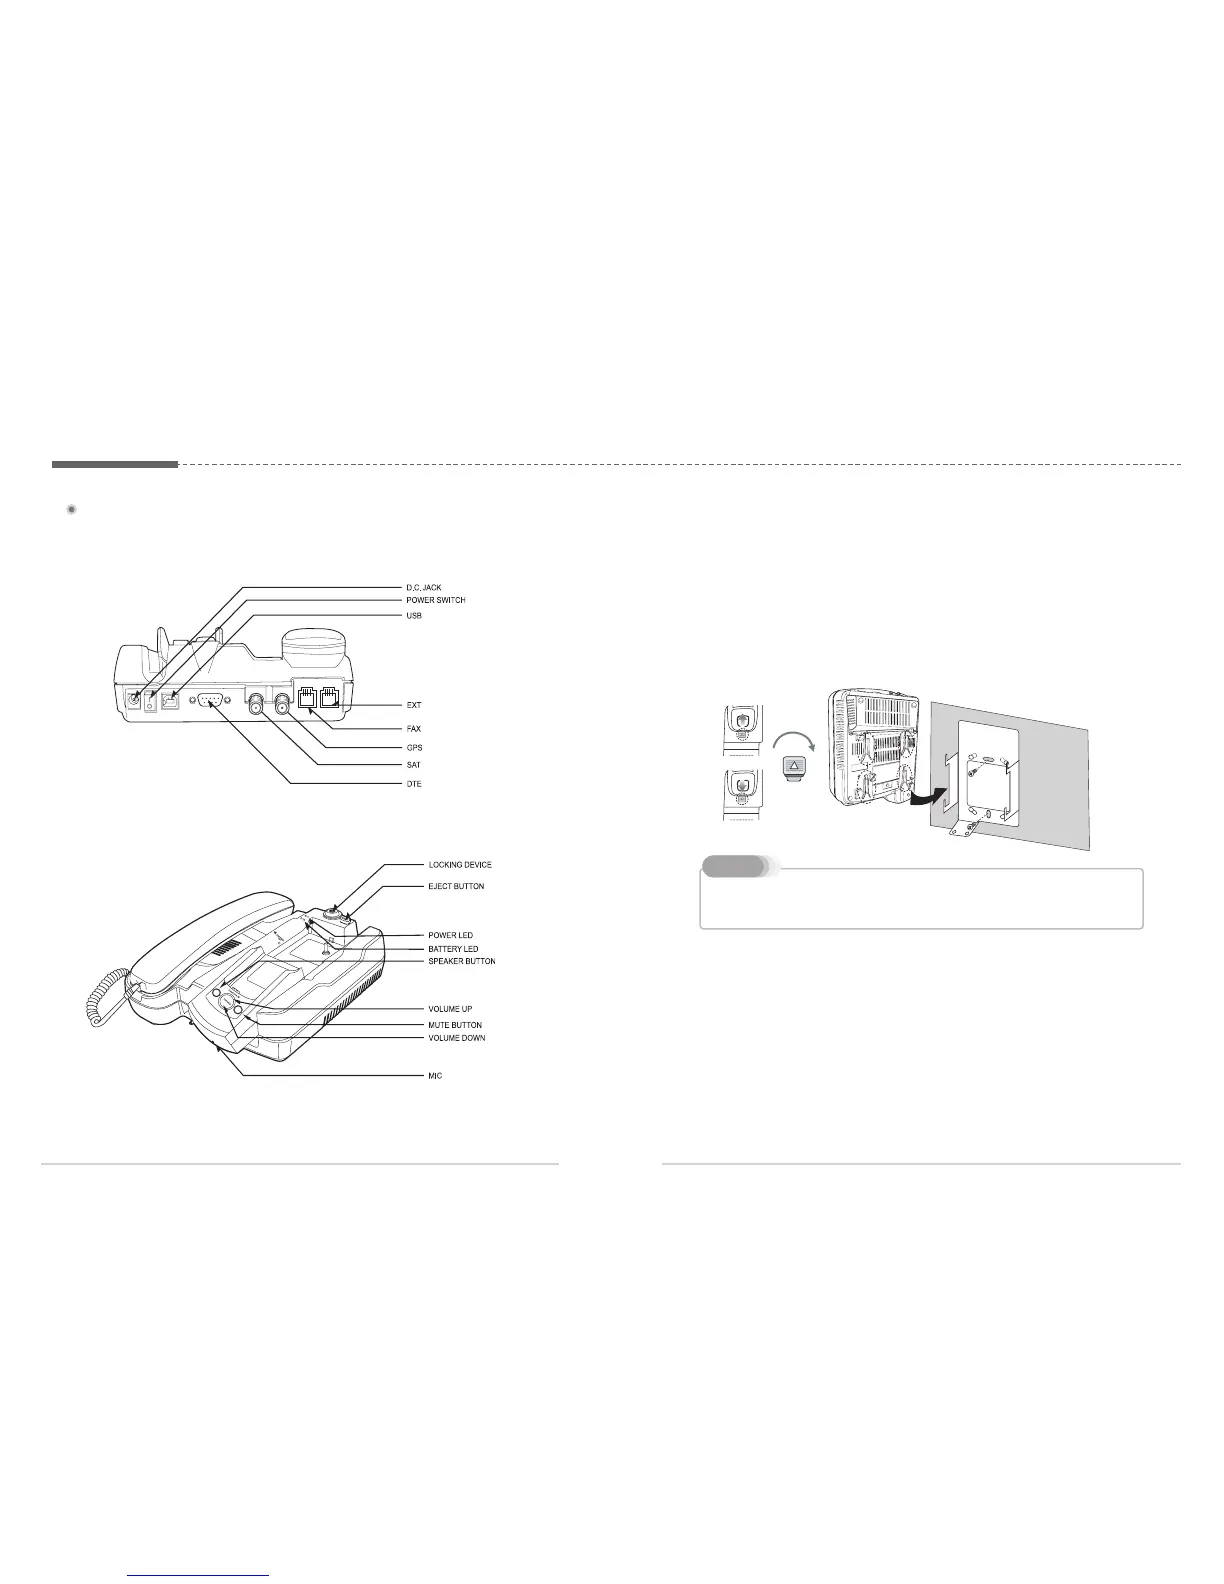
4.2. Connection Interface
4.3. Using FDU-XT as a wall mounted unit
The FDU-XT can be fixed on the wall by using the included brackets. Slots for
brackets are provided on the back of the FDU-XT.
1. Find an appropriate location on the wall to mount the FDU-XT.
2. Place the bracket on the fixing location and mark the location of the screw
holes.
3. Place a suitable-length screw on the wall for mounting FDU-XT.
4. Change the direction of Handset holder to a wall-mounted unit.
5. Hook theFDU-XT to the bracket on the wall.
This product contains an air ventilation fan. To ensure the fan’s normal operation, do not
install the unit in a dusty area.
Note
4.4. Start using the FDU-XT
Plug in the attached power supply to an external power source and connect the
power cable to the DC IN connector on the reverse side of the FDU-XT. Afterwards
you are ready to switch on the FDU-XT on the reverse side of the unit. The blue
power LED will be activated to indicate the power status of the FDU-XT.
4.5. Connecting an extension phone to the FDU-XT
An alogue extension phone can be connected to the FDU-XT at the RJ-11
interface using the included RJ-11 cable.