.Make
note
of the
power
consumprion
when you sef up
[his
game
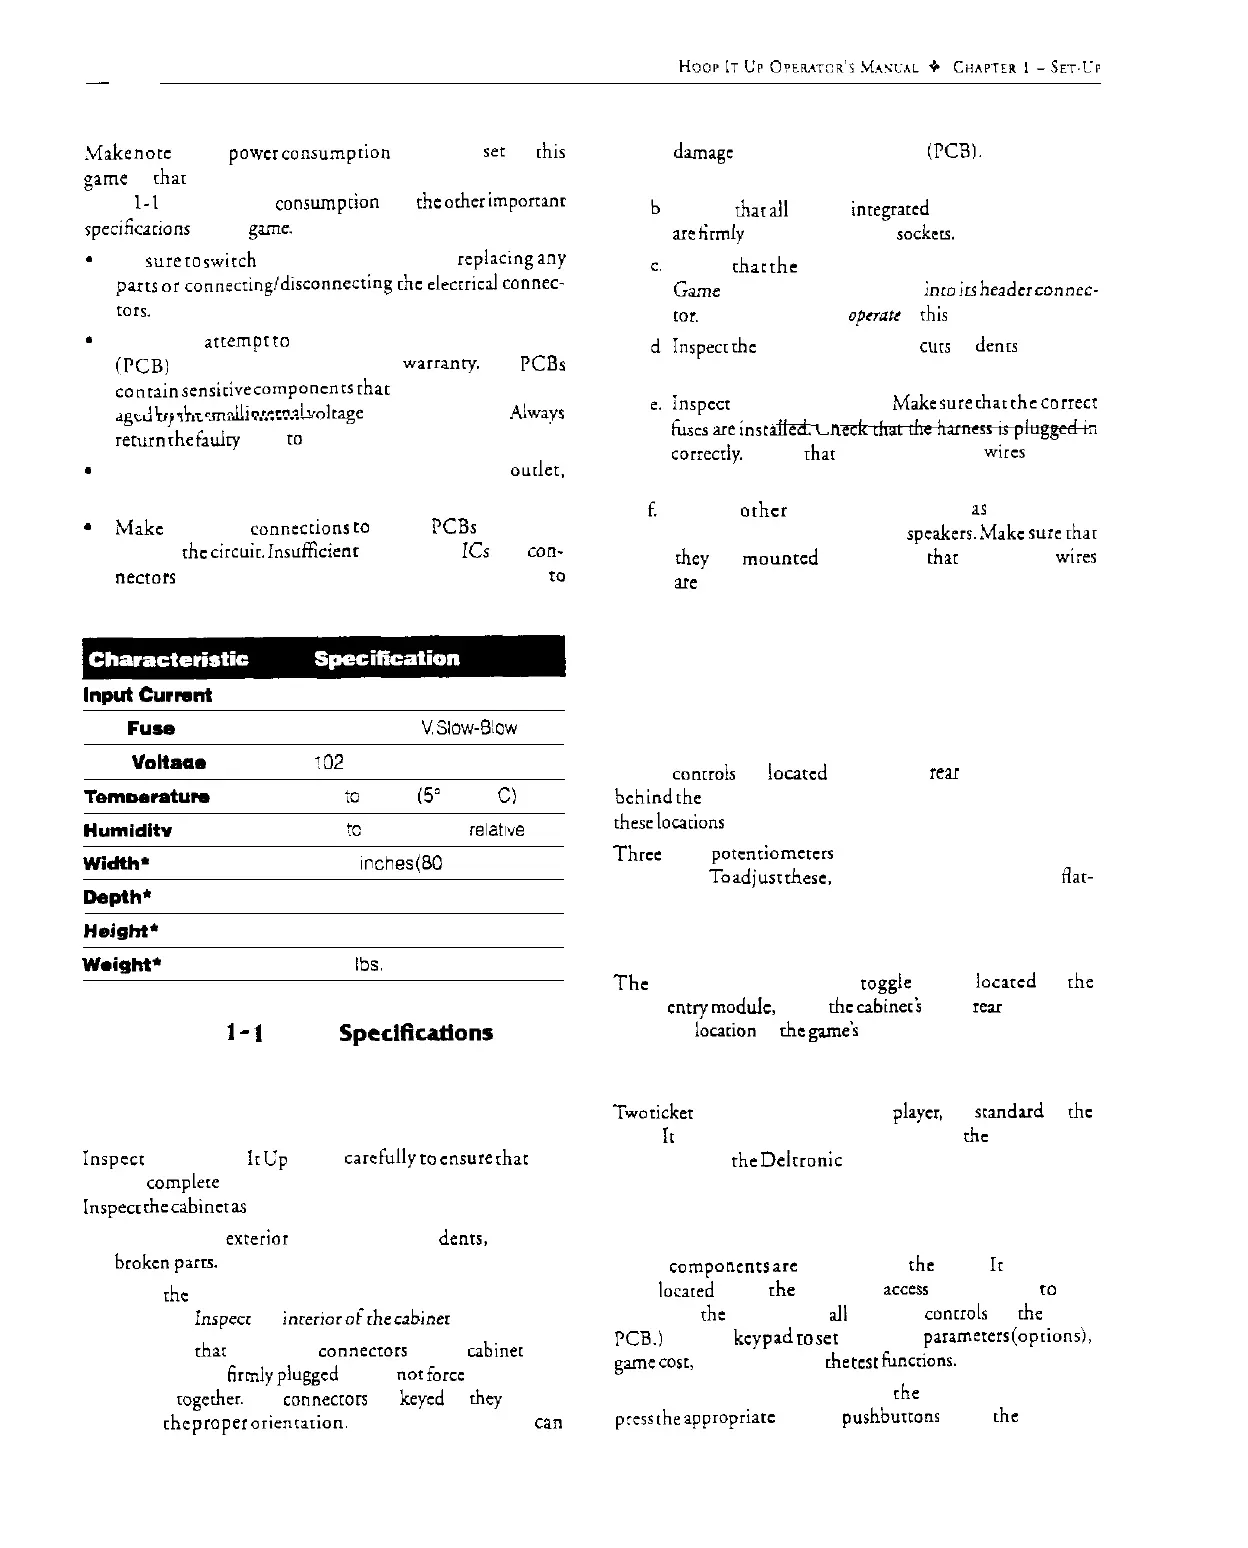
so char you do nor overload your electrical circuit. See
Table
l-1
for the power
consumprion
and the orhcr
important
spcciticacions
of rhis game.
*
Be
sure
ro
nvirch
rhe power OFF before
replaying
any
pans
or
coooecringldisconnccting
[hc
elecrriczl
connec-
mrs.
*
DO NOT
atrempr
co
repair rhe printed-circuit boards
(PCB)
yourself. This will void rhe
warranty.
The PCBs
conrain
semi&e
componcnrs
char could easily be dam-
---A
l...
FL-
~-9ll
inrrmai
w&age
of a multi-mctcr. Always
d&E-U
“,
5l.L
>,.l....
I..._..._
return
rhe fatdry PCB
IO
your distributor for repair.
*
When unplugging rhe game from rhe electrical
ourlcr.
grasp rhe plug, NOT rhc cable.
*
Make
complete
connecrions
co
all rhc PCBs and ocher
parts of rhc
circuit.
insuff%enc
insertion of ICs and con-
necfors
will lead to unreliability and possible damage ro
the machine.
Input
curnnt 3 Amos
Linr
Fuse
Rating
3 Amps, 250
V
Slow-B!ow
Line Voltaar
!02
to 132 VAC. 60 Hz
Temmwatum
37’
io
100” F
(5’
to 36”
C)
Humiditv
Not
!c
exceed 95%
ieIat,ve
Width-
31.25 Inches
(80
cm)
Depth’
Height’
Weight’
‘Unboxed
35 inches (69 cm)
75 inches (190 cm)
350
lbs.
(159 kg)
Table
1
-
1
Game
Speclficatlons
Inspecting the Game
Inspccr
your Hoop
ir
Up game
carefully
IO
ensure
char rhe
game is
complere
and was delivered to you in good condition.
Inspea
ihe
cabincr
as
follows:
I. Examine rhe
exterior
of rhc cabinet for
denrs,
chips, or
broken
parrs.
2.
Open rhc lower-rear access panels. Unlock and open rhc
coin door.
inspccr
rhe
interior
ofche
cabiner
as follows:
a. Check char all plug-in
connectors
on the
cabiner
har-
nesses are firmly
plugged
in. Do nor forcc the connec-
tors
rogcdxr.
The
connectors
are keyed so
rhey
fit only
in [he
prapcr
oricnrarion.
A reversed connector
can
damage
a printed-circuit board
(PCB1.
This will void
your warranty.
Ensure char ail plug-in inregrarcd circuits on each PCB
are
tirmly plugged into their
sackecs.
Check char
the
liquid crystal display (LCD) on rhe
Game PCB is securely plugged inro
irs
header
connec-
[or.
The game will nor qpcrnu if this display is loose.
Inspect
rhc power cord for any
cus
or
dents
in rhc in-
s&ion.
inspect
the power supply. Make
we
char
the
COIICCI
t&es aIe
;naiiea.
t_n
correcrly. Check
that
the green ground
wires
are con-
nected.
Inspect
orhcr
sub-assemblies. such
1s
rhc controls,
primed-circuit boards. and
spcakerr.
Make
sure
rhar
they are
mounrcd
securely and
that
rhc ground
wi:es
UC
connected.
Controls and Switch
Locations
All rhe
conrrols
are
located
in the lower rear of rhe cabinet or
behind
rhc coin doors. The following paragraphs describe
these locarions in more derail.
Three
small
potcnriomcrcrs
are mounted on the Hoop It Up
game PCB.
To
adjust
rhesc,
you need a small (jeweler‘s)
Aar-
head or Phillips-head screwdriver.
Power On/Off Switch and Main Fuse
The
power on/off switch is a
rogglc
switch
locarcd
on rhe
power
cnuy
mod&,
above
chc
cabineri
lower rear panel. This
is also the
locarion
of rhc
game’s
main fuse.
Ticket Dispensers
Two
ticker
dispensers, one for each playcr, are
standard
in the
Hoop It Up game. Servicing information on
ihc
mechanisms
is provided in rhc
Deirronic
Labs ticker dispenser manual,
which was included in your Hoop It Up game.
Liquid-Crystal Display and Keypad
These
componenrs
arc
mounted on the Hoop
Ir
Up Game
PCB
locared
inside
the
lower rear
access
panel. (Refer
IO
Fig-
ure l-1 for
rhe
locations of all operator
controls
on the game
PCB.) Use the
keypad
IO
set rhe game
paramerers
(optionsi,
game cosr, and to perform
rhe
tcsr
funcrionr.
To access rhe game PCB, unlock
the
lower rear panel and
press
rhe
appropriarc
keypad
purhburtonr
while rhe power is
I-3