Snooze Button
Forward Button
Reverse Button
Enter Button
Dimmer Switch
Band Switch
Tuning Control
Volume Control
AUX indicator
Wake To Switch
Side View
Bottom View
Listen To Switch
Alarm Set Button
Power On/Off Button
Alarm On/Off Button
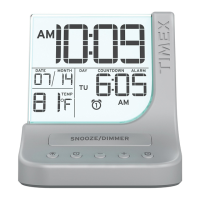
Alarm Indicator
PM Indicator
DST
Indicator
Battery Low Indicator
AUX cord
FM Antenna
Time / Cal Button Time Zone Switch DST Switch
4
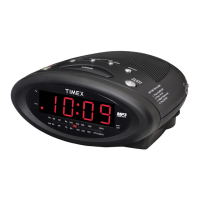
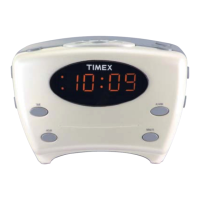
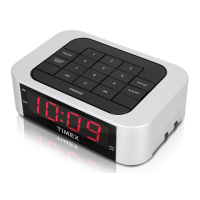
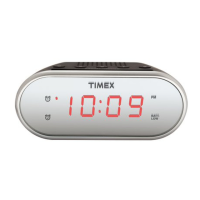
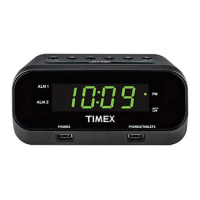
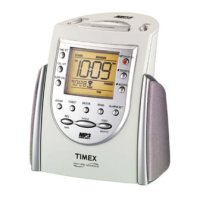
Controls and Indicators
Manual Time and Date Setting
1. Press and hold the Time/Cal Button (located at the bottom of the
unit) until the display flashes.
2. Press the Forward or Reverse Button to adjust current time. Hold
the forward or reverse button to set the time rapidly. Remember to set
the correct AM or PM time. A PM Indicator is located at the upper left
corner of the display. There is no AM indicator.
3. Press the Time/Cal Button again to start to set current year (2 digits,
“11” = 2011, etc.). Press Forward or Reverse Button for adjustment,
press and hold the button to adjust rapidly.
4. Press the Time/Cal Button again to start to set current date (format
is month/date). Press Forward or Reverse Button for adjustment,
press and hold the forward or reverse button to adjust rapidly.
5. Press the Enter Button or wait for about 10 seconds to complete
time/calendar setting. You will hear 2 beep tones to confirm time and
calendar setting is completed.
Listening to Nature Sounds
Listening to Radio
1. Press the Power On/Off Button.
2. Set the Listen To Switch to one of the nature sounds (Wind Chime,
Ocean or Brook).
3. Adjust the Volume Control to desired listening level.
4. The radio/nature sound will stop automatically after 90 minutes. To
stop the radio/nature sound immediately, just press the Power On/Off
Button again.
Note: Extend FM wire antenna fully for best FM reception. Rotate radio
as required for best AM reception.
1. Press the Power On/Off Button.
2. Set the Listen To Switch to Music/Radio and the Band Switch to the
desired AM or FM band setting.
3. Use the Tuning Control to select the desired station. Adjust the
volume to the desired level. Remember that the station and volume
selected will also be heard in the morning if you select wake to radio
(see Alarm Operation).
4. The radio will stop automatically after 90 minutes. To stop the radio
immediately, just press the Power On/Off Button again.
Note: To avoid interference, make sure no auxiliary audio device (CD,
MP3 player, etc.) is connected or playing while listening to the radio.
5 6
Alarm operation
Setting Alarm Time
1. Press and release the Alarm Set Button. The current alarm time
display will flash.
2. Press the Forward or Reverse Button to set the desired alarm time.
Hold the forward/reverse button to set the alarm time rapidly. Watch
the PM indicator at the upper left of the display to set the correct
AM/PM alarm time.
3. Press the Enter Button to complete alarm time setting. You will hear
2 beep tones to confirm the alarm set operation is completed. The
alarm indicator lights, showing the alarm is armed.
4. To wake to the current radio station, set the Wake-To Switch to
“Radio”. To wake to bell sounds or the buzzer, set the Wake-To
Switch to one of the bell sounds or to buzzer. The bell sounds/ buzzer
alarm is equipped with a “Gentle Wake” alarm system. When the
alarm goes on, it will begin at a low level and gradually become louder
until it reaches maximum volume or until you stop the alarm.
5. Once the alarm sounds, it will play for 30 minutes then turn off
automatically. Press the Alarm On/Off Button to turn off the alarm.
The alarm will be stopped and will not come on the following day
unless you arm it with the Alarm On/Off Button.
Snooze Operation
Press the Snooze Button after the alarm sounds. The alarm will go off
and will come on again after 9 minutes. You may repeat this cycle sever-
al times during the 30 minute alarm cycle.
Dimmer Switch
Set the Dimmer Switch to HI or LOW depending on the brightness in
the room.
7
Listening to AUX/MP3
1. Connect the AUX cord to your MP3 player or other audio device, then
turn the device on, select the desired audio and place device in play
mode.
2. Press the Power On/Off Button. Set the Listen To Switch to
Music/Radio and the Band Switch to AUX. The AUX indicator will
light up to indicate the unit is in AUX mode.
3. Adjust the volume to the desired level. You may need to adjust volume
output for your audio device, too.
4. The unit will stop automatically after 90 minutes. To stop the AUX sound
source immediately, just press the Power On/Off Button again.
Remember to turn off your audio device, too.
Installation and Maintenance
Auto-Set Time and Date Setting
1. The unit comes with one CR2450 battery installed. Replace the
battery when the Battery Low indicator located on lower right corner of
the display is flashing.
Use a Phillips screwdriver to remove the battery compartment cover
located on the bottom of the unit. Install a CR2450 3V battery with the
“+” side facing up as shown. The battery will maintain the correct time
in the event of power failure or accidental line cord disconnection,
even though the display is darkened.
Note: In the case of power failure, if a battery is
not installed or the battery is dead, the display
will begin flashing once AC power resumes,
indicating the clock and alarm must be reset.
2. Place the unit on a level surface away from
sources of direct sunlight or excessive heat.
Note: Protect your furniture when placing your unit on a natural wood
and lacquered finish. A cloth or other protective material should be
placed between it and the furniture.
3. Fully extend FM wire antenna. Do not connect the FM wire antenna to
an external antenna.
4. Plug AC line cord into wall outlet. When the unit is connected to AC
power for the first time, the display will blink. If time is incorrect, set the
correct time.
5. Clean your unit with a soft cloth moistened only with mild soap and
water. Stronger cleaning agents, such as Benzene, thinner or similar
materials can mar the surface of the case.
Note: Make sure to unplug your unit from AC outlet before cleaning.
This model is equipped with the Auto-Set feature, meaning that the
year, month, date and time have been programmed at the factory and
will already be set when you first plug the model in. Auto-Set is
programmed for Eastern Standard Time. To change your time zone
setting, set the Time Zone Switch located on the bottom of the unit to
the time zone in your area.
Daylight Saving Time (DST) Setting
When the DST Switch located at the bottom of the unit is set to Auto,
this unit automatically advances the time one hour at the start of Daylight
Saving time, and moves it back one hour at the end of Daylight Saving.
Or you can manually set the DST to ON to add one hour or Off to
subtract one hour. The DST indicator will light up to indicate the time is
advanced 1 hour.
T1201 IB_Inside
Size: 420 x 150 mm Printing color: Black Mat’l: 90gsm book paper
Jul. 26, 11.
 Loading...