When connected, the DL-1 can be started and then stopped with each location where a test is run. The
TRAC software will show all the tests that were conducted, with each start/stop data set represented as a
unique sequence.
BATTERIES
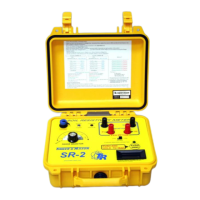
The Model SR-2 has an internal 12volt, rechargeable battery and a replaceable 9volt battery.
If the internal 12v battery is low, the LED test indicator blink. This LED is located just above the PUSH
TEST button. If this LED is lit, the instrument needs to be charged.
The battery charger plugs into the panel face of the Model SR-2, just above the RANGE SELECTOR
switch. A CHARGING INDICATOR LED will light when the battery is being charged. The AC battery
charger should fully charge the battery on an overnight charge. (8 – 10 hours).
Because the PUSH TEST button must be held down to operate, the unit cannot be left on and the battery
drain is minimal.
The 9v battery may need to be replaced. The battery is accessed from the outside of the case. As you face
the instrument, look on the Right side, below the panel level. You will see a black plastic battery holder.
Using a small screwdriver or finger nail in the slot along the bottom, lift up and pull out the battery drawer.
Replace the 9v battery, observing polarity.
In older units, up to Serial # 1097, to replace the 9v battery, the panel must be removed from the case. Two
screws hold the panel to the case, one each side of the outside of the case (Left and Right). The screws are
just below the panel leve. Remove the screws and lift the panel off the case. The overlay membrane switch
adheres to the case itself, and this will make the panel difficult to remove. Lift up and rotate the panel into
the lid of the case. You will see the 9v battery clipped to a bracket. Carefully remove the battery connector
and replace battery. Observe polarity when reconnecting the battery connector. Set panel back into place
and replace screws.
CHARGING
The Model SR-2 comes with an AC (wall) battery charger. The charger automatically recognizes and uses
110v AC or 240v AC. The charger comes with the standard North American 110v wall plug. An adapter or
different (local) cable is required to use with 240v AC.
Input: AC100 – 240V, 50/60Hz
Output: DC14.4V, 1.5A
REPAIR
Tinker & Rasor repair department has a 24-hour turn around on most repairs.
If you need to send an instrument in to our repair department, please visit us online and fill out our Repair
Form, or call us for address information.
www.tinker-rasor.com Info@tinker-rasor.com
WARRANTY:
This instrument is warranted against manufacturer defect for a period of ninety (90) days from purchase
date. Please fill out and send in your Warranty Card, found inside the instrument lid.
 Loading...