17
E
N
G
L
I
S
H
WARNING
Keep exposed skin away from escaping gas when
installing or removing a CO2 cartridge, or if the marker or
air supply is leaking. Compressed air, CO2, and nitrogen
gasses are very cold, and can cause frostbite under
certain conditions.
6. To reassemble, follow these instructions in reverse. NOTE: Carefully hand start all
threaded parts and do not overtighten and strip threaded parts when reassembling.
NOTE: Failure to reassemble correctly can cause damage to parts, air/CO2 leaks, and
other problems. As you reassemble your marker, double check to be sure parts are
clean, not damaged, lubricated, and installed correctly.
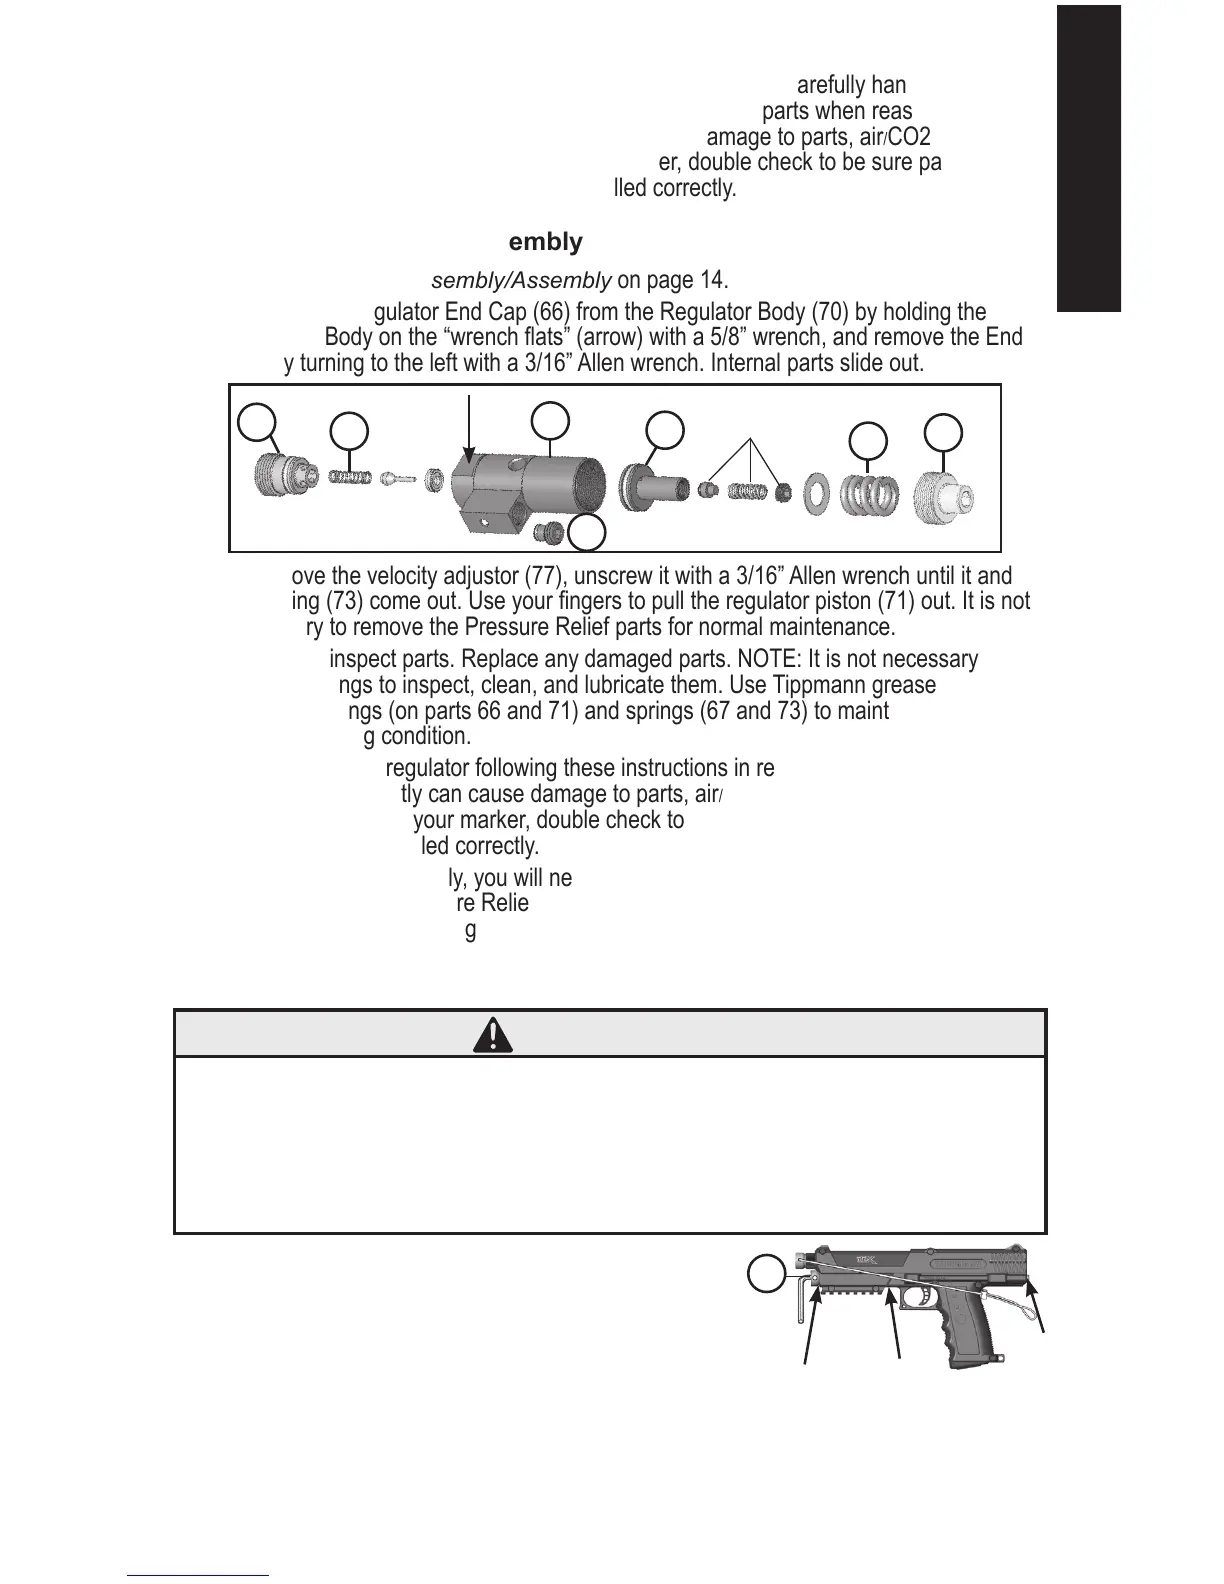
Regulator Disassembly/Assembly
1. Follow Marker Disassembly/Assembly on page 14.
2. Remove the Regulator End Cap (66) from the Regulator Body (70) by holding the
Regulator Body on the “wrench ats” (arrow) with a 5/8” wrench, and remove the End
Cap by turning to the left with a 3/16” Allen wrench. Internal parts slide out.
3. To remove the velocity adjustor (77), unscrew it with a 3/16” Allen wrench until it and
the spring (73) come out. Use your ngers to pull the regulator piston (71) out. It is not
necessary to remove the Pressure Relief parts for normal maintenance.
4. Clean and inspect parts. Replace any damaged parts. NOTE: It is not necessary to
remove O-rings to inspect, clean, and lubricate them. Use Tippmann grease to lightly
lubricate O-rings (on parts 66 and 71) and springs (67 and 73) to maintain your marker
in good working condition.
5. Reassemble the regulator following these instructions in reverse. NOTE: Failure to
reassemble correctly can cause damage to parts, air/CO2 leaks, and other problems.
As you reassemble your marker, double check to be sure parts are clean, not damaged,
lubricated, and installed correctly.
6. Upon marker reassembly, you will need to adjust the Regulator Pressure Relief Valve if
you removed the Pressure Relief parts from item #71 (see Regulator Pressure Relief
Valve Adjustment
on page 19).
Release Pressure From a Marker That Will Not Fire
Only use this procedure if marker will not re and the CO2
cartridge has been punctured. Put the trigger safety in Safe
mode (see page 6) and install the barrel blocking device
(see page 4). Remove the Magazine as outlined in CO2
Cartridge Removal
(see page 10).
Keep marker pointed in a safe direction during CO2 cap (15) removal. Keep exposed skin
away from escaping gas as it rushes out at the air/CO2 release points (arrows).
Remove exterior locking set screw, and then slowly loosen adjusting set screw to empty CO2
from the cartridge. Remove and dispose of the CO2 cartridge.
15
66
67
70
71
73
77
Pressure Relief
parts
78