This document is an operator's manual for a 3-Point Rotary Tiller manufactured by Titan Attachments. The manual covers models ROTIL48, ROTIL60, and ROTIL72, with corresponding part numbers 191630, 191631, and 191632.
Function Description:
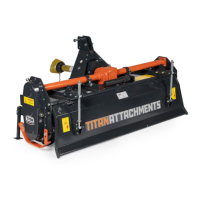
The Rotary Tiller is designed for horticultural and agricultural applications, specifically for tilling soil to prepare seedbeds and planting areas. It is intended to be mounted on tractors equipped with a hydraulic lift and a universal three-point hitch. The tiller's operation is powered by the tractor's PTO (Power Take-Off) drive shaft. Any use outside of these intended applications is considered unauthorized and dangerous, and the manufacturer disclaims liability for damages resulting from such non-intended use.
Important Technical Specifications:
The manual provides a detailed breakdown of the tiller's main parts, including:
- Frame Assembly: The structural base of the tiller.
- 3-Point Linkage: Connects the tiller to the tractor's three-point hitch.
- Gear Box: Transmits power from the PTO shaft to the rotor assembly.
- Side Gear Drive: Drives the rotor assembly.
- Plank Board: A rear component that helps level and compact the tilled soil.
- Rotor Assembly: The core tilling mechanism.
- Blade: The individual tilling elements attached to the rotor.
- RT Parking Stand: A stand for supporting the tiller when not in use.
- Depth Skid: Adjustable components that control the tilling depth.
The tiller is designed for Category Cat-I 3-point hitches (IS:4468) and Quick Hitch Category Cat-I (ASABE Standard). The PTO shaft is equipped with a slip clutch assembly to protect the machine from overload. The manual also includes torque values for common bolt sizes, essential for proper assembly and maintenance.
Usage Features:
- Tiller Identification: Each tiller has a unique identification plate with model and serial numbers for assistance and information requests.
- Connection to Tractor: The manual details the process of connecting the tiller to the tractor's three-point hitch, including attaching lift arms, the top link, and the PTO shaft.
- PTO Shaft Sizing: Instructions are provided for properly sizing the PTO shaft to prevent structural damage to both the tractor and tiller. This involves measuring, marking, and cutting the inner and outer shields and shafts to ensure adequate overlap and prevent bottoming out.
- Parking Stand Adjustment: The parking stand can be raised and fastened with a spring locking pin for transport or storage.
- Lower Clevises Adjustment: The lower hitch position can be adjusted by loosening and sliding the clevises, then tightening the bolts.
- Skids Adjustment: The working depth of the tiller is controlled by adjusting the height of the side skids. Both skids must be adjusted to the same height. This involves lifting the machine, securing it, loosening bolts, adjusting the skid height through available holes, and then tightening the bolts.
- Rear Board Adjustment: The plank board's position is adjustable by varying the hole position on the shocker mounting plate. Lowering the hole increases soil compaction, while raising it reduces pressure.
- Transporting: Specific steps are outlined for preparing the tiller for transport, including disengaging the PTO, lifting the tiller to transport position (ensuring a minimum 2 cm gap with the tractor), locking hydraulics, shutting off the engine, setting the parking brake, removing the ignition key, and adjusting the parking stand to its highest position. Compliance with local traffic regulations is emphasized.
Maintenance Features:
- General Safety: Emphasizes the importance of reading the manual, being familiar with tractor and implement functions, keeping guards in place, keeping bystanders away, and operating from the driver's seat.
- Personal Protective Equipment (PPE): Operators must always use appropriate PPE during operation, adjustment, maintenance, repairing, or transportation.
- Lubrication:
- Every 8 Work Hours: Grease PTO Shaft cross journals and check hoe blade bolt tightness.
- Every 50 Work Hours: Check and top up oil levels in the gearbox and reduction unit, and check oil level in the side drive transmission.
- Every 200 Work Hours: Change the oil in the gearbox, reduction unit, and transmission casing by draining old oil through the drain plugs.
- Lubricant Type: Advises using SAE 140 EP Grade OIL or equivalent for the gearbox and side transmission, and high-quality grease for all greasing points.
- Cleaning: Greasing points must be thoroughly cleaned before injecting grease to prevent contamination.
- Oil Type: When topping up or changing lubricant, ensure the new oil is of the same type as previously used.
- Blades Replacement:
- Inspection: Daily check for wear, bends, or breaks. Damaged blades must be replaced immediately.
- Procedure: Raise the tiller with a safe lifting device, place safety stands, study blade placement, and replace one blade at a time to avoid positioning errors.
- Troubleshooting: The manual includes a section for common problems and their solutions:
- PTO Shaft rotating but not gearbox: Check and replace the safety bolt.
- PTO Shaft making noise/vibration: Check and replace the PTO cross.
- Rotary tiller not taking proper depth: Adjust side depth skids.
- Rotary tiller taking more depth on one side: Adjust linkage and ensure both side skids are in the same bolt position.
- Gearbox is noisy: Replace bearing or bevel gear.
- Gear shafts rotating but not the rotor: Open side gear cover and replace broken transmission shaft or RD shaft.
- Oil leakage from RD shaft hub or dead hub: Replace worn seals by opening the hub assembly, removing the shaft, replacing the seal, inspecting bearings, cleaning, and reassembling with proper greasing.
- Storage: Instructions for end-of-season or long-term storage, including washing, drying, checking for damaged parts, tightening fasteners, thorough lubrication, and protecting with a plastic sheet in a dry place.
- Safety Labels: Emphasizes keeping safety labels clean and legible, replacing damaged or missing ones, and proper installation of new labels.
The manual also includes a limited warranty statement, outlining terms, exclusions, and limitations of remedies, directing users to www.palletforks.com/warranty.html for full details. It explicitly disclaims all other warranties, express or implied, including merchantability and fitness for a particular purpose.