Before you start
Getting started...
16
Assembly
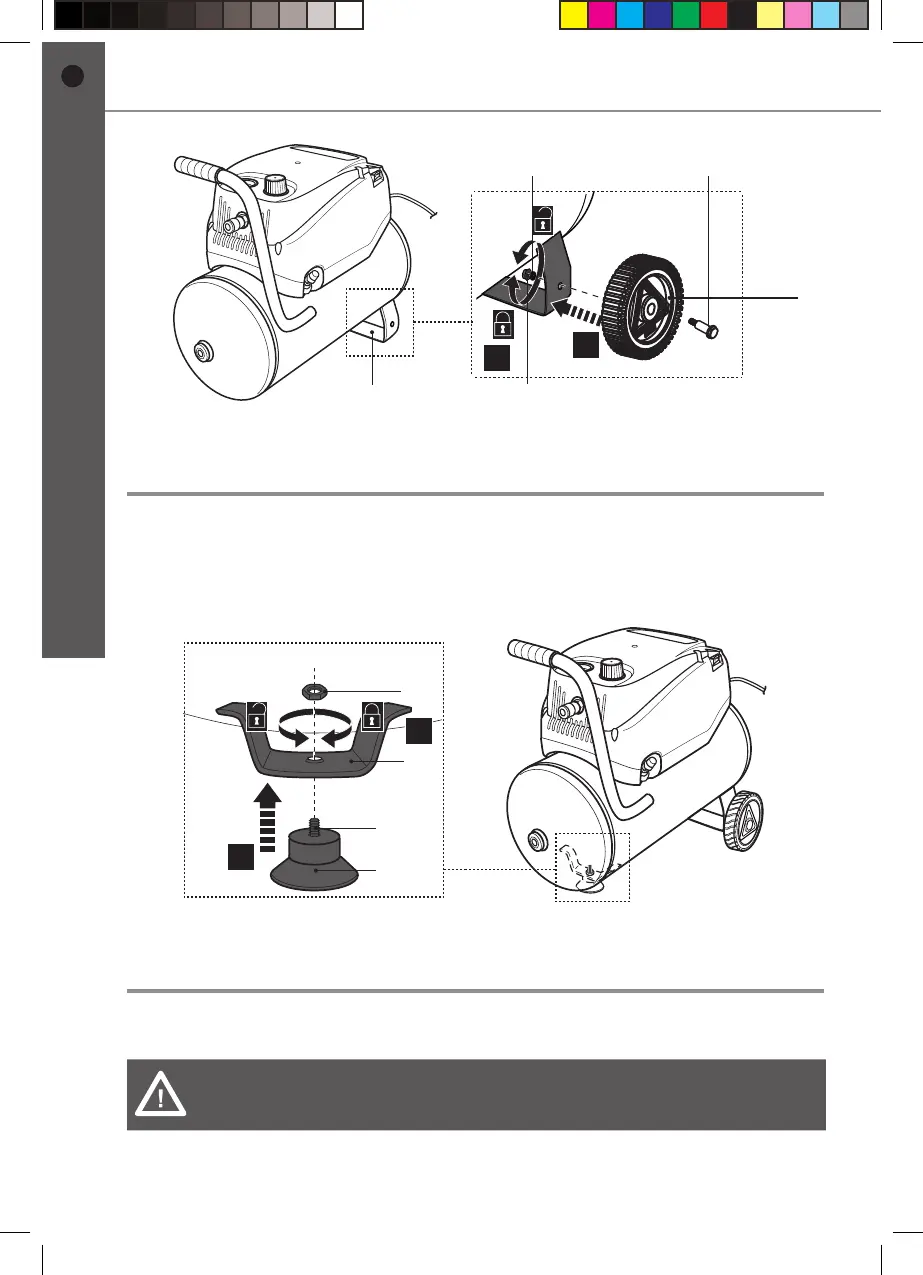
Foot
> Align the bolt (12a) of the foot (12) with the opening on the front support (11)
and insert it (Fig. 2, step 1).
> Screw the nut (12b) onto the bolt (12a) (Fig. 2, step 2). Do not overtighten.
2.
1.
12a
11
12b
12
Fig. 2
Connection to power supply
> Make sure the on / off switch (4) is in its off position O.
> Connect the plug (5) with a suitable socket.
WARNING! Check the voltage! The voltage must comply with the
information on the rating label!
> Your product is now ready to be used.
4/19/17 4:35 PM
EN
TTB797CPR
by TITAN
9
8b
8a8c
1.
2.
8
Fig. 1
 Loading...