EasyManua.ls Logo

Titanium TI-TCWH7 - User Manual

Titanium TI-TCWH7
12 pages
Print Icon
To Next Page IconTo Next Page
Loading...
!"#"$%&'(%)*+#"$*%,$-%.$$/-00)))1.,(+&(2(*"3.$14&5
65,"7%&'(%$*4.8"4,7%#'//&($%,$-%/(&9'4$#'//&($:.,(+&(2(*"3.$14&5
TI-TCWH7
58058
Owners Manual & Safety Instructions
Save This Manual Keep this manual for the safety warnings and precautions, assembly,
operating, inspection, maintenance and cleaning procedures. Write the product’s serial number in the
back of the manual near the assembly diagram (or month and year of purchase if product has no number).
Keep this manual and the receipt in a safe and dry place for future reference. 20l
When unpacking, make sure that the product is intact
and undamaged. If any parts are missing or broken,
please call 1-888-866-5797 as soon as possible.
Copyright
©
2020 by Harbor Freight Tools
®
. All rights reserved.
No portion of this manual or any artwork contained herein may be reproduced in
any shape or form without the express written consent of Harbor Freight Tools.
Diagrams within this manual may not be drawn proportionally. Due to continuing
improvements, actual product may differ slightly from the product described herein.
Tools required for assembly an d se rv ic e may n ot b e in cl uded.
Read this material before using this product.
Failure to do so can result in serious injury.
SAVE THIS MANUAL.
Question and Answer IconNeed help?

Do you have a question about the Titanium TI-TCWH7 and is the answer not in the manual?

Summary

Warning Symbols and Definitions

Important Safety Information

Helmet Condition Checks

Check lens, sensors, and frame for damage. Ensure work area is clean and well-lit.

Work Area and Personal Safety

Avoid damp locations, flammable gases. Keep children away, dress properly, use hearing protection.

Operational Safety

Stay alert, use common sense, avoid welding under alcohol/drug influence.

Inhalation Hazard Warning

General Safety Precautions

Pre-Use Inspection and Maintenance

Check for damaged parts, use identical replacement parts, and ensure qualified service.

Product Usage Limitations

Do not modify, use for unintended purposes, or outside operating temperature range.

Filter Maintenance and Care

Clean filters, replace damaged front covers, do not tamper with the auto-darkening filter.

Specifications

Operating Instructions

Helmet Functionality

Auto-darkening filter protects eyes from sparks, splatter, and radiation during welding.

Power and Shade Adjustments

Utilizes solar cells and battery backup; features user-selectable variable shades.

Filter Protection

High-performance UV/IR filters provide full protection against harmful radiation.

Pre-Welding Checks

Remove protective film, check lens cleanliness, sensors, and secure components before use.

Controls

Mode and Shade Selection

Guide to selecting shade options, ranges, and numbers using Set and Range switches.

Delay and Sensitivity Settings

Adjusting filter return delay time and sensitivity to ambient light levels.

Adjusting Headband

Maintenance

Lens Replacement Procedures

Instructions for replacing outer and inside lens covers, and the filter lens.

Battery Installation and Replacement

Procedure for installing or replacing the CR2450 lithium battery.

Common Problems and Remedies

Troubleshooting guide for issues like irregular darkening, poor vision, and slipping.

Parts List and Diagram

Limited 90 Day Warranty

Overview

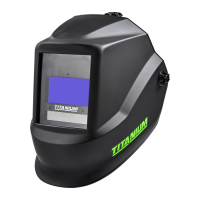
The Titanium TI-TCWH7 Auto-Darkening Welding Helmet (Item 58058) is designed to protect the eyes and face from sparks, splatter, and harmful radiation under normal welding conditions. It features high-performance solar cells as its primary power supply, supplemented by a replaceable 3V CR2450 lithium battery for backup. The helmet automatically transitions from a clear state to a dark state when an arc is struck, and returns to clear when welding stops.

Function Description:

The helmet's core function is to provide eye and face protection during various arc welding processes. Its auto-darkening filter (ADF) automatically adjusts the shade level, ensuring continuous protection against UV and IR radiation, even in the clear state, up to shade 15. This automatic darkening and clearing mechanism enhances user safety and convenience, eliminating the need to manually flip the helmet up and down. The helmet is suitable for MIG/Flux welding, stick welding, TIG welding (2+ amps), plasma arc welding/cutting, oxyacetylene welding/cutting, and air carbon cutting. It is not designed for laser welding.

Important Technical Specifications:

  • Power Source: Solar powered cell with battery assistance (replaceable 3V CR2450 lithium battery).
  • Operating Temperature: 14° to 149° F.
  • Resting Shade: Shade #3.
  • Shade Range: Variable from 5 to 9 and 9 to 13.
  • UV/IR Protection: Up to DIN 15 at all times.
  • Lens Type: ANSI Z87.1-2020 compliant.
  • Viewing Area: 1.84" L x 3.81" W (7.1 sq. in.).
  • Lens Switching Speed (Clear to Dark): 1/25,000 second (0.04 ms).
  • Delay Control: Controls dark-to-light state from 0.1 to 0.9 seconds.
  • Sensitivity Adjustment: Adjustable for ambient lighting and welding arcs (five stages).
  • Grinding Mode: Transforms helmet to grinding shield without shade flickering.
  • Power ON/OFF: Fully Automatic.
  • Shell Material: Nylon PA 66.
  • Weight: 20.6 ounces.
  • Features: Ratcheting headband with padded sweatband, 3 arc sensors, Shade Control, Time Delay Control, Sensitivity Control.

Usage Features:

The helmet offers several user-adjustable features for optimal performance and comfort:

  • Mode Selection and Shade Number: The "Set Switch" allows selection of the Shade option. The "Mode Switch" toggles between Shade 5-9 and Shade 9-13 ranges, displayed on the screen. Users can then fine-tune the shade level within the selected range using the "Range Switch," guided by the Shade Guide Chart (page 5 of the manual). For cutting and grinding, the "Mode Switch" also allows switching between "Cut" and "Grind" modes. The shade number can be set from 5 to 9 for cutting or 5 to 9 and 9 to 13 for welding, depending on the selected shade range.
  • Time Delay Control: This function adjusts the time it takes for the filter screen to return from dark to clear after welding stops. The delay time can be set from 0.1 seconds (shortest) to 0.9 seconds (longest) using the "Range Switch" after selecting the "Delay" option with the "Set Switch."
  • Sensitivity Adjustment: The sensitivity setting determines the amount of light required to activate the filter. Users can select the "Sensitivity" option with the "Set Switch" and then adjust the sensitivity level (from 1, lowest, to 5, highest) using the "Range Switch."
  • Magnifying Cheater Lens: A magnifying cheater lens (sold separately) can be attached to the inside of the helmet by sliding it into place underneath the tabs on the lower right and left sides of the Lens Retaining Frame.
  • Headband Adjustment: The headband is ratcheting and features a padded sweatband. It can be adjusted for height by tightening or loosening the top straps, and for head size using the Head Size Adjustment Knob. The Segmental Positioning Mechanism allows adjustment of the protection plate for optimal viewing angles. Proper adjustment ensures the helmet is seated securely, low on the head, and close to the face, with the Front Lens Cover aligned with the user's eyes.

Maintenance Features:

Regular maintenance is crucial for the helmet's reliable protection and longevity:

  • Pre-Use Inspection: Before each use, inspect the helmet for any signs of wear or damage, including cracked lenses, dirty sensors, loose retaining frames, or any other condition that might affect operation. Any scratched, cracked, or pitted parts should be replaced immediately.
  • Lens Cover Replacement:
    • Outer Lens: To replace the outer lens, remove the Lens Frame from the Helmet Shell, then remove the Outer Lens. Remove protective film from both sides of the new lens. Install the new Front Lens Cover into the Gasket and reassemble the Lens, Gasket, and Lens Holder into the Shell. It is critical that the front lens remains in place during welding to prevent permanent damage to the Auto-Darkening Filter and to maintain warranty validity.
    • Inside Lens Cover: The old Inside Lens Cover can be removed by pulling it up at the finger notch. Remove protective film from both sides of the new lens. Line up the new Inside Lens Cover with the flanges at the sides of the lens and snap it into place.
  • Filter Lens Replacement: If the Auto-Darkening Filter itself needs replacement, remove the Lens Frame from the Helmet Shell, then remove the Auto-Darkening Filter from the Lens Frame. Remove protective film from both sides of the new filter lens. Install the new Filter Lens into the Lens Holder and replace the Lens Holder into the Shell. It is crucial to use an exact replacement filter lens to ensure proper protection and fit.
  • Battery Installation/Replacement: The helmet uses a CR2450 Lithium Battery. A battery indicator is located in the top left corner of the display screen. To replace the battery, remove the Automatic Filter from the Lens Holder, slide the Battery Housing out of the Auto-Darkening Filter, remove the used battery, place a new CR2450 Lithium Battery inside the Battery Holder, and then reinsert the Battery Holder and Auto-Darkening Filter into the Lens Holder and Shell. Ensure the new battery is installed correctly. Used batteries must be properly disposed of.
  • Cleaning: Clean the filter's surfaces, sensors, and solar cells regularly using a clean, lint-free tissue/cloth. Avoid using solvents on filter screens or helmet components. Protect the filter from liquid and dirt contact, and do not immerse it in water.
  • Troubleshooting: The manual provides solutions for common problems like irregular darkening/dimming (adjust headband), auto-darkening filter not darkening/flickering (clean/change lens cover, clean sensors, adjust sensitivity), slow response (check operating temperature), poor vision (clean/change lens covers/filter, check ambient light, reset shade number), and helmet slipping (adjust headband). If problems persist, stop using the helmet immediately.
  • Storage: When not in use, the helmet should be stored in a dry location to prevent rust and kept out of reach of children.

Titanium TI-TCWH7 Specifications

General IconGeneral
BrandTitanium
ModelTI-TCWH7
CategoryMotorcycle Accessories
LanguageEnglish