First Use
4
Charging the Battery
The TM9S775 has a built-in battery that may not be fully charged on first use. It is highly
recommended to fully charge the battery upon first use. Included in the package is an
AC power adaptor to connect to AC power outlet as well as a USB cable to connect to a
powered PC. Both methods can be used to recharge the internal battery. But recharging
via AC power will take less time than recharging via USB. The tablet will indicate that it in
operating a low power condition and that it needs recharging (occurs at about 10-15%
power). It takes approximately five hours to recharge the battery via AC power or longer via
USB. And it is normal for the tablet to feel warmer during recharging.
IMPORTANT: Close Apps that are not in use to avoid excessive battery drain.
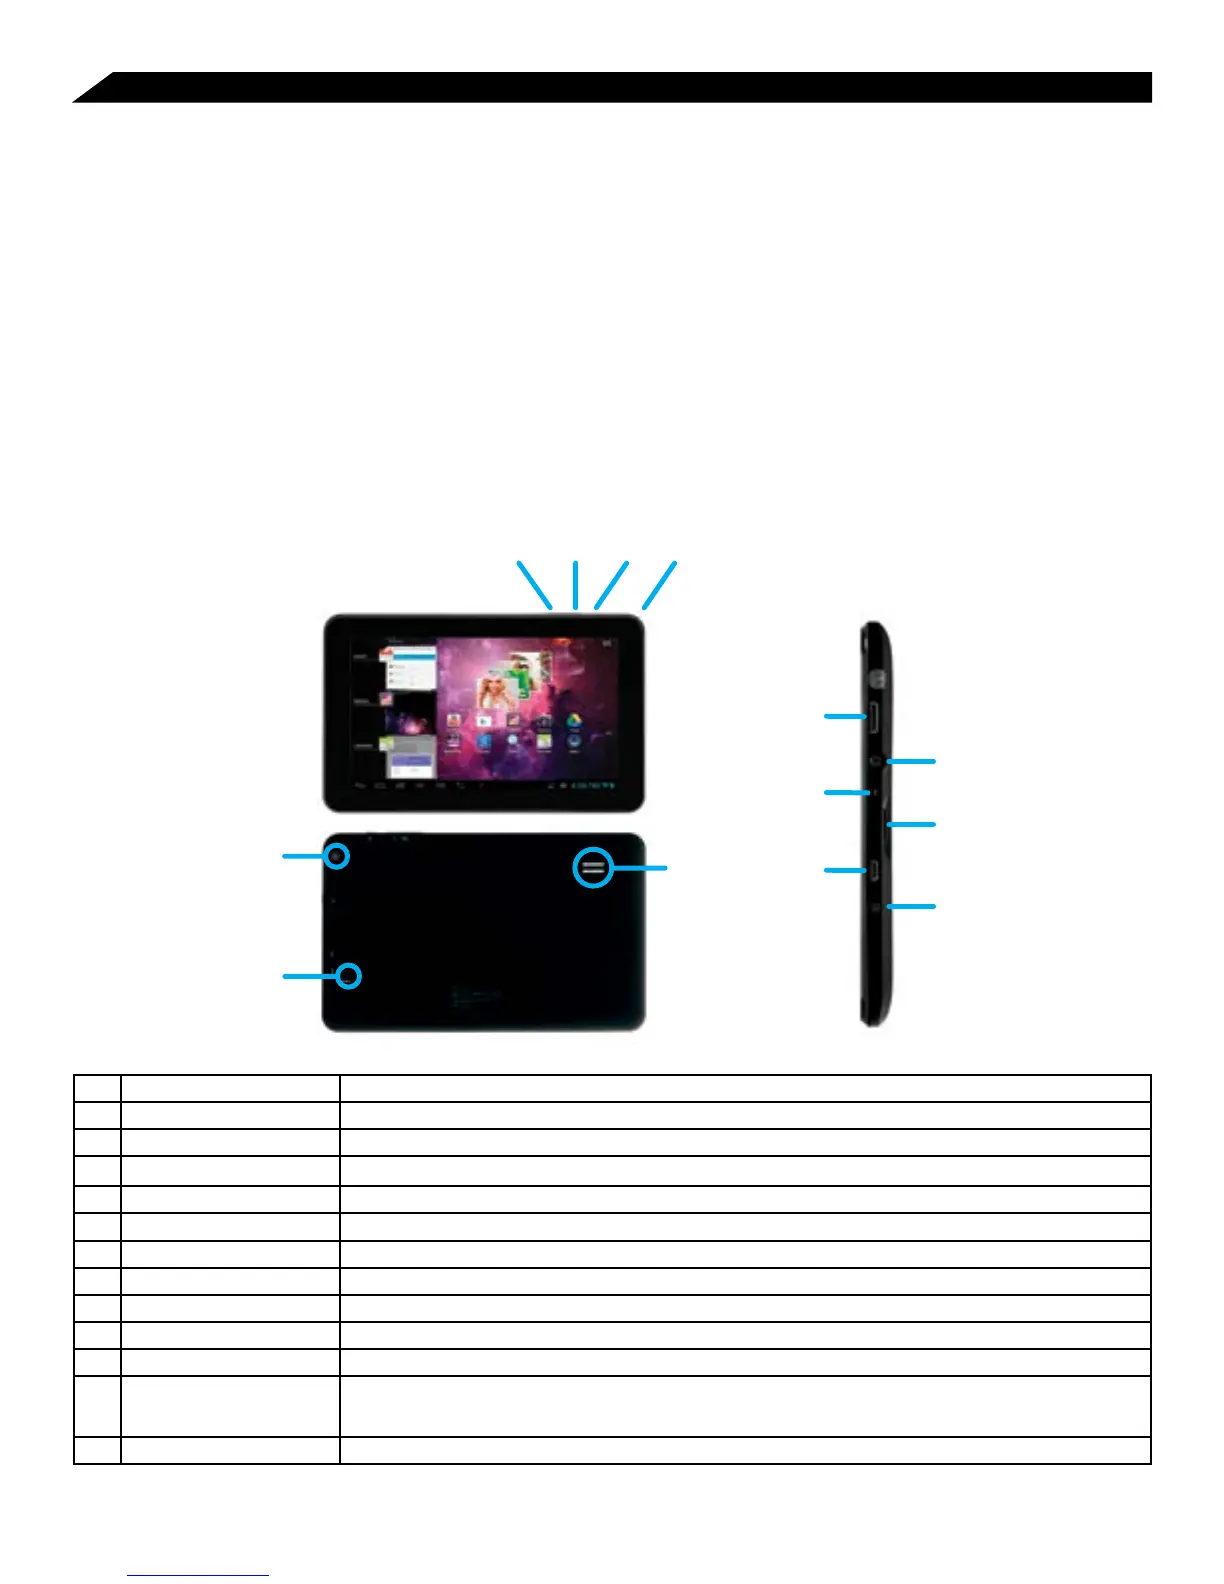
Tablet Functions and Controls At-a-Glance
13
7
5
9
6
8
10
12
11
1 Volume + Key Increases audio volume in either speakers or earphones.
2 Volume - Key Decreases audio volume in either speakers or earphones.
3 Power/Lock Key Powers ON/OFF the tablet when held for 3 seconds. Locks and unlocks the tablet in Stand-by Mode.
4 Camera 0.3 camera on front of tablet (facing the user.)
5 High-Definition Video Output 1080P High Definition Video Output.
6 Earphone Jack For use with a standard 3.5 mm stereo headphone jack.
7 MIC Built-in microphone.
8 Memory Card Slot Slot for a memory card.
9 Micro USB Port Connect to a computer via micro USB cable to transfer data (i.e. music, video, photo, data files.)
10 Power Jack (DC Input) Connects to an AC adapter.
11 Camera 2.0 MP camera on back of tablet.
12 Reset Button (At bottom of
aperture.)
Press to reset the tablet. The aperture requires a paper-clip or other small, narrow-tipped item to insert and trigger
the reset. (Be careful not to apply undue pressure to the button located inside the aperture. Do not use a knife or
other bladed tool, as this may damage the unit, and potentially cause personal harm.)
13 Speaker