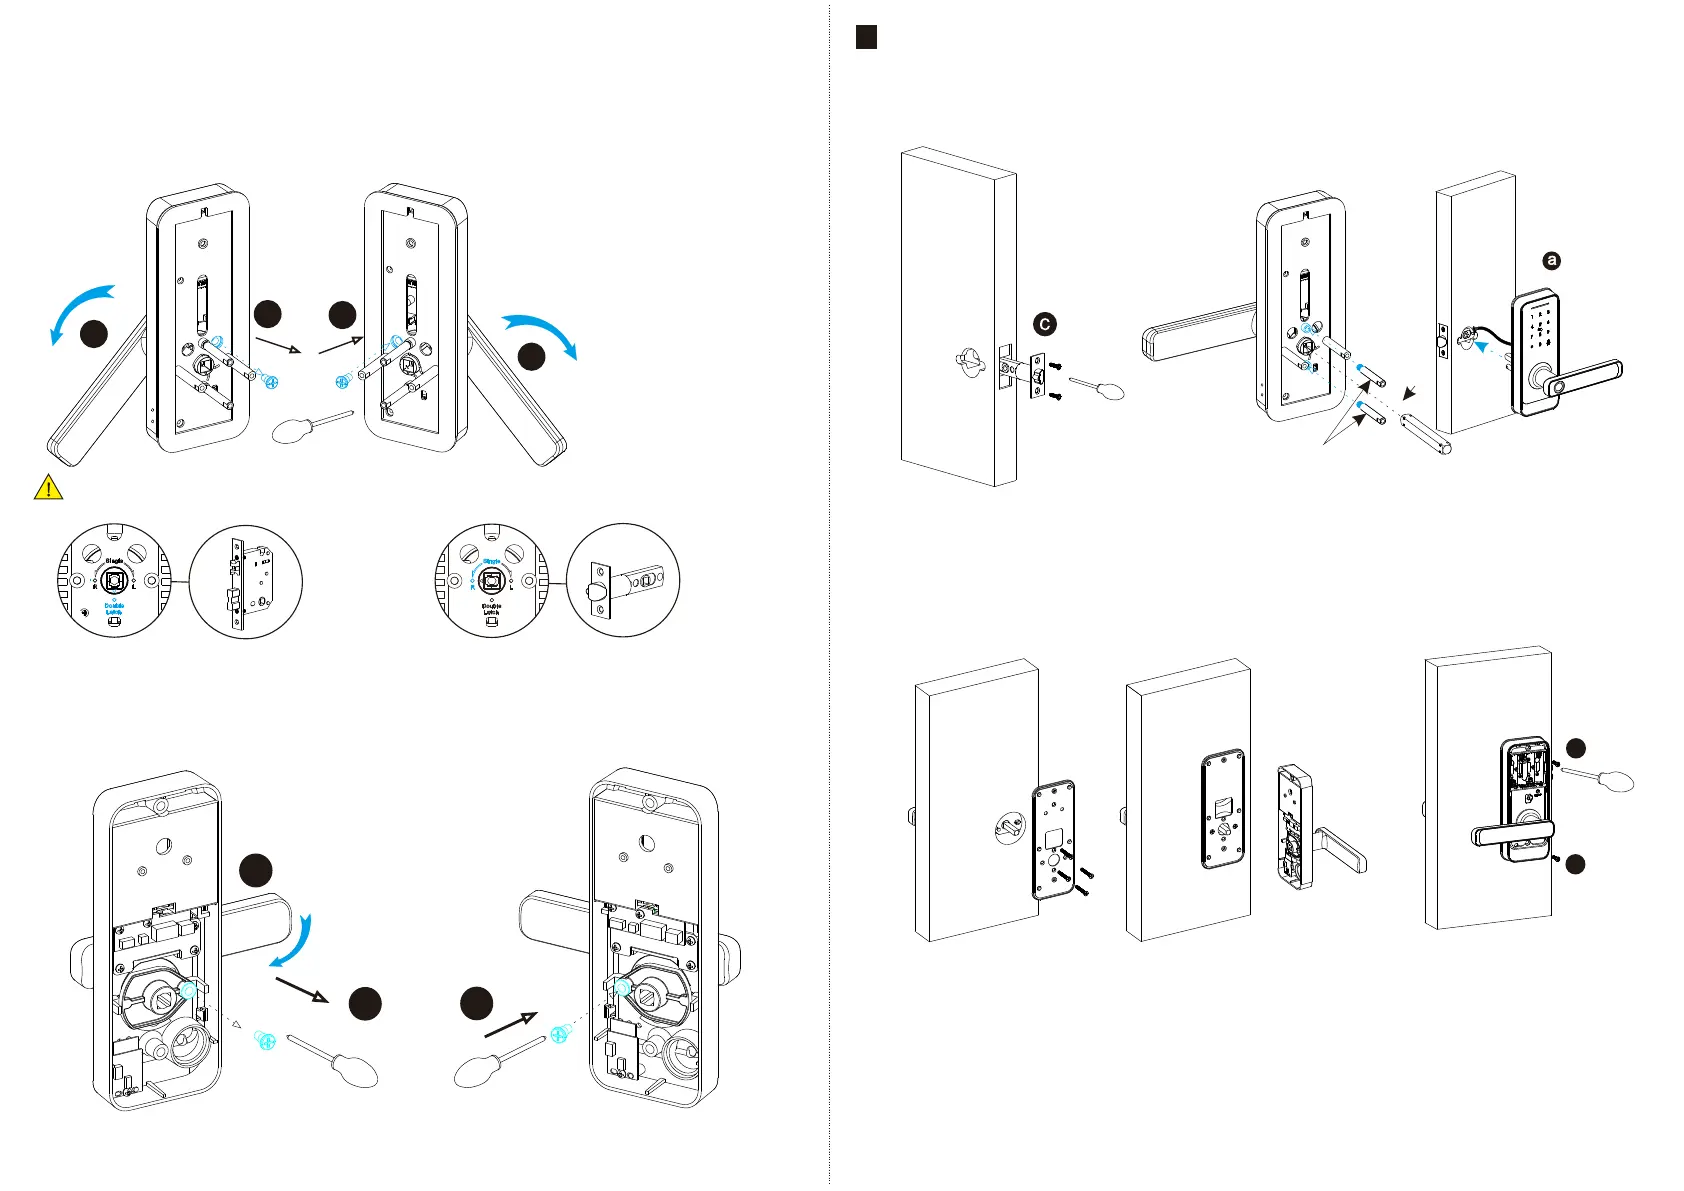
6.2 Adjust Direction
Double Latch
Single
Make sure the arrow point to the right position according to the different mortise.
6.2.1.Adjust from Right to Left Direction(Front Panel)
1. Turn the handle with 45 degree.
2.Use the allen key to take off the screw like the photo.
3. Turn the handle to 270 degree counterclockwise.
4. Tighten the screw in left position.
2
4
1
3
45°
270°
6.2.2.Adjust from Right to Left Direction(Back Panel)
1. Use the allen key to take off the screw on the right position.
2. Turn the handle to 180 degree counterclockwise.
3. Tighten the screw in left position.
1
3
2
180°
EN - 5 support@tmezon.comEN - 6 support@tmezon.com
7
7.1 Assemble the Mortise
Assemble the latch bolt() into the
c
slot which is drilled according to the
template.
7.2 Assemble the Front Panel
7.2.1 Tighten the two posts with front plate
7.2.2 Press hard the spindle (h) into the handle hole.
7.2.3 Cross the cable through the hole and fix the
front panel(a) on the door.
INSTALLATION STEPS:
1
2
7.3 Fix Back Plate
Fix the back plate on the back, cross
the cable through the hole and connect
with the PCB board.
7.4 Fix the Back Panel
Tight the back panel with front panel with
the long screws as the photo.
f
g