4
Unpack your hardware:
Toast Flex + Toast Printer
1
Step 2
Step 4
Step 5
Step 3
Place near
wall outlet
2
3
4
5
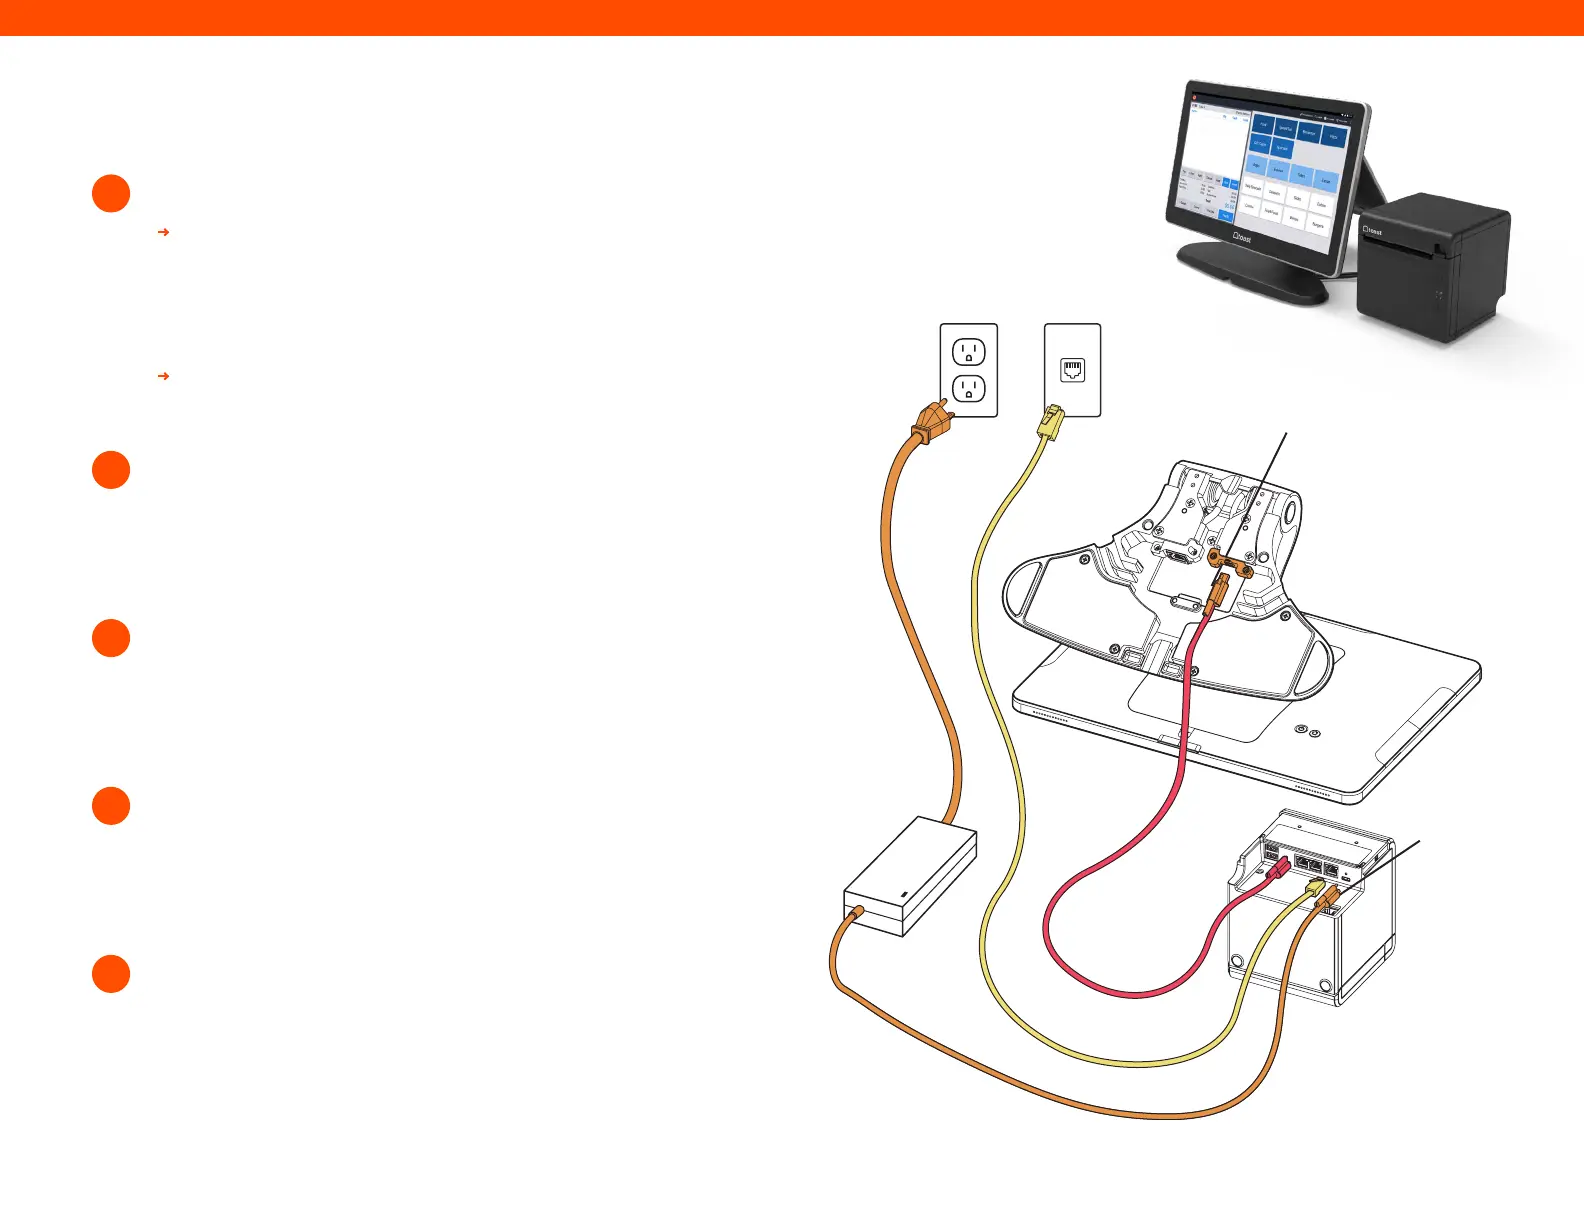
Next, remove the box labeled “Power.”
This box contains the power adapter. Plug it into the
orange port labeled “Power In” on the Toast Printer.
Use the thumb screw to secure it.
Then, place the other end near the wall outlet, but don’t
plug it into the outlet yet. Placing it near the outlet now
will help you know where you want to coil or hide your
cables at the end of installation.
Next, remove the box labeled “Connect.” This box
contains two yellow ethernet cables. One is 3 ft and
one is 7 ft. Choose the cord length that best suits your
restaurant and connect it from the Toast network to the
yellow port labeled “Internet IN” on the Toast Printer.
Take the red end of the USB-C cable and plug it into the
red “To Stand” port on the Toast Printer. Take the other
end and connect it to the orange port on the base of the
Toast Flex. Use the thumb screw to secure it. Ensure the
thumbscrew is tight to avoid connectivity issues.
Unpack the Toast Printer first. It will contain a USB-C
to USB-C cable with a red end and an orange end.
It will also contain a wall mounting bracket, paper,
and a Toast TP200 Printer Quick Start Guide.
Unpack the Toast Flex terminal box next.
Power
Adapter
Printer
Step 4
Step 5
Step 2
To Meraki /
Toast Network
 Loading...