Adjust the height flexibility of the arm
Press your hand down firmly on the upper part of the arm until the arm position is horizontal. Use the
large Allen wrench to loosen the screw at the top of the base on the arm until the arm sinks further
towards the table without you having to apply more preassure. Start tightening the screw gradually.
Adjusting this screw adjusts how sensitive the arm is to the weight of the eye tracker and screen.
Tightening the screw will decrease the sensitivity and loosening the screw will increase the sensitivity
to weight. In other words, if you don’t want the monitor mount to move, tighten it as much as possible.
If you want to be able to adjust the height, find a setting in between as tight as it goes and as loose as
it goes. As the combined weight of the monitor and eye tracker is quite high, this screw will have to be
turned counterclockwise a few rotations.
Attach the X60/X120 Monitor Mount to the X60/X120 Monitor Mount monitor regulator
Hold the X60/X120 Monitor Mount in place with one hand while you place and tighten the top
screws. Ideally, this should be done by two people where one holds the X60/X120 Monitor Mount in
place while the other attaches the screws. Once the two top screws have been put in place, the grip
on the X60/X120 Monitor Mount can be released and the rest of the screws attached. Ensure to
leave enough space between the monitor and the monitor mount for the eye tracker to fit.
Lock the arm position in place
Place the monitor and eye tracker in the desired position. Tighten the screws on the joints of the arm
using the smaller of the Allen wrenches supplied with the arm. This will keep the arm stationary during
the testing.
Place the eye tracker in the X60/X120 Monitor Mount
Place the eye tracker in the X60/X120 Monitor Mount and lock it in place using the screw supplied
with the X60/X120 Monitor Mount.
Hide the cables
Thread the cables for the eye tracker and monitor thorugh the arm as shown in the image to the left.
Place the caps delivered with the arm according to the image to the left to cover the cables.
Adjust the X60/X120 Monitor Mount to the monitor size
Calculate the necessary distance between the eye tracker
and the monitor and adjust the monitor mount to accomodate
for this.
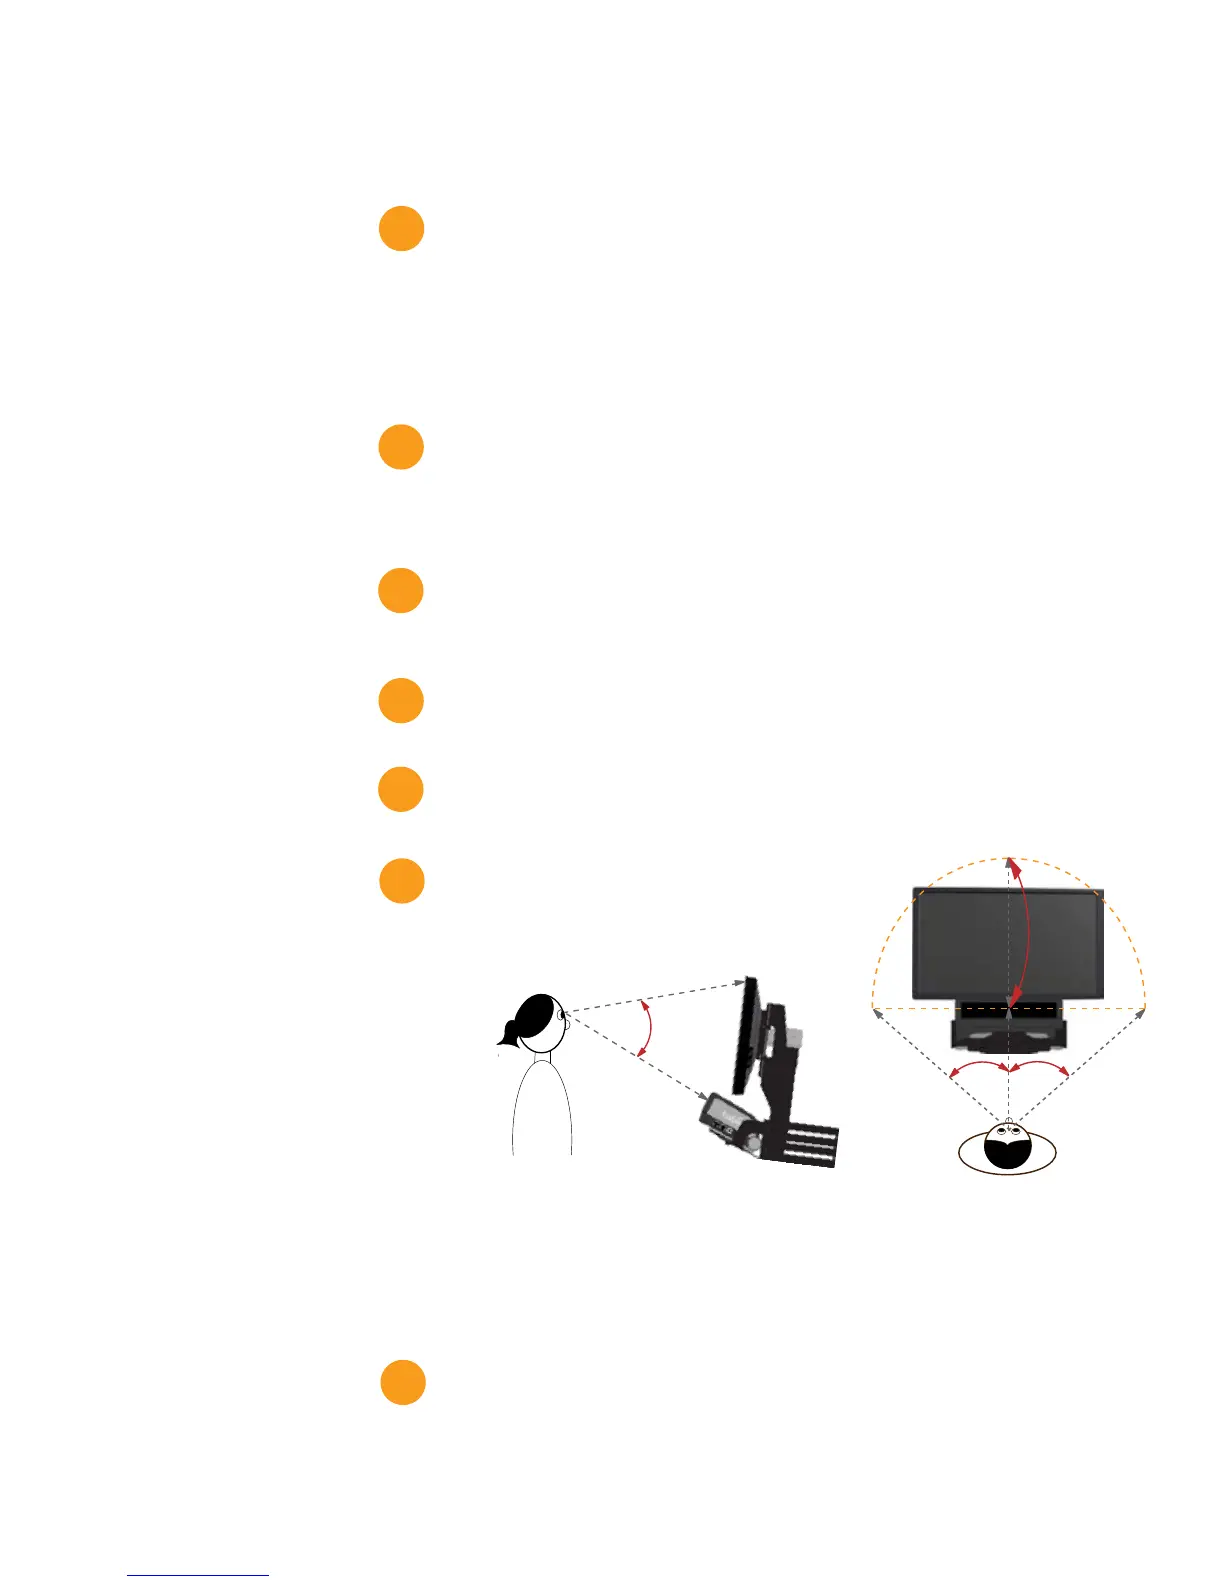
The distance from the person’s eyes to the eye tracker
should be approximate 64 cm (27’’). The eye tracker should be placed so that the gaze angle will not
exceed 35º to any point on the monitor (see image to the right and below).
It is very important to have the correct distance to the monitor. Otherwise the eye tracker cannot
track the entire area. If the monitor is placed too close to the eye tracker there is a risk that the gaze
data for the corners of the monitor will not be collected. The correct distance can be calculated by
using basic trigonometry and including the gaze angles and the monitor size.
More information about how to calculate the appropriate distance can be found in the X60 or X120
Eye Tracker user manual.
Enter the values into the X Configuration tool
Measure all the values required and enter these into the X Configuration tool.
More information about how to enter the values can be found in the X60 or X120 Eye Tracker user
manual.
9.
10.
11.
12.
13.
14.
 Loading...