12
13
OPERATION MANUAL OPERATION MANUAL
WWW.THETOOLSHED.CO.NZWWW.THETOOLSHED.CO.NZ
OPERATION OPERATION
Pull the Recoil Starter
During Use
Filling the Fuel Tank
Starting the Engine
Operating the Post Hole Borer
Stopping the Engine
Stop/Run Switch
• When resistance is felt, pull the cord sharply.
Continue this procedure until the engine
starts.
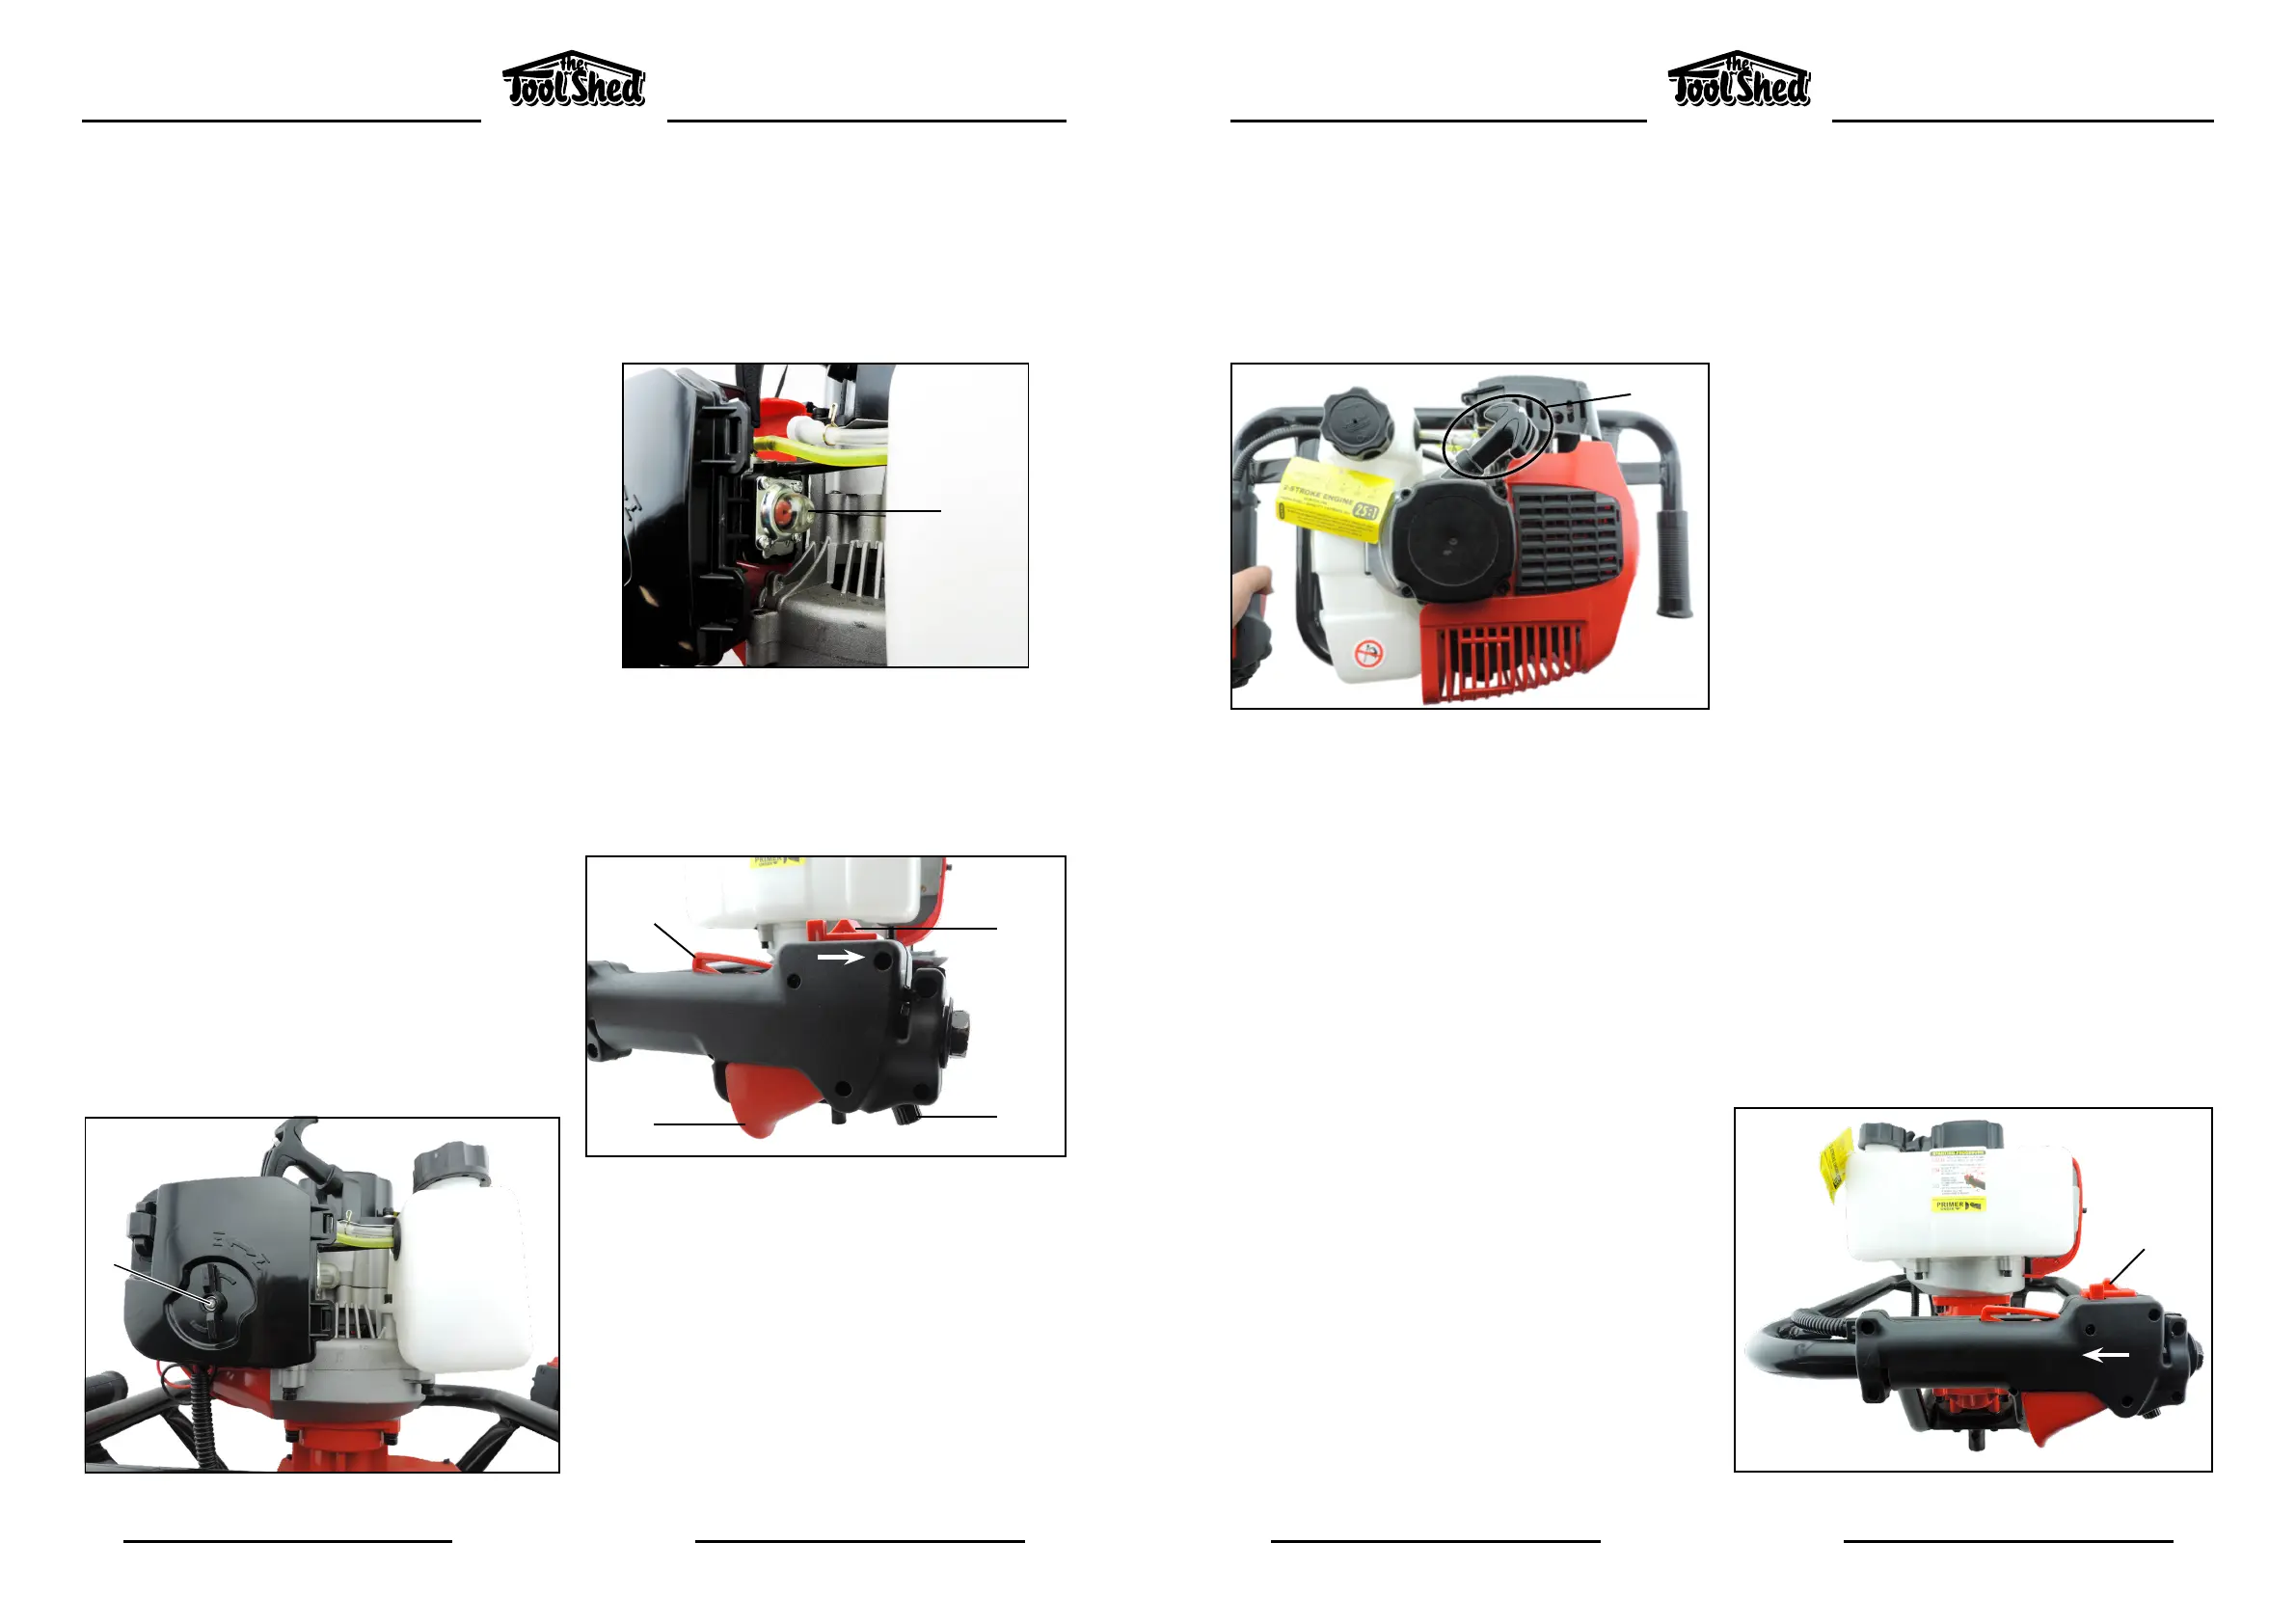
• Hold down and secure the hole borer engine
and body rmly with one hand. With the
other hand grip the recoil starter cord handle
(6.1) and pull slowly until resistance is felt. The
resistance indicates that the recoil starter is
engaged.
• Remove any objects or debris that could be
thrown, jammed or become entangled in the
auger bit.
• Adopt a stable stance, always keeping the
hole borer in front of your body.
• Grip the handles with both hands, ensuring
you can safely operate the control levers.
• Allow the auger bit to reach full speed before
commencing the boring operation.
• If the auger bit hits a stone or hard ground
the rotation may stop immediately and give a
hard torque reaction.
• It is therefore required that the operator has a
rm grip on both of the handles during oper-
ation in order to compensate for a sudden
torque reaction.
• Remove any jammed debris from the auger
bit and examine for any damage before
recommencing work.
• This product requires two hands to ensure
safe operation.
• Make sure that the hole boring operation
does not involve the risk of underground
contact with electric cables, gas mains, water
pipes etc.
• Inspect the work area before starting.
• When the engine has been successfully
started and is running smoothly, return the
choke lever (3.1) to the OFF position.
• Press in the safety switch lever (5.2) then
squeeze the throttle lever (5.3), the auger will
begin to rotate.
• To adjust the boring speed; rotate the speed
adjuster (5.4) until the desired setting is
achieved.
• To stop the auger bit from rotating, briey
squeeze then release the throttle lever.
• Push the STOP/RUN switch to the STOP posi-
tion (7.1)
• Use a suitable funnel to transfer the fuel mix
from the Fuel Mixing Bottle to the hole borer
fuel tank, taking care not to spill any fuel, or
over ll the fuel tank.
• For safety reasons, this product has been
supplied with the fuel system completely
drained of fuel, therefore the engine will
require “Running In”.
• When using this machine for the rst time, you
may experience some diculty in starting the
hole borer. Once the fuel has fully circulated
through the system, the hole borer will start.
• Once it has been started, and run in for the
rst time, future starting will be easier.
• Gently agitate the fuel mix by gently rocking
the hole borer backwards and forwards a few
times. This will ensure that the two stroke oil
has not settled out from the petrol within the
tank.
• Set the choke lever (3.1) to the ON position.
• If the carburettor requires priming, pump the
clear rubber priming button (4.1) until fuel
appears in the clear button.
• Make sure that the STOP/RUN switch (5.1)
found atop the right handle of the Post Hole
Borer, is in the RUN position.
3.1
4.1
5.2
5.1
5.4
5.3
7.1
6.1


 To Next Page
 Loading...