MAINTENANCE
CAUTION: Disconnect tool from the air supply before removing or installing the
contact tip.
!
r, reassemble in reverse order.
REGULAR MAINTENANCE
Clean and inspect the tool daily. Make sure the tool is disconnected from the air
supply.
Blow the tool clean with compressed air and inspect for wear or damage.
Use
necessary. DO NOT SOAK tool with cleaning solutions. Such solutions can
damage internal parts.
Inspect the trigger and the safety mechanism to assure the system is complete
and functional. Check for loose or missing parts, and any parts that may be
sticking.
Keep all the screws tight. Loose screws may cause personal injury .
Place two or three drops of pneumatic oil (included) into the air inlet of the tool
daily.
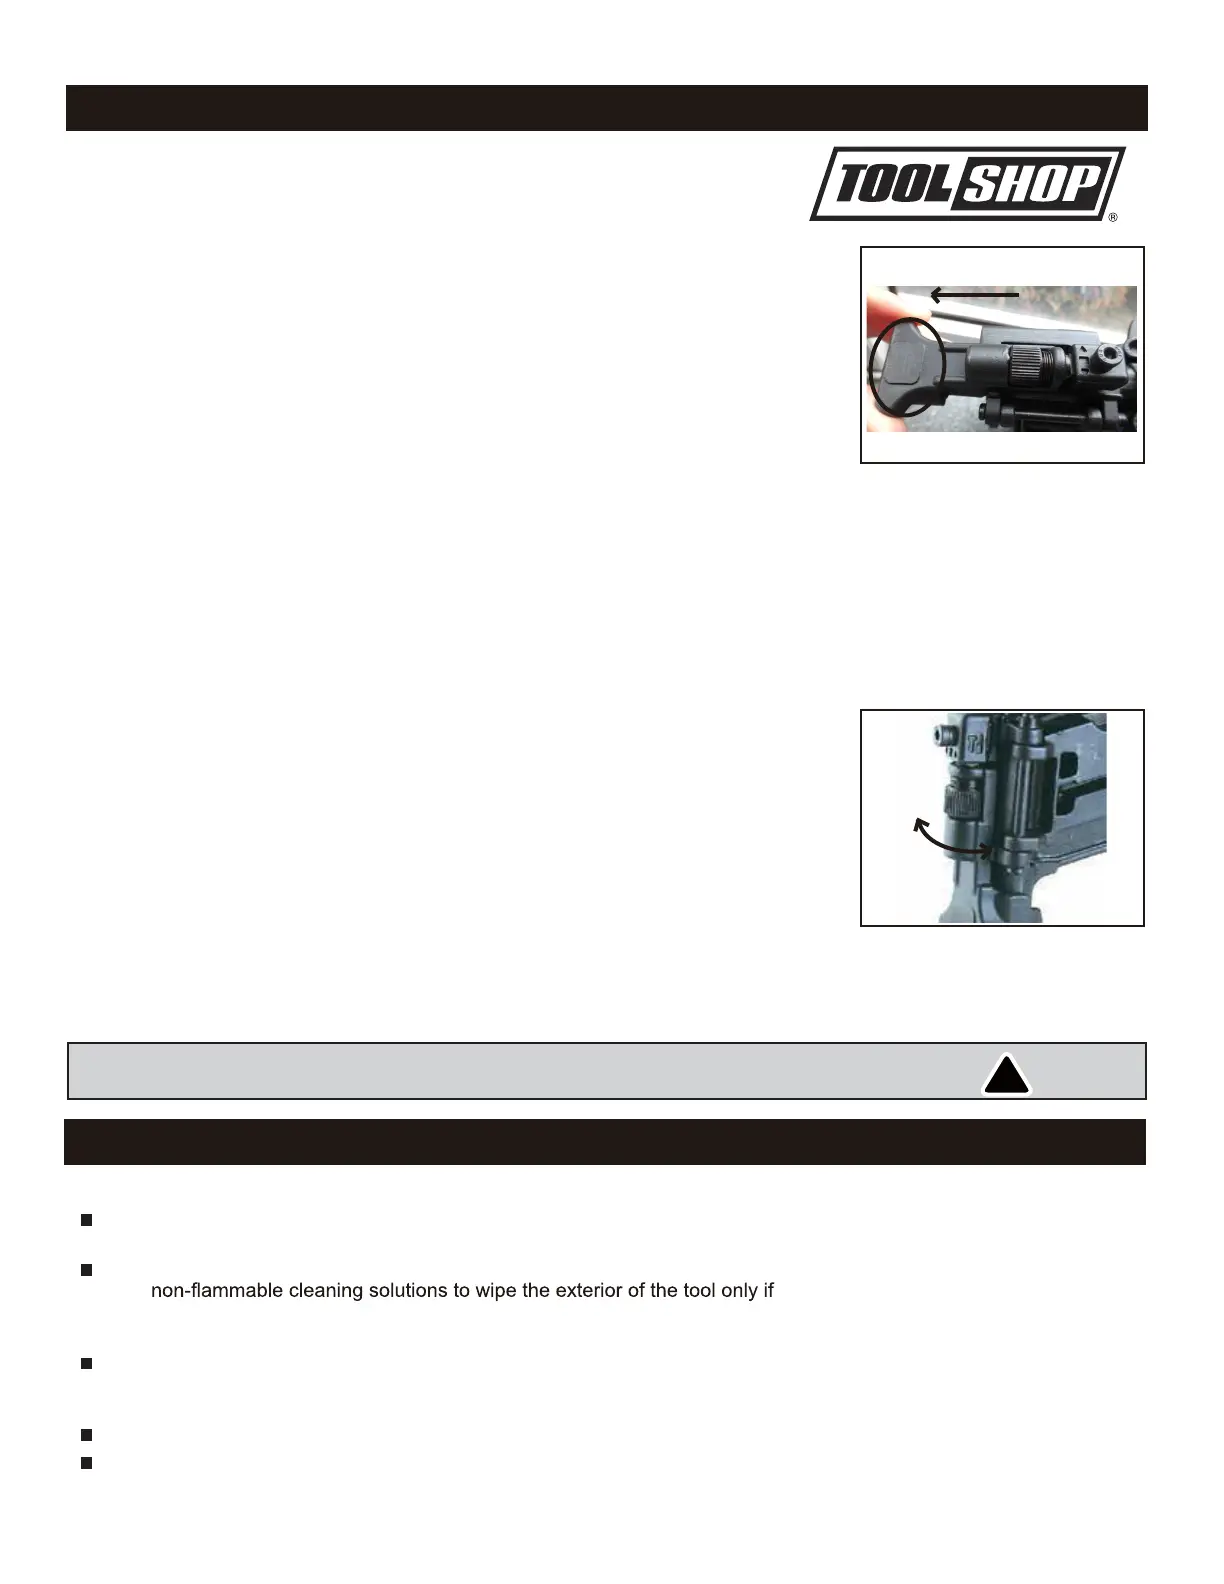
ADJUSTING FASTENER DEPTH
The depth to which a fastener is driven is controlled by the depth adjustment (Fig.8/9).
The depth drive is adjusted to the maximum setting by the factory.
1. Fire a fastener into a scrap workpiece to check depth.
2.
3.
If a change is desired, pull the “release catch A” (Fig.8) , then rotate the
adjustment knob clock
wise (upward) to increase the depth, counterclockwise
4. Fire another fastener in a scrap work piece and check the depth.
of air pressure required will vary depending on the size of the setting.
OPERATING PROCEDURES
8
1. Unlock the magazine latch and open the magazine cover.
2. Use pliers or any appropriate tool to remove the jammed nails.
3. Close the movable cover and verify that the magazine latch is moved to its original position.
4. Reload the nails into the tool magazine.
5. Reconnect the air supply line to the tool’s air inlet.
6. Test fire 3 to 5 nails into a piece of scrap wood in order to ensure a proper operation.
CLEARING A JAMMED NAIL
Complete all the steps in PREPARING THE TOOL before using.
Please Note: This tool is fired in only one way:
BUMP FIRE:
The tool should only fire if the Safety Nosepiece is pressed
against the workpiece and the trigger is pulled. It should fire again if the trigger is
released and pulled OR if the safety is lifted and pressed against the workpiece
again. The tool should not fire if the Safety Nosepiece is not pressed against an
object.
1. Connect the air supply to the tool and set within the Operating Air Pressure
indicated on the Specification chart.
2. Pull trigger with nailer off workpiece.
3. Depress the contact mechanism firmly until it is completely depressed to drive a nail.
4
.
With depressing the workpiece,release the trigger and pull it again,the nailer
fires again.
5
.
With pulling trigger, lift the tool and press it against the workpiece again,nailer fires again.
Fig.9
(downward) to decrease it ( Fig.9).
To prevent rotating while operating, make sure the tip on the “release catch A”
match the gap of the screw( Fig.8).
Fig.8
“release catch A”
(#49)
(#49)
5. REPEAT AS NECESSARY UNTIL DESIRED DEPTH IS ACHIEVED. The amount
 Loading...