73
MAINTENANCE
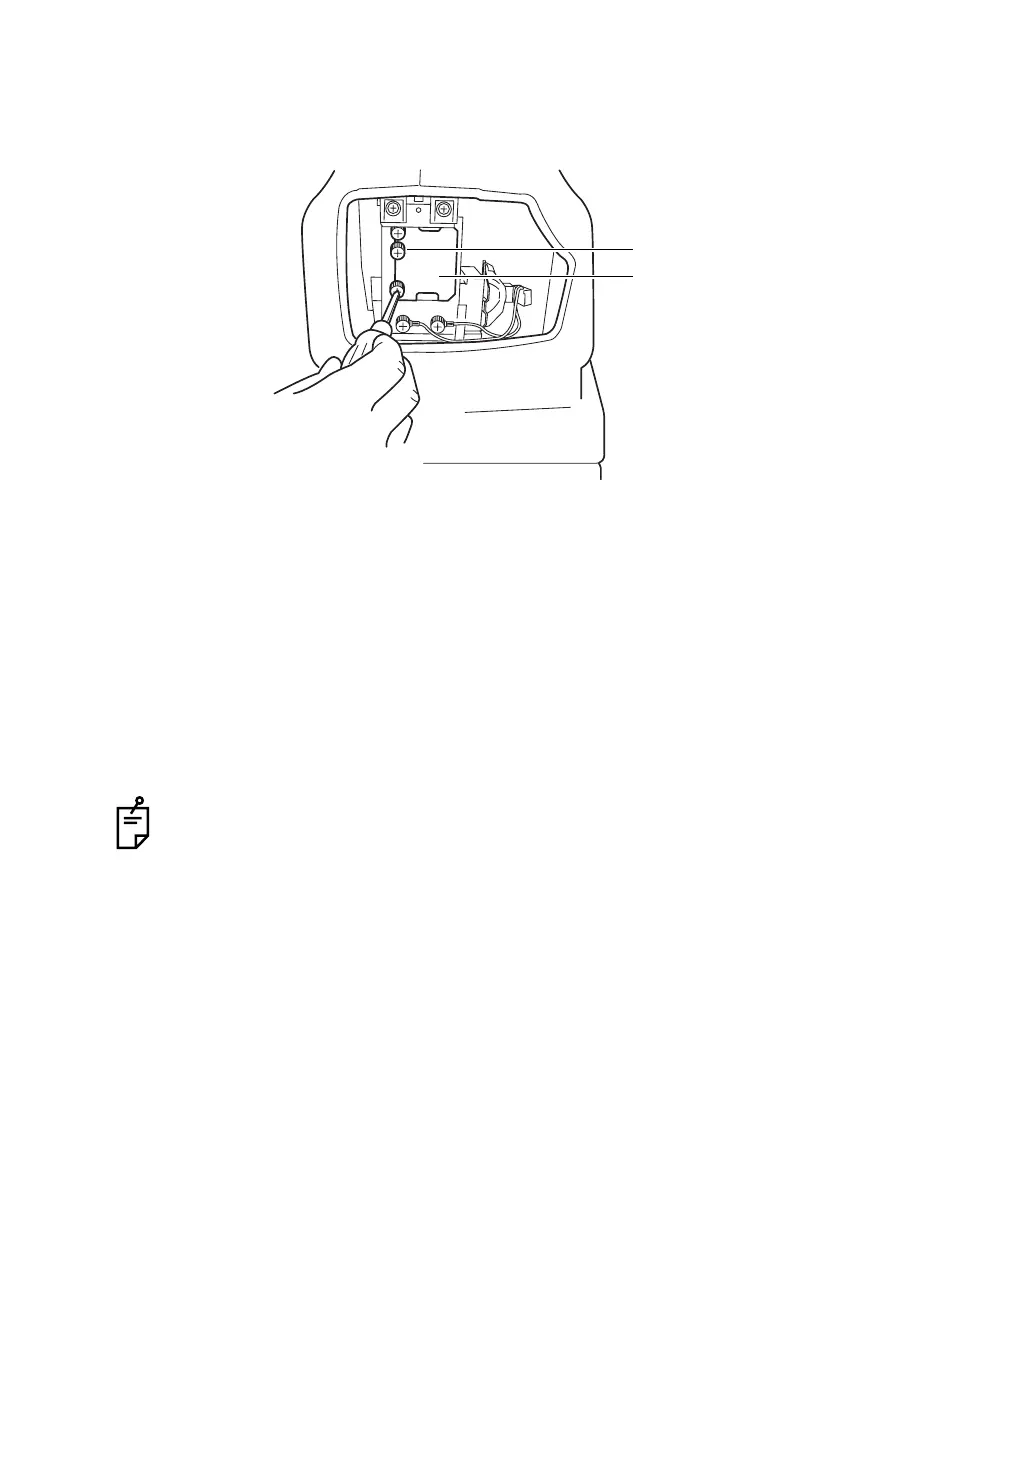
2 Unscrew the lamp house cover with a coin, etc. to remove it.
3 Loosen the three xenon set screws.
4 Hold the xenon PCB at the top and the bottom, slightly slide it to the right and pull it out
straight toward the operator’s side.
5 Insert the new xenon PCB, so the xenon lamp does not touch the surrounding metal com-
ponents, and upon reaching the stopper, slightly move it to the left and slide it into the
xenon set screws.
6 Securely fasten the three xenon set screws.
7 Attach the lamp house cover by matching the projection at the bottom part of the lamp
house cover with the groove of the body cover. Turn the screws with a coin, etc. and
securely fasten the lamp house cover.
To avoid electric shock, if the lamp house cover is not correctly attached, an error is dis-
played on the color LCD monitor and operations, including photography, cannot be
done.
Xenon set screw
Xenon PCB
 Loading...