124
Sharpening
Japanese Chisels
These differ in shape from the Western style chisels. The
rough shape from the forging is retained without machining,
the sides are usually not parallel and the blades are shorter.
This means that you cannot use the alignment shoulder in
the jig for an exact 90° alignment. The clamp is designed
so tools with a tapered shank can also be rmly mounted
(page 121). Be cautious when sharpening Japanese chis‑
els! Compared to longer Western style chisels there is a
limited amount of available steel, so you should set carefully to minimize the removal of
expensive steel. The back has a hollow, which moves closer to the edge at each sharpening.
After some sharpenings you might need to atten the back, so the hollow does not reach
the edge. Then use the side of the wheel.
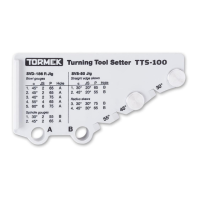
Draw a pencil line on the
stone using the Universal
Support as guide.
Align the tool to the
line when mounting.
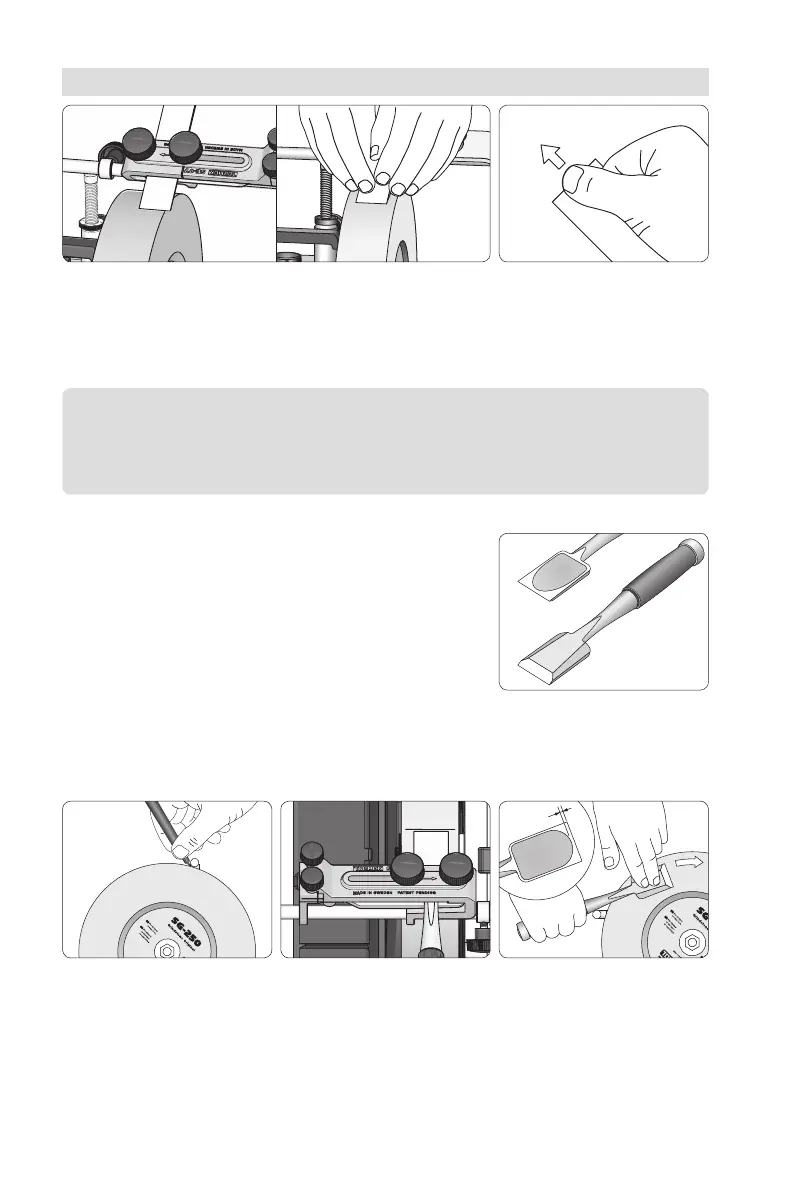
Ensure that the hollow does not
reach to the edge. If neccessary,
flatten the back on the side of
the grinding wheel. Important!
Bring the tool to the wheel care-
fully when flattening the back.
The edge must not touch the
wheel before the heel.
Move the tool sideways to use the whole width of the wheel.
Donot move more than approx. 2 mm (
4
") outside the wheel.
Press with your fingers close to the edge for best control.
Ahigher grinding pressure means faster steel removal. Lighten
the pressure at the end of the sharpening and you will obtain
afiner surface.
Sharpen until a burr develops
on the entire bevel. You can
feel it with your finger.
Important You control with your hands – the pressure and grinding time –
where the grinding takes place. Check the shape frequently and grind more
where it is needed.
 Loading...