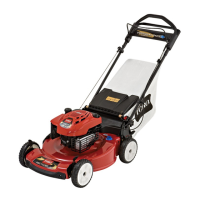
Figure13
1.Dipstick3.Full
2.Add
4.Removethedipstickandchecktheoillevel(Figure13).
IftheoillevelisbelowtheAddmarkonthedipstick,
slowlypouroilintotheoillltubetoraisetheoillevel
totheFullmarkonthedipstick.Donotoverll.
5.Installthedipsticksecurely.
AdjustingtheHandleHeight
Youcanraiseorlowerthehandlein1of2positionsthatis
morecomfortableforyou(Figure14).
Figure14
1.Loosenbothhandleknobsuntilyoucanpushthe
squareedgesofthecarriageboltsoutofthesquare
holesinthehandlebrackets.
2.Pushtheknobsuntiltheyareloose.
3.Movethehandletotheupperorlowerheightposition.
4.Pulltheknobsuntilthesquareedgesofeachcarriage
bolttsintoitsrelatedsquarehole.
5.Tightenthehandleknobsastightasyoucan.
AdjustingtheCuttingHeight
Adjustthecuttingheightasdesired.Setthefrontwheelsto
thesameheightastherearwheels(Figure15).
Note:Toraisethemachine,movethefrontcutting-height
leversrearwardandtherearcutting-heightleversforward.
Tolowerthemachine,movethefrontcutting-heightlevers
forwardandtherearcutting-heightleversrearward.
Figure15
1.Raisethemachine2.Lowerthemachine
Note:Thecutting-heightsettingsare25mm(1inch);35
mm(1-3/8inches);44mm(1-3/4inches);54mm(2-1/8
inches);64mm(2-1/2inches);73mm(2-7/8inches);83mm
(3-1/4inches);92mm(3-5/8inches);and102mm(4inches).
DuringOperation
DuringOperatingSafety
GeneralSafety
•Wearappropriateclothing,includingeyeprotection;
slip-resistant,substantialfootwear;andhearing
protection.Tiebacklonghair,securelooseclothing,and
donotwearjewelry.
•Donotoperatethemachinewhileill,tired,orunderthe
inuenceofalcoholordrugs.
•Thebladeissharp;contactingthebladecanresultin
seriouspersonalinjury.Shutofftheengineandwaitfor
allmovingpartstostopbeforeleavingtheoperating
position.
8