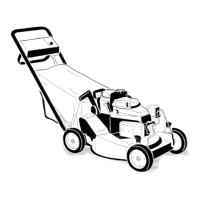
Figure27
1.Sail
3.Wear
2.Flatpartoftheblade4.Slotformed
Note:Forthebestperformance,installanewbladebefore
themowingseasonbegins.Duringtheyear,ledownany
smallnickstomaintainthecuttingedge.
DANGER
Awornordamagedbladecanbreak,andapiece
ofthebladecouldbethrowninyourdirectionor
inthedirectionofbystanders,resultinginserious
personalinjuryordeath.
•Inspectthebladeperiodicallyforwearor
damage.
•Replaceawornordamagedblade.
InspectingtheAccelerator
ServiceInterval:Beforeeachuseordaily—Inspectthe
acceleratorforwearordamage.
Carefullyexaminetheacceleratorforexcessivewear(Figure
28).Becausesandandabrasivematerialcanwearawaythe
metal(especiallyintheareashownasitem2inFigure28),
checktheacceleratorbeforeusingthemachine.Ifyounotice
thatatabontheacceleratorhasbeenworndowntoasharp
edgeorthereisacrack,replacetheaccelerator;referto
RemovingtheBlade(page20).
Figure28
1.Accelerator3.Tab
2.Weararea
4.Crackformed
WARNING
Awornordamagedacceleratorcanbreak,anda
pieceoftheacceleratorcouldbethrownatyouor
bystanders,resultinginseriouspersonalinjuryor
death.
•Inspecttheacceleratorperiodicallyforwearor
damage.
•Replaceawornordamagedaccelerator.
RemovingtheBlade
1.Grasptheendofthebladeusingaragorathickly
paddedglove.
2.Removethebladebolt,thelockwasher,theaccelerator,
andtheblade(Figure27).
SharpeningtheBlade
ServiceInterval:Every50hours—Sharpenorreplacethe
blade.Maintainitmorefrequentlyifthe
edgedullsquicklyinroughorinsandy
conditions.
Filethetopsideofthebladetomaintainitsoriginalcutting
angle(Figure29A)andinnercuttingedgeradius(Figure
29B).Thebladewillremainbalancedifyouremovethesame
amountofmaterialfrombothcuttingedges.
Figure29
1.Sharpenthebladeatthis
angleonly.
2.Maintaintheoriginalradius
here.
20