Setting Height-of-Cut
11
3. Rotate the cutting unit backward to gain access
to reel and bedknife.
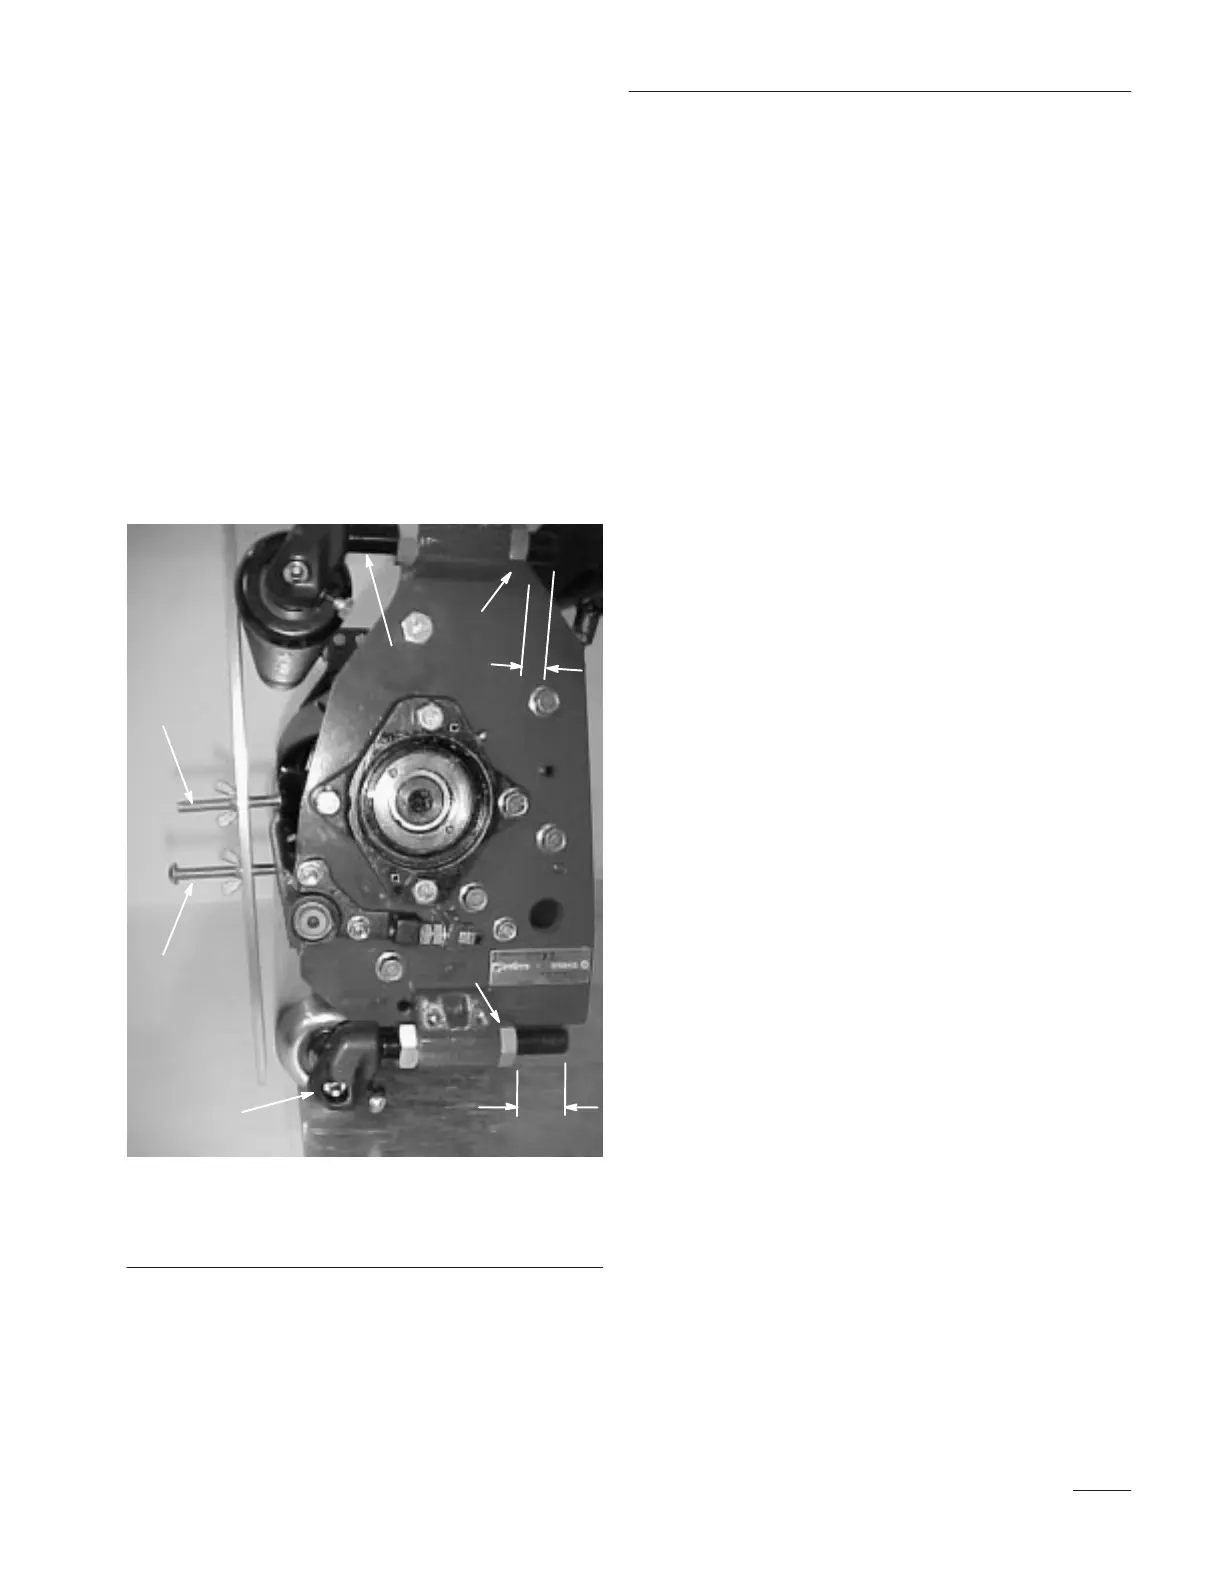
4. Set the front height-of-cut rod height,“B,” using
the dimension given in Table 1. This
measurement is between the top surface of the
height-of-cut rod and top cone nut (Fig. 8).
5. Set the rear support casting in either the top or
bottom location as indicated in Table 1. Set the
rear height-of-cut rod height .100” (3 mm) less
than the dimension given in Table 1 which will
create a gap between the rear roller and the
gauge bar (Fig. 8).
1
2
“B”
3
4
“C”
3
4
Figure 8
1. First screw
2. Second screw
3. Height-of-cut rod
4. Cone nut
6. Place gauge bar across front and rear rollers. The
first screw head should fit snugly over edge of
bedknife and the end of second screw should
contact bottom of bedknife (Fig. 8). If there is a
gap between the front roller and the gauge bar or
you can not put the gauge bar on, adjust the front
roller until: (1) first (height-of-cut) screw fits
snugly over bedknife, (2) second screw just
contacts bedknife, and (3) gauge bar touches
front roller. Verify front roller (attitude) at each
end of the bedknife.
Note: At this time, there should be a small
gap between the rear roller and gauge
bar.