10
SETĆUP INSTRUCTIONS
INSTALL FRONT WHEELS
Note: Grease axle shafts before installing wheels.
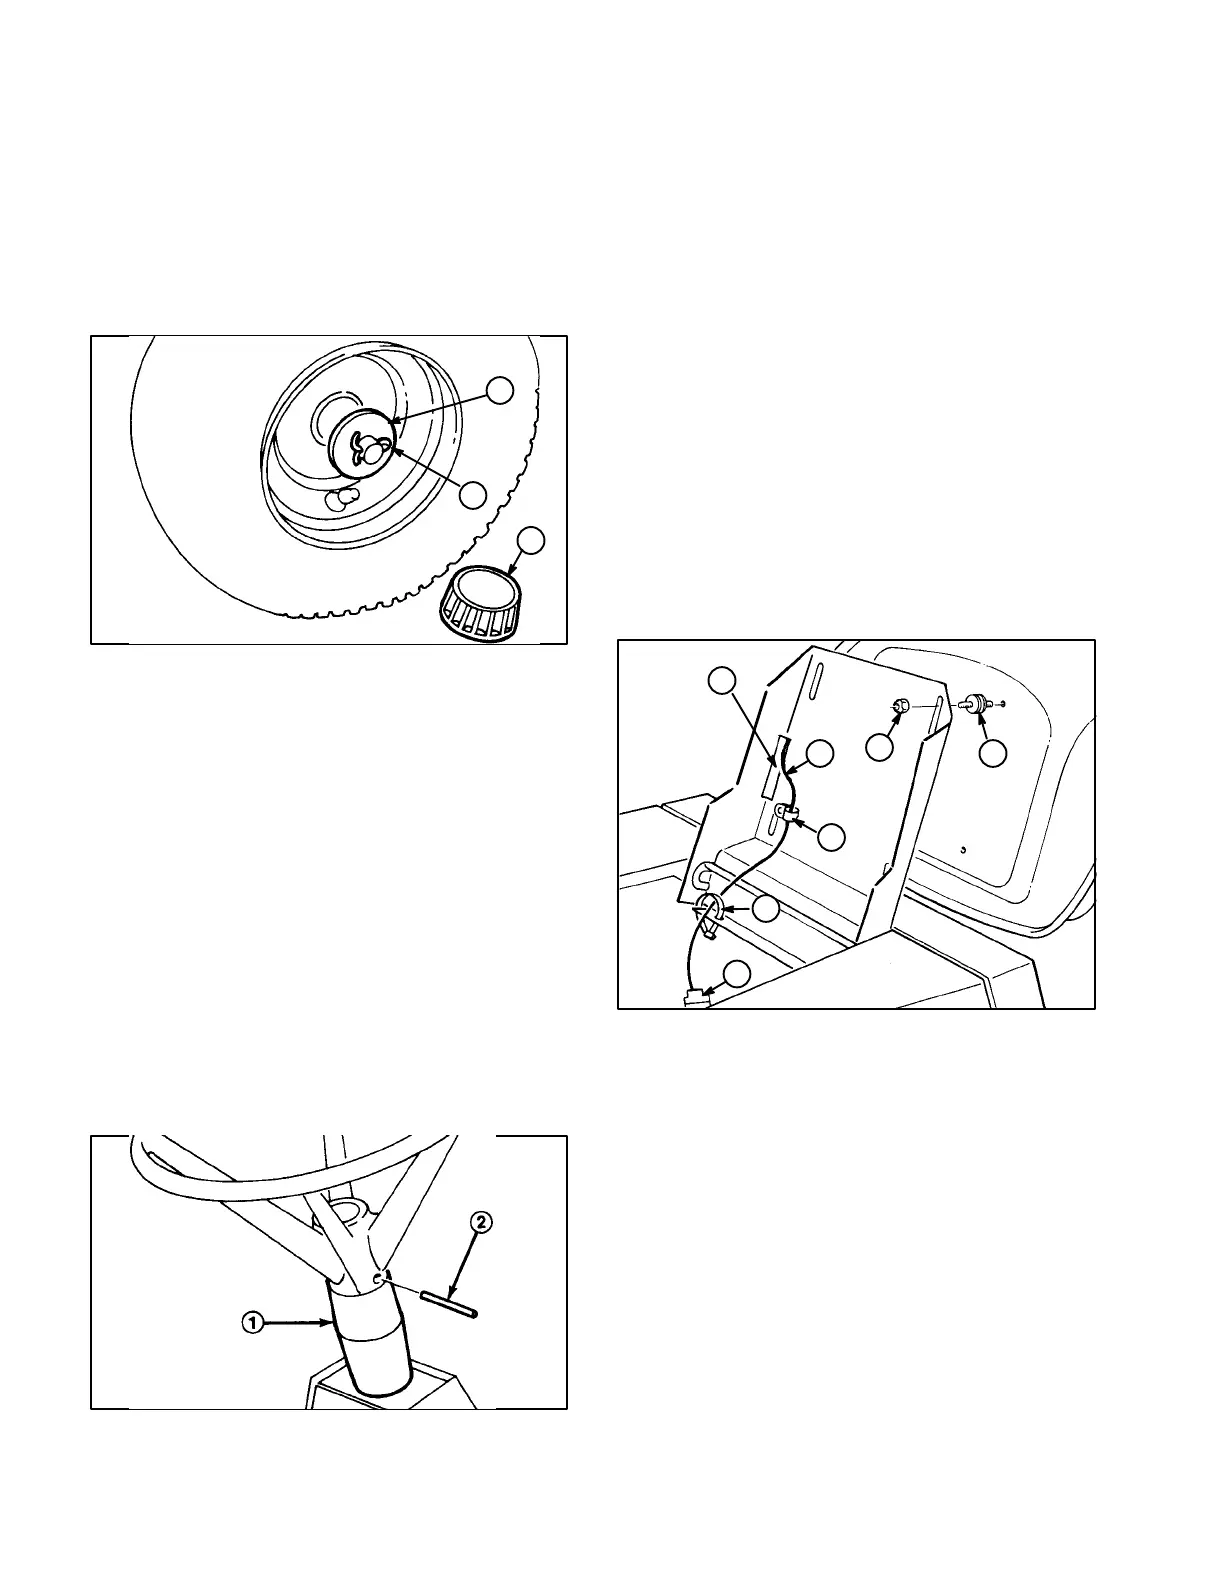
1. Install wheel onto axle.
2. Mount flat washer onto axle, insert cotter pin and
open pin ends with pliers (Fig. 1).
3. Install hub caps.
Figure 1
! $ !! "
1
2
3
4. Repeat steps 1Ć3 on opposite side.
5. Check front and rear tires for 12 psi (82.7 kPa)
inflation.
6. Lubricate both front wheels with No. 2 general
purpose grease. Pump grease gun until grease
comes through bearings. Wipe up any excess
grease.
INSTALL STEERING WHEEL
1. Position wheels in straight ahead direction and
slide steering shaft cover over steering shaft.
2. Slip steering wheel over shaft and line the steerĆ
ing wheel mount hole with the shaft mounting hole
(Fig. 2). Toro logo should be readable from operaĆ
tor's position.
Figure 2
! ! #
3. Insert a drift punch partially through the holes to
maintain alignment and insert the roll pin in from the
opposite side.
4. Drive the roll pin in until it is flush with the outĆ
side of the wheel (Fig. 2).
INSTALL SEAT
1. Thread (4) seat spacers into bottom of seat
(Fig. 3).
2. Position seat onto seat base, inserting seat
switch cable thru slot and spacer studs thru mountĆ
ing holes (Fig. 3).
3. Slide wire clamp over seat switch wire (Fig. 3).
4. Using left front spacer stud, loosely secure wire
clamp and seat to seat base with a locknut (Fig. 3).
Figure 3
!
! $! $
"!
! $! !
! $! !
!
3
4
5
6
7
1
2
5. Mount seat to seat base with (3) remaining lockĆ
nuts.
Note: Seat may be adjusted for operator comfort by
positioning seat as desired in seat base slots.
6. Tighten all locknuts.
7. Insert seat switch connector into wire harness
connector.
8. Secure wire harness to front of seat base with
wire tie.