Maintenance
43
Spark
Plug
Check the spark plug(s) after every 100 operating
hours. Make sure the air gap between the center and
side electrodes is correct before installing the spark
plug. Use a spark plug wrench for removing and
installing the spark plug(s) and a gapping tool/feeler
gauge to check and adjust the air gap. Install a new
spark plug(s) if necessary.
Type: NGK BPR5ES (or equivalent) Air Gap: 0.030
in. (.75 mm)
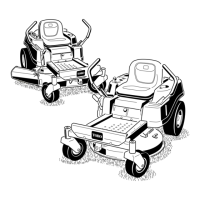
Removing the Spark Plug(s)
1. Disengage the power take off (PTO), set the
parking brake, and turn the ignition key to
“OFF” to stop the engine. Remove the key.
2. Pull the wire(s) off the spark plug(s) (Fig. 29).
Now clean around the spark plug(s) to prevent
dirt from falling into the engine and potentially
causing damage.
3. Remove the spark plug(s).
2
1
Figure 29
1. Spark
plug wire installed
2.
Spark plug
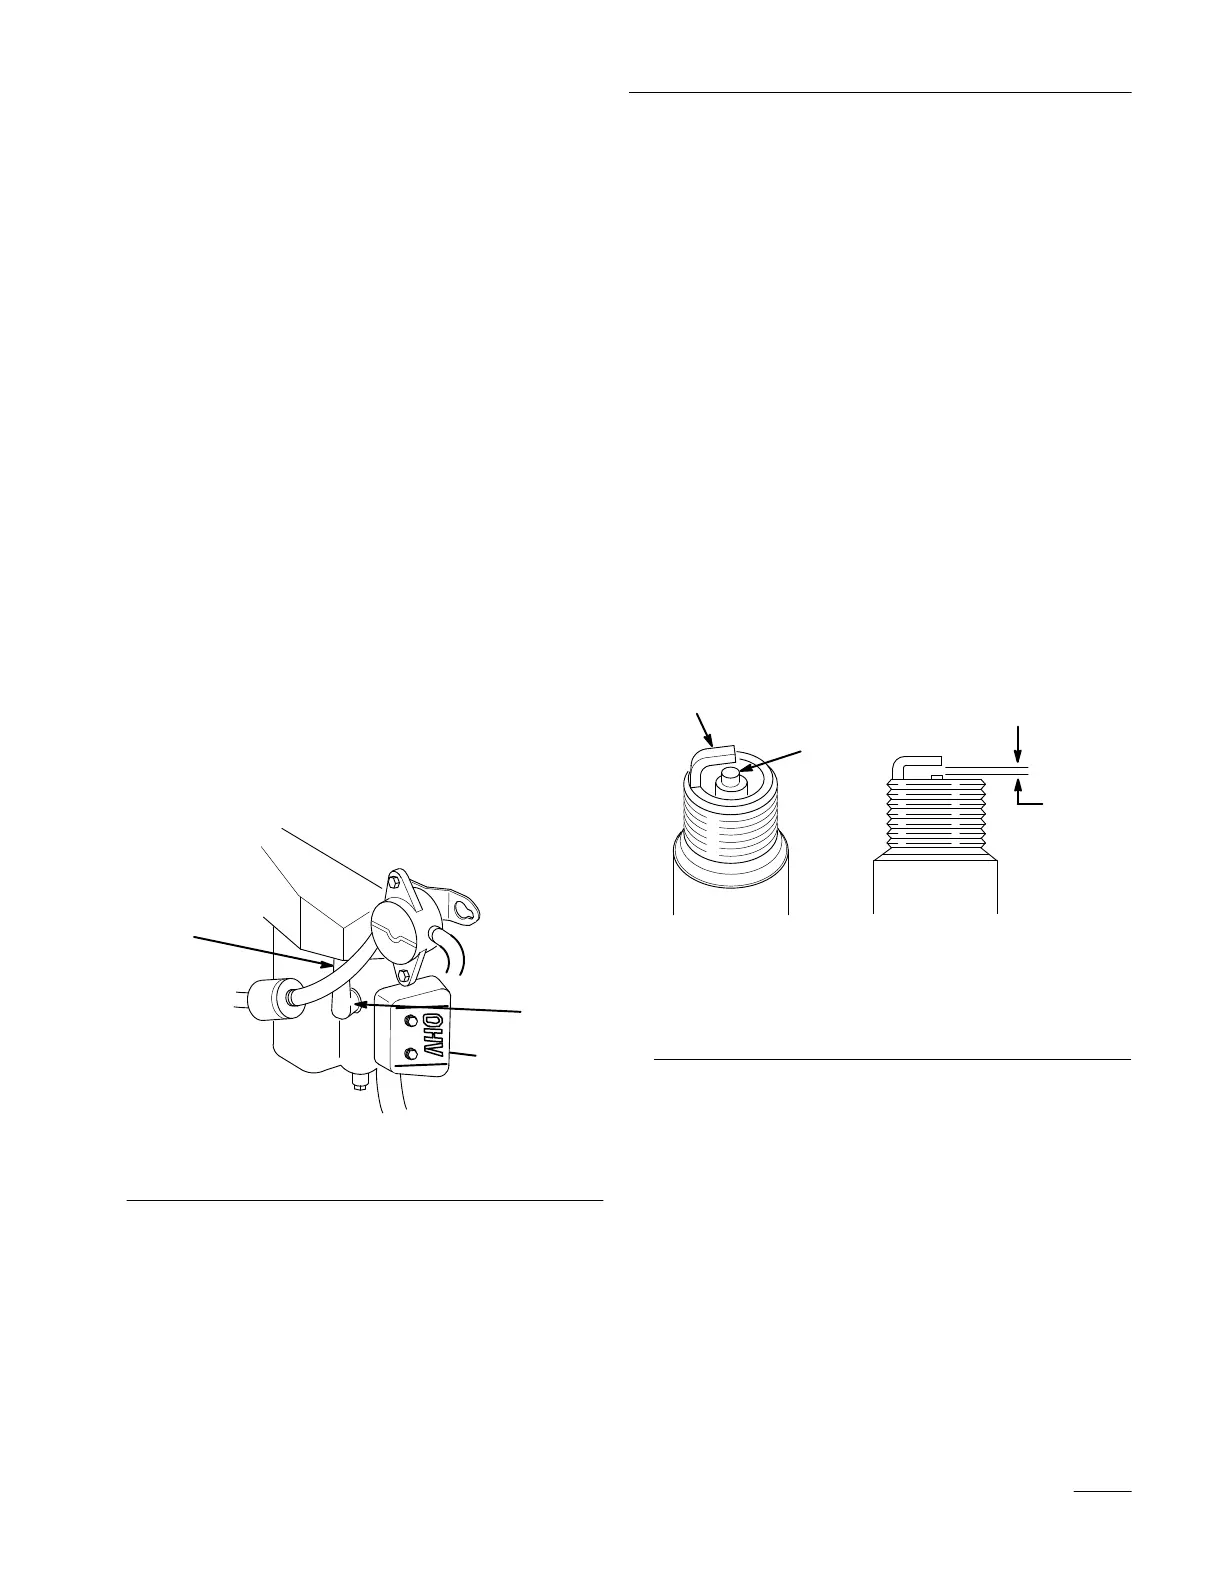
Checking the Spark Plug
Clean or replace spark plug and set gap every 100
hours.
1. Look at the center of the spark plug(s) (Fig. 30).
If you see light brown or gray on the insulator,
the engine is operating properly. A black coating
on the insulator usually means the air cleaner is
dirty.
IMPORTANT: Always replace the spark
plug(s) when it has a black coating, worn
electrodes, an oily film, or cracks.
2. Clean the electrode by scraping or with a wire
brussh to remove carbon deposits and wetness.
3. Check the gap between the center and side
electrodes (Fig. 30). Bend the side electrode
(Fig. 30) if the gap is not correct.
0.030
in.
(.75 mm)
2
3
1
m–3215
Figure
30
1. Center
electrode insulator
2.
Side electrode
3.
Air gap (not to scale)
Installing the Spark Plug(s)
1. Install the spark plug(s). Make sure the air gap is
set correctly.
2. Tighten the spark plug(s) to 16 ft-lb (22 N.m).
3. Push the wire(s) onto the spark plug(s) (Fig. 29).