Maintenance
42
Changing/Draining Oil
1. Start the engine and let it run five minutes. This
warms the oil so it drains better.
2. Park the machine so that the drain side is slightly
lower than the opposite side to assure the oil
drains completely. Then disengage the power
take off (PTO), set the parking brake, and turn
the ignition key to “OFF” to stop the engine.
Remove the key.
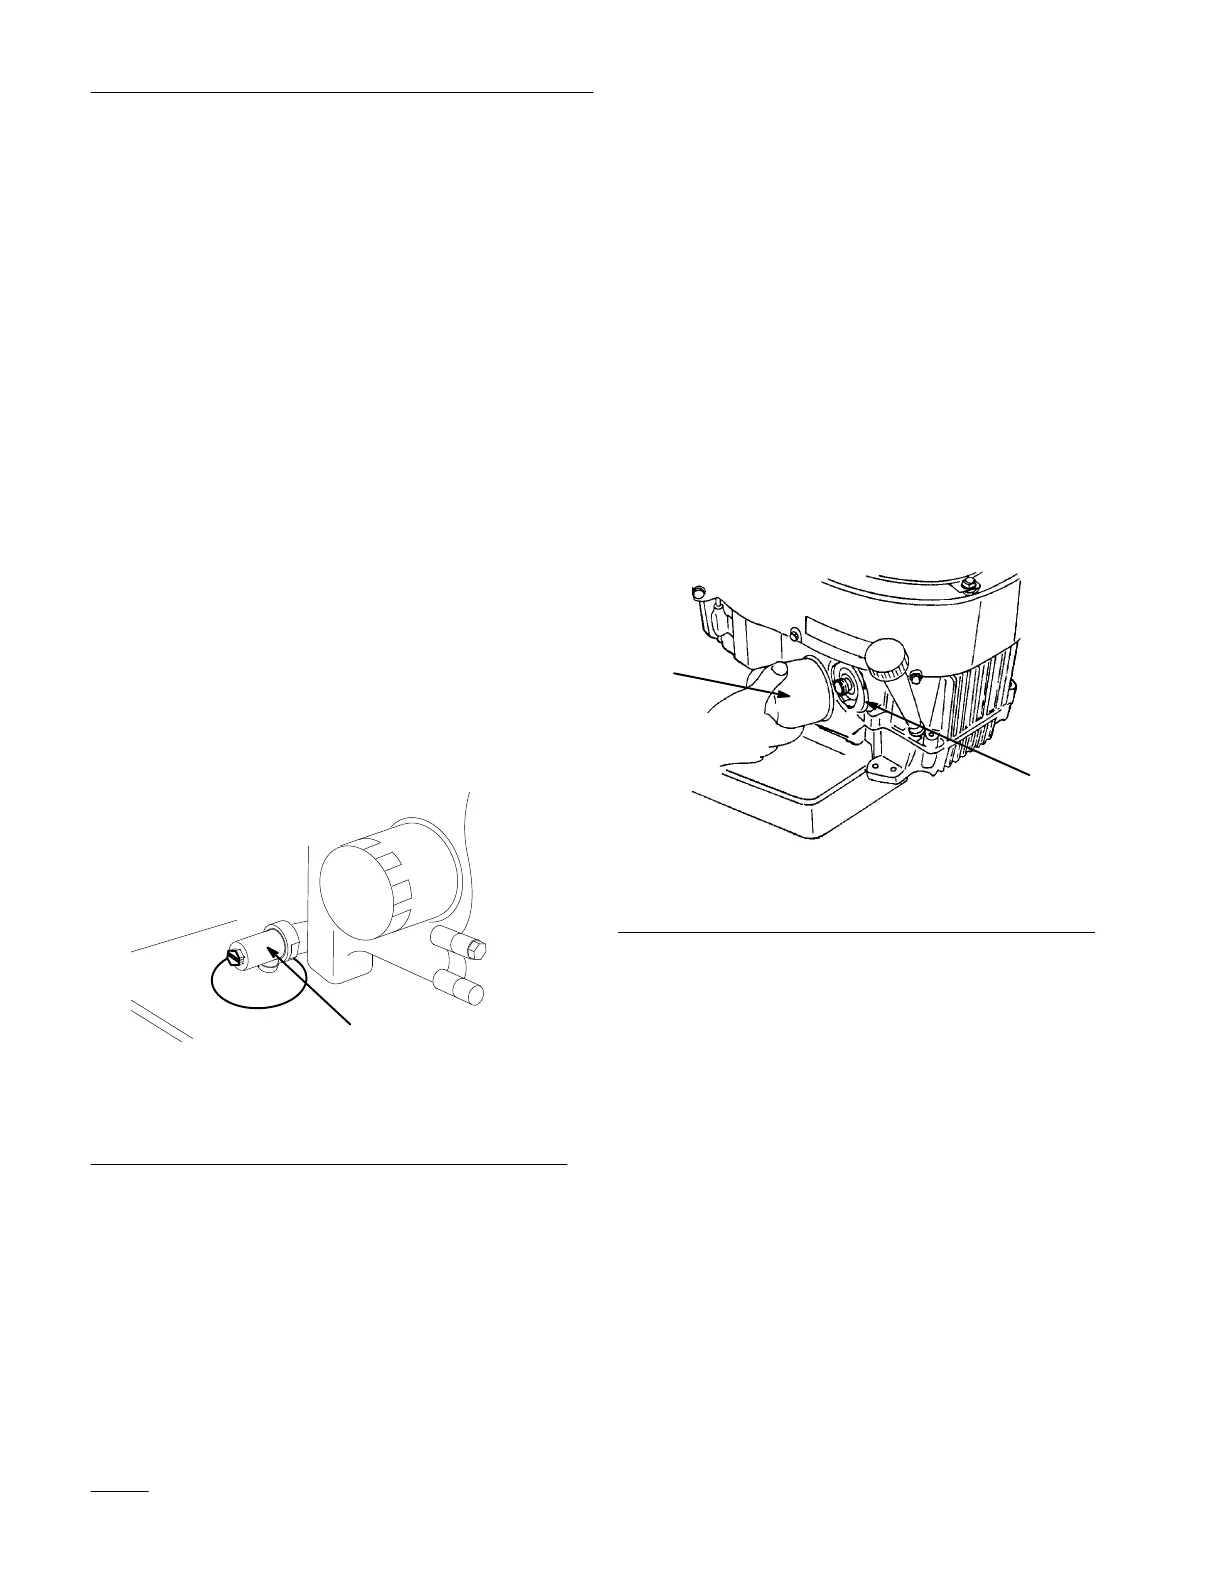
3. Place a pan below the oil drain. Use either a flat
screw driver, 3/8” wrench or 10mm wrench to
open valve (Fig. 27).
4. Rotate valve end clockwise to close valve.
Rotate valve end counterclockwise to open valve
(Fig. 27).
5. When oil has drained completely, close the drain
valve (Fig. 27).
Note: Dispose of the used oil at a certified
recycling center.
1
m–4674
Figure 27
1. Oil
drain valve
6. Slowly pour approximately 80% of the specified
amount of oil specified, page 41, into the filler
tube (Fig. 26). Now check the oil level; refer to
Checking Oil Level, page 41. Slowly add
additional oil to bring to “FULL” mark on
dipstick.
Change Oil Filter
Replace the oil filter every 200 hours or every other
oil change.
Note: Change oil filter more frequently when
operating conditions are extremely
dusty or sandy.
1. Drain the oil from the engine; refer to
Changing/Draining Oil, page 42.
2. Remove the old filter (Fig. 28).
3. Apply a thin coat of new oil to the rubber gasket
on the replacement filter (Fig. 28).
1
2
Figure 28
1. Oil
filter
2. Adapter
4. Install the replacement oil filter to the adapter.
Turn the oil filter clockwise until the rubber
gasket contacts the filter adapter, then tighten the
filter an additional 3/4 turn (Fig. 28).
5. Fill the crankcase with the proper type of new
oil; refer to Changing/Draining Oil, page 42.