Do you have a question about the Toro MultiMatrix V-1550 and is the answer not in the manual?
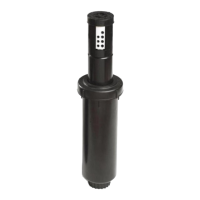
Flow adjustment can be made wet or dry.
Insert tool into slot and turn flow adjust ring to align arrow with desired flow rate number.
Arc can be adjusted wet or dry. Turn nozzle to left stop before changing arc.
Insert tool into small slot in nozzle top and turn clockwise to increase, counterclockwise to decrease.
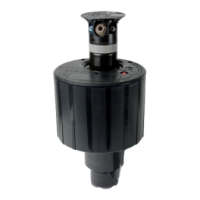
Install sprinkler onto threaded fitting, aligning arrow with left watering border.
Check arc during operation, observe reversing point, and fine tune with adjustment slot.
7° setting is not recommended for newly seeded areas.
Insert tool through radius adjustment hole and turn right to decrease or left to increase trajectory.
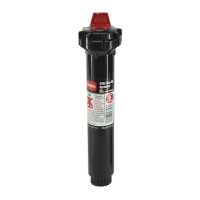
Grasp lower edge of rubber cover and pull away from lip of body.
Insert tool into snap ring slot to press down gray interlocking ring, then twist snap ring out.
Position alignment keys for part circle sprinklers and insert assembly into body.
For part circle sprinklers, align arrow on cover with body alignment keys, then push cover to secure.
Snap ring must be properly installed in body groove with gray interlocking ring for retention.
| Brand | Toro |
|---|---|
| Model | MultiMatrix V-1550 |
| Category | Irrigation System |
| Language | English |