1. Set the watering day schedule to water every day of the week (except watering-
restricted days).
2. Set the run time for each zone to those used during the summer months.
Visit http://schedulingadvisor.toro.com to download free software to help with this step.
Step 3– Adjust the Watering Program
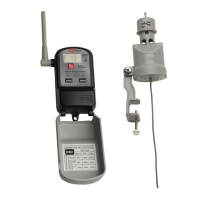
1. Before installing the batteries in the probe, press the Menu button on the receiver once
so “CA” (calibration) is displayed.
2. At this point you have two calibration options: Manual or Automatic.
Manual*GZPVIBQQFOUPLOPXUIFTPJMIBTCFFOUIPSPVHIMZTPBLFEXJUIJOUIFQBTUIPVST
BOEIBTIBEIPVSTUPTPBLJOGPSFYBNQMFBGUFSBOJODIPSNPSFPGSBJOPSBGUFSNVMUJQMF
watering cycles), press or hold down the Minus button
until zero is displayed. This will
set the calibration duration to last zero hours, effectively telling the sensor to set whatever
the current moisture level is as 100%.
Automatic*GUIFTPJMIBTOPUCFFOTPBLFEXJUIJOUIFQBTUIPVSTQSFTTPSIPMEEPXOUIF
Minus button
to set the number of hours for the calibration period duration so it will
MBTUVOUJMUIF&/%PGUIFOFYUBVUPNBUJDXBUFSJOH"EEJUJPOBMMZJGUIFJSSJHBUJPODPOUSPMMFSJT
TFUVQUPBVUPNBUJDBMMZGBMMCBDLJOUPi3VOww"VUPwNPEFBGUFSDPNQMFUJOHBNBOVBMQSPHSBN
run a manual program immediately after installation as well. This will allow for a total of two
watering cycles (one automatic and one manual) within the calibration period, making for a
more accurate calibration.
Note: For additional calibration methods, refer to the full-length User Guide available at
www.toro.com/pss.
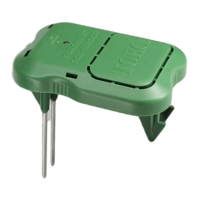
8IJMFTUBOEJOHOFYUUPUIFSFDFJWFSMPDBUFBOESFNPWFUIFTFOTPSCBUUFSZDPNQBSUNFOU
cover.
Step 4– Sensor Installation and Calibration
5
English