Maintenance
16
Greasing
the Bearings and
Bushings
The cutting unit must be lubricated regularly. Refer to
the Service Interval Chart on page 11. Grease with
No. 2 general purpose lithium base or molybdenum
base grease.
1. Stop the engine, remove the key and disconnect
the spark plug wire(s) from the spark plug(s).
2. Grease the fittings on the three spindle bearings
and the idler arm (Fig. 24).
Note: You’ll have to remove the deck cover
to access the grease fitting on the idler
arm.
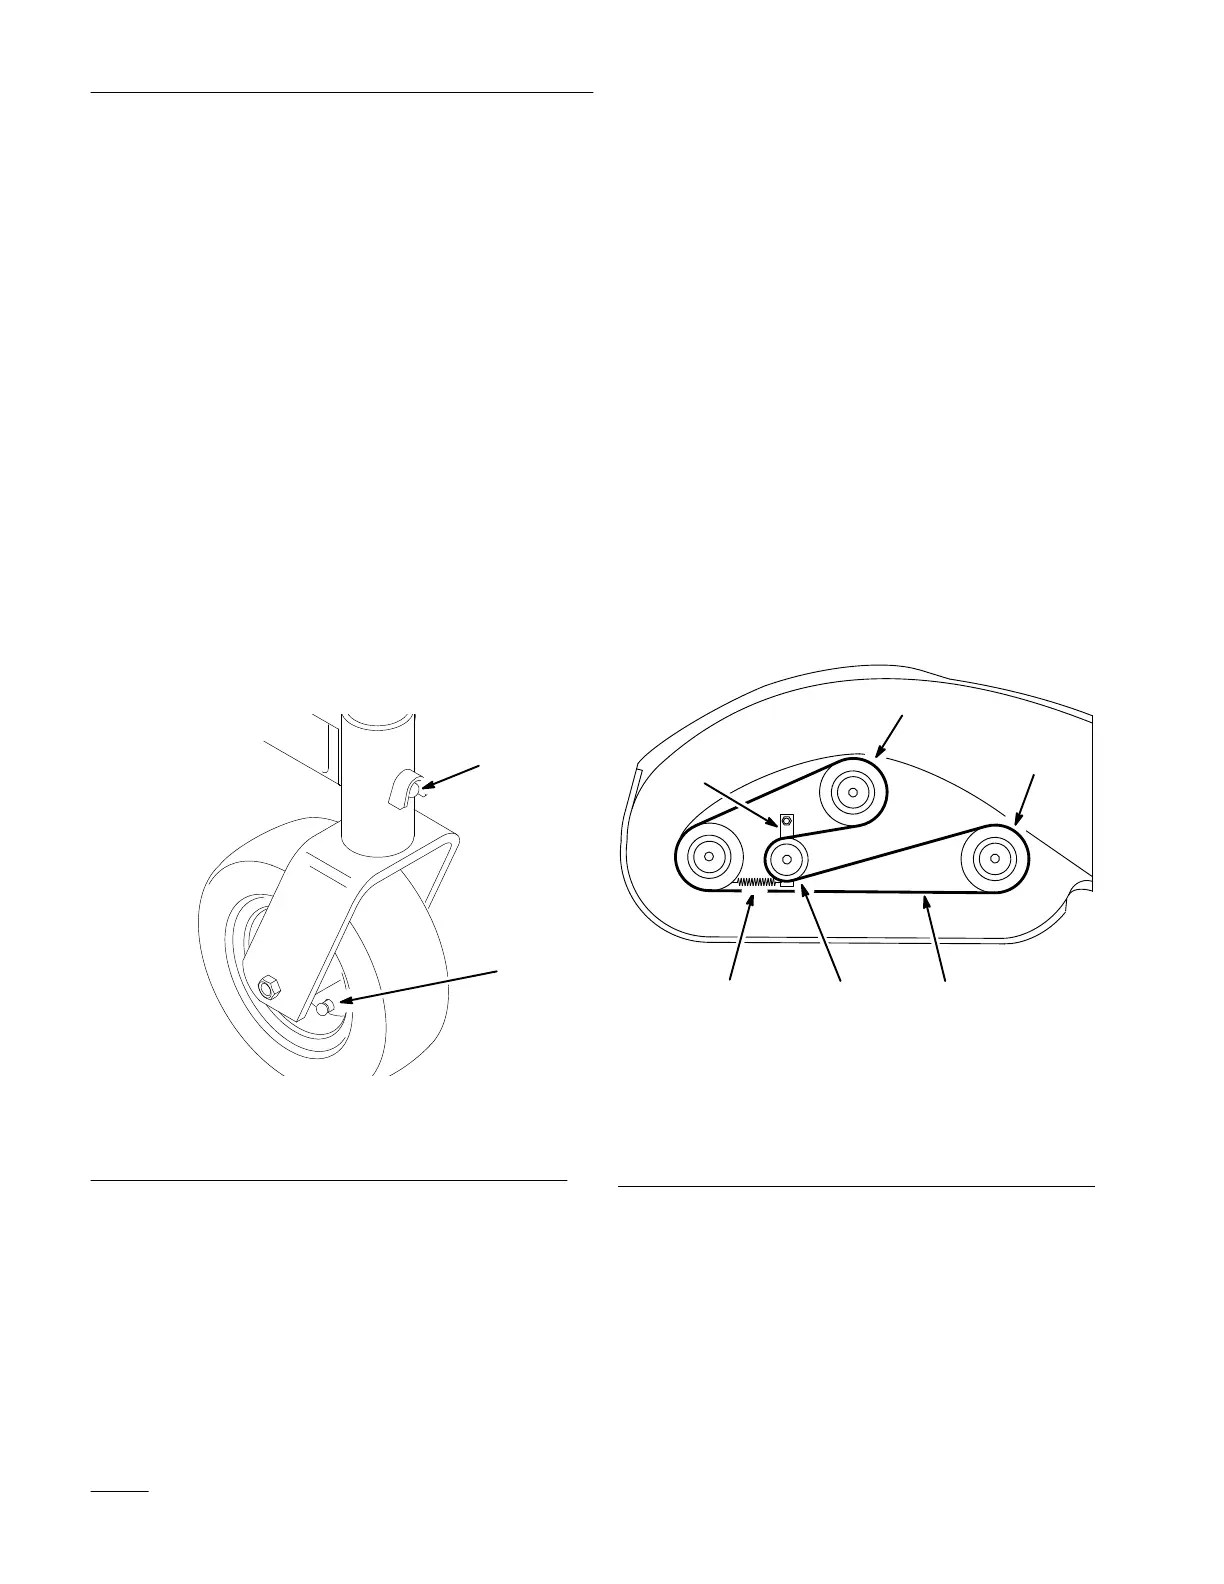
3. Grease the fittings on the carrier frame mounting
tubes and castor wheels (Fig. 23).
1
2
Figure 23
1. Carrier
Frame Mounting
T
ube Grease Fitting
2.
Castor Wheel Grease
Fitting
Replacing
the Deck Belt
Squealing when the belt is rotating, blades slipping
when cutting grass, frayed belt edges, burn marks and
cracks are signs of a worn deck belt. Replace the deck
belt if any of these conditions are evident.
1. Stop the engine, remove the key and disconnect
the spark plug wire(s) from the spark plug(s).
2. Remove the hand knobs holding the deck cover
to the top of the cutting unit and remove the
deck cover.
3. Remove the drive belt. Refer to Replacing the
Drive Belt, steps 1–4 on page 17.
4. Disconnect the idler arm spring to relieve
tension on the idler arm and idler pulley, then
remove the worn deck belt (Fig. 24).
5. Install the new deck belt around the two
outboard spindle pulleys, the idler pulley, and in
the lower groove of the center spindle pulley
(Fig. 24).
6. Reconnect the idler arm spring (Fig. 24).
46
2
3
m–2538
1
5
Figure 24
T
op V
iew
1. Idler
Arm
2.
Center Spindle Pulley
3.
Outboard Spindle
Pulley (2)
4.
Idler Arm Spring
5.
Idler Pulley
6.
Deck Belt
7. Reinstall the drive belt. Refer to Replacing the
Drive Belt, steps 5 and 6 on page 17.
8. Reinstall the deck cover onto the cutting unit,
then reinstall and tighten the hand knobs.