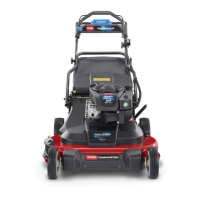
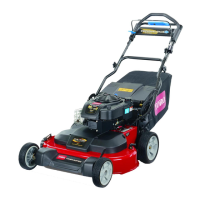
ChargingtheBattery
Electric-StartModelOnly
ServiceInterval:Every25hours
Yearlyorbeforestorage
Chargethebatteryfor24hoursinitially,thenmonthly
(every25starts)orasneeded.Alwaysusethe
chargerinashelteredarea,andchargethebattery
atroomtemperature(about22°Cor70°F)whenever
possible.
Note:Themachineisnotequippedwithanalternator
chargingsystem.
1.Connectthechargertothewireharnesslocated
belowtheignitionkey(Figure32).
g017518
Figure32
2.Plugthechargerintoawalloutlet.
Note:Whenthebatterynolongerholdsa
charge,recycleordisposeofthelead-acid
batteryaccordingtolocalcodes.
Note:Yourbatterychargermayhavea2-colorLED
displaythatindicatesthefollowingstatesofcharging:
•Aredlightindicatesthatthechargerischarging
thebattery.
•Agreenlightindicatesthatthechargerisfully
chargedorisdisconnectedfromthebattery.
•Aashinglightthatalternatesbetweenredand
greenindicatesthatthebatteryisnearlyfully
charged.Thisstatelastsonlyafewminutesuntil
thebatteryisfullycharged.
ReplacingtheFuse
Electric-StartModelOnly
Ifthebatterydoesnotchargeortheenginedoesnot
runwiththeelectricstarter,thefusemaybeblown.
Replaceitwitha40Aplug-intypefuse.
Important:Youcannotstartthemachinewith
theelectricstarterorchargethebatteryunlessa
workingfuseisinstalled.
1.Openthesealedfuseholderandreplacethe
fuse(Figure33).
g020856
Figure33
1.Fuseholder
2.Closethecovertothefuseholder,andensure
thatitissealedtightly.
ReplacingtheBattery
Electric-startmodelonly
RemovingtheOldBattery
1.ContactanAuthorizedServiceDealertoobtain
areplacementbattery.
2.Removethebeltcover;refertostep1of
ServicingtheBlade-DriveSystem(page27).
3.Removetherear-dischargeplug.
4.Movethehandletotheverticalposition.
5.Removethe4smallboltsthatholdtherear
deectorandhandle-lock-leverassemblyin
place.
6.Foldthehandleallthewayforward.
7.Removethereardeectorandhandle-locklever
assembly(Figure34).
25