Maintenance
37
Taillights
Bulb: GE 194
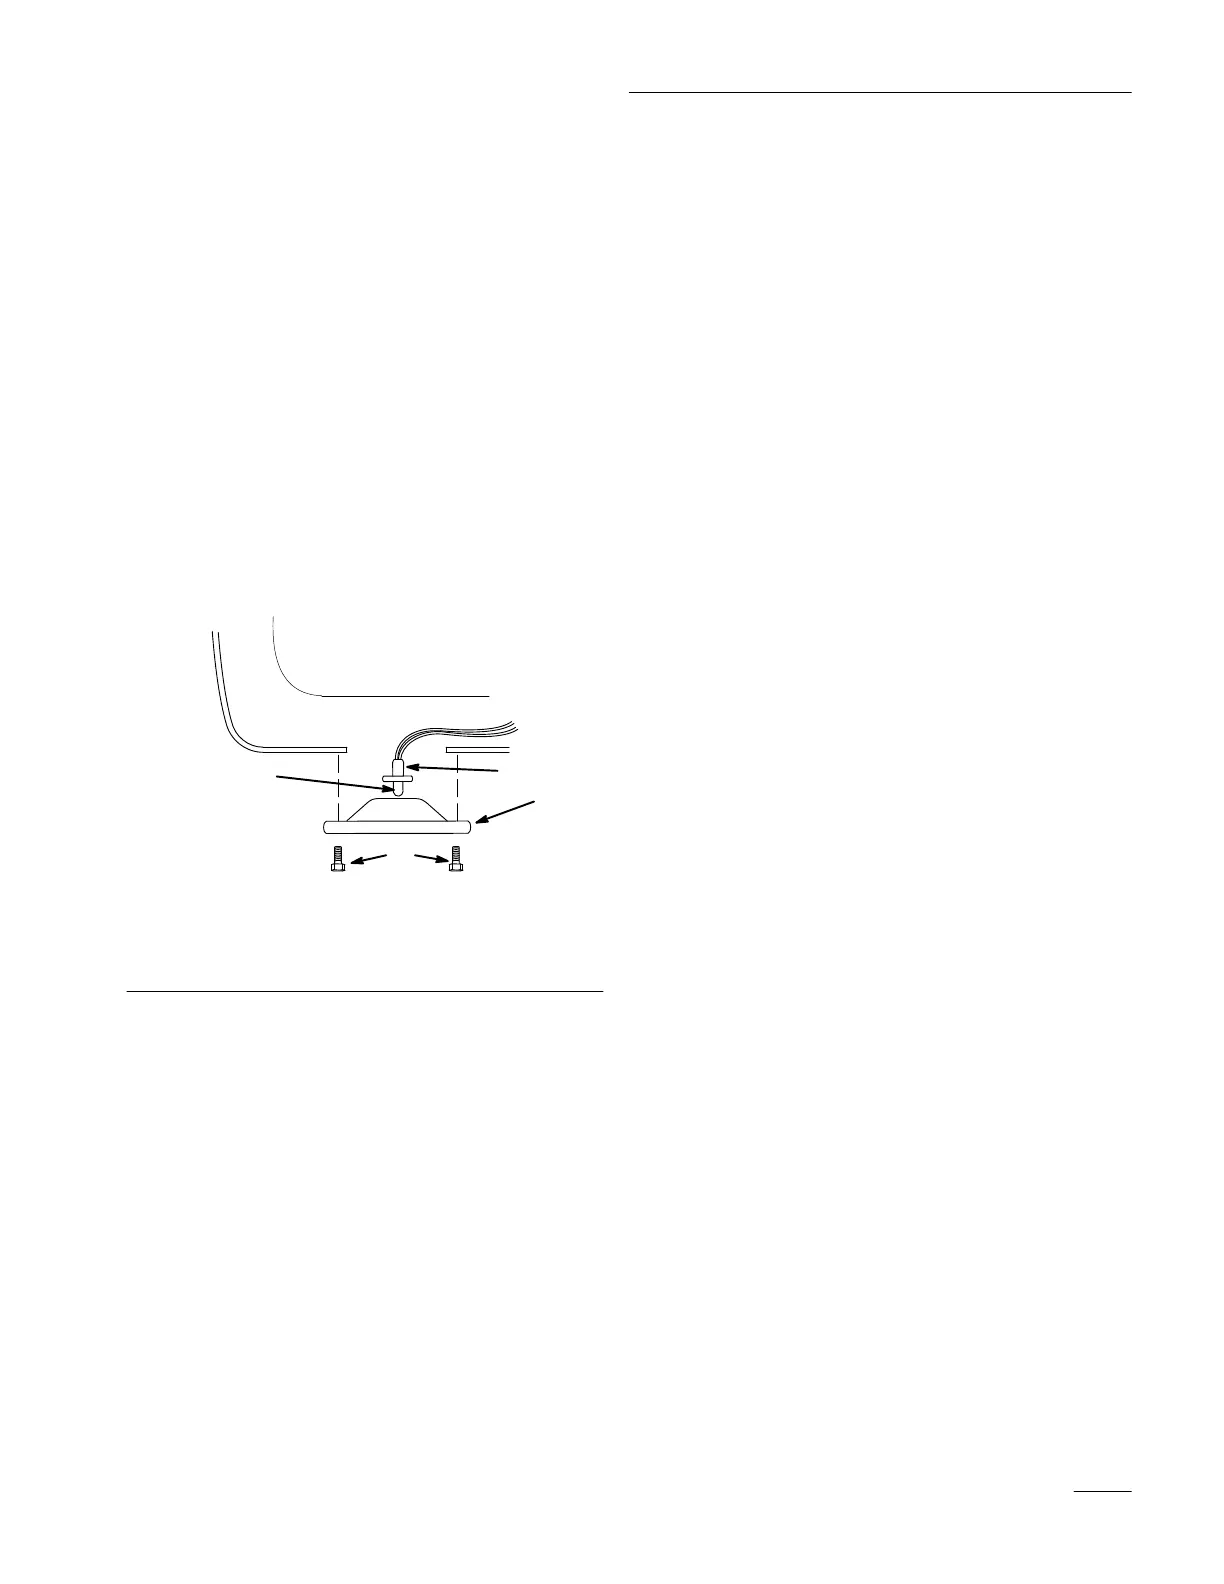
Removing the Bulb
1. Disengage the power take off (PTO), set the
parking brake, lower the attachment lift, and turn
the ignition key to “STOP” to stop the engine.
Remove the key.
2. Remove the two screws.
3. Pull the lens out far enough so that you can
remove the bulb socket.
4. Pull the bulb from the socket.
1
m–3321
2
3
4
Figure 49
1. Lens
2. Screws
3. Bulb
4. Socket
Installing the Bulb
Reverse the bulb removal procedure.
Battery
Service Interval/Specification
Check the electrolyte level in the battery every 25
hours. Always keep the battery clean and fully
charged. Use a paper towel to clean the battery case.
If the battery terminals are corroded, clean them with
a solution of four parts water and one part baking
soda. Apply a light coating of grease to the battery
terminals to prevent corrosion.
Battery size: 12 v, 380 Cold Cranking Amps
Checking the Electrolyte Level
1. Park the machine on a level surface. Disengage
the power take off (PTO), set the parking brake,
lower the attachment lift, and turn the ignition
key to “STOP” to stop the engine. Remove the
key.
2. Remove the front grill by pulling it outward
toward you.
3. Remove the battery shield.
4. Open the cell covers to see into the cells. The
electrolyte must be up to the lower part of the
tube (Fig. 50). Do not allow the electrolyte to get
below the plates.
5. If the electrolyte is low, add the required amount
of distilled water; refer to Adding Water to the
Battery.
6. If the fluid level is correct, press the cell covers
onto the battery and replace the battery shield.
IMPORTANT: Keep the battery shield in
place to protect the battery from heat.
7. Replace the grill.

 Loading...