ELECTRICAL ADJUSTMENTS
2-16: SEPARATION 1, 2
Receive the stereo signal (L=2KHz, R=400Hz).
Connect the AC voltmeter to AUDIO OUT JACK though
stereo filter (L=400Hz, R=2KHz).
Activate the adjustment mode display of Fig. 1-1 and
press the channel button (31) on the remote control to
select "SEP1".
Press the VOL. UP/DOWN button on the remote control
until the output of L-CH and R-CH become minimum.
Press the CH UP button once the set to "SEP2" mode.
Press the VOL. UP/DOWN button on the remote control
until the output of L-CH and R-CH become minimum.
Press the CH DOWN button once the set to "SEP1"
mode.
Repeat step 4 to step 7 several times.
The output difference of the between with Filter and
without Filter should be more than 25db for both L and R.
1.
2.
3.
4.
5.
6.
7.
8.
2-19: SUB TINT/SUB COLOR
1.
2.
3.
4.
5.
6.
7.
8.
9.
10.
11.
12.
Receive the color bar pattern. (RF Input)
Connect the synchro scope to TP806.
Activate the adjustment mode display of Fig. 1-1 and
press the channel button (20) on the remote control to
select "TINT".
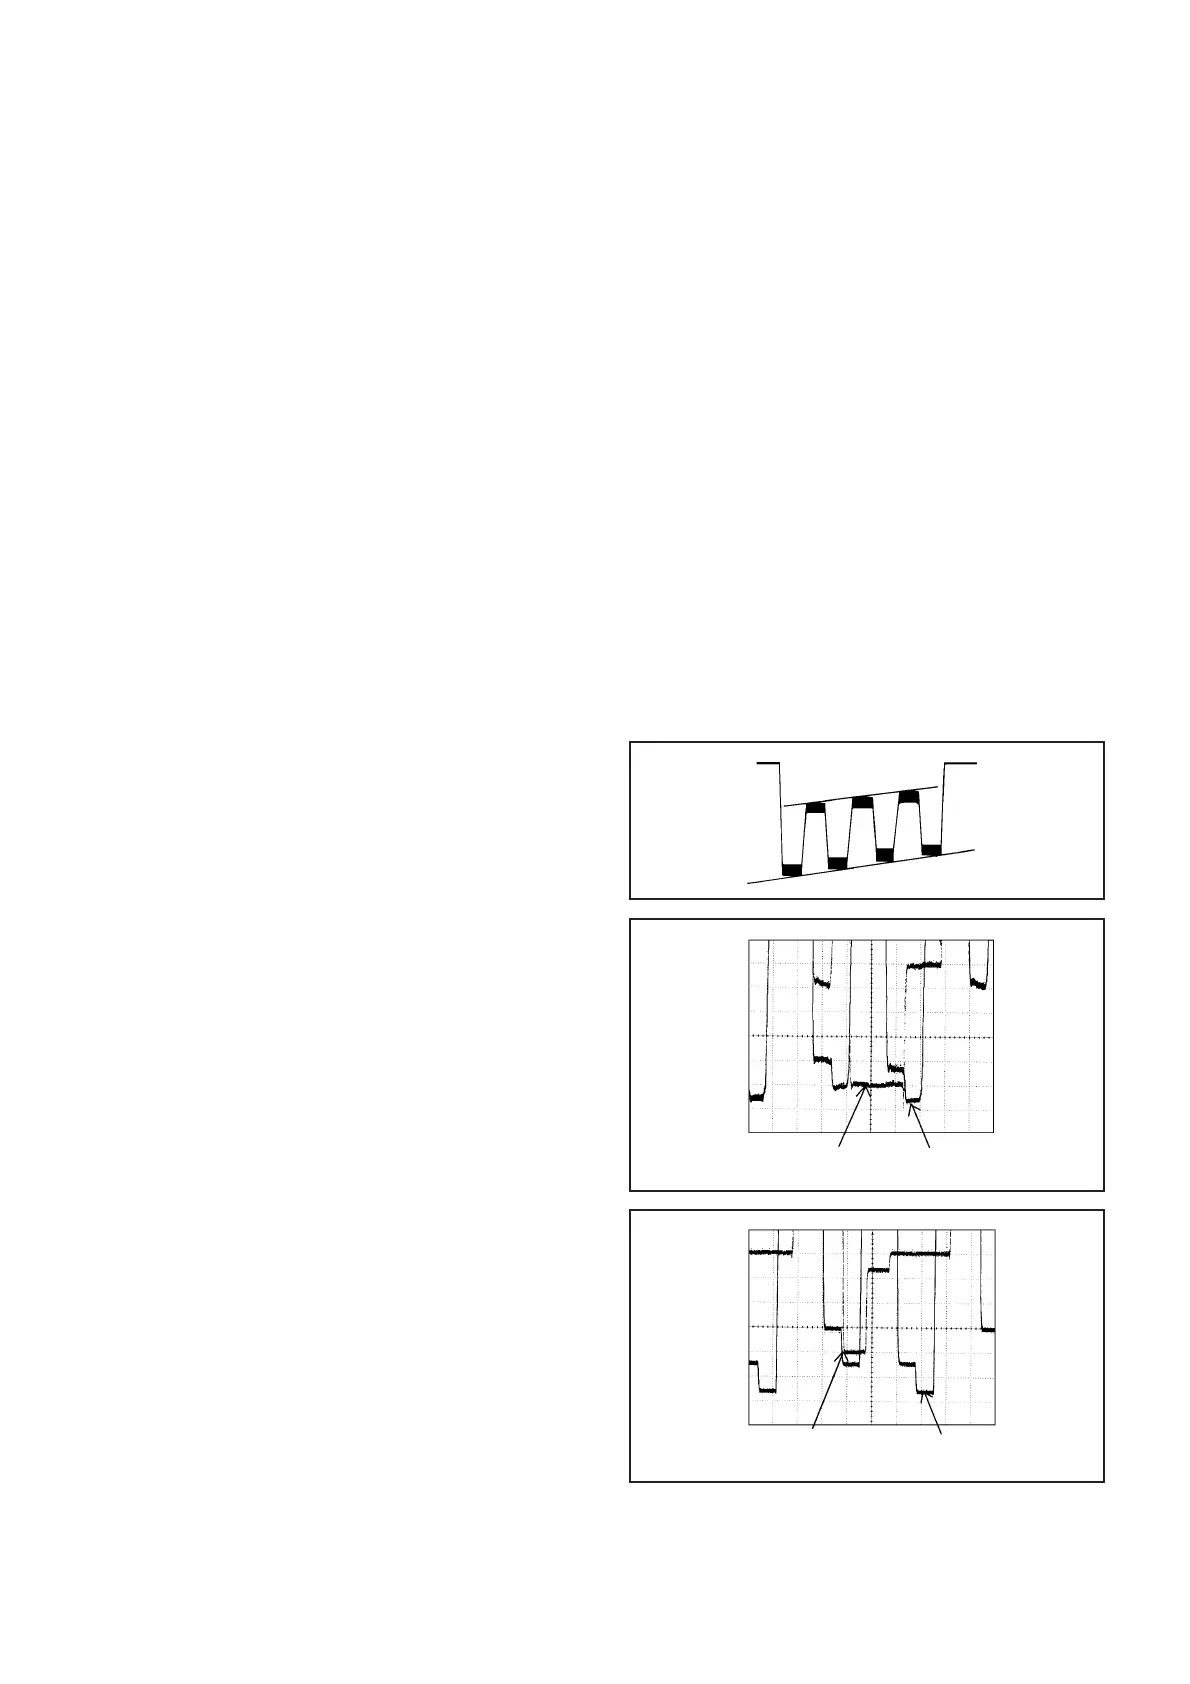
Press the VOL. UP/DOWN button on the remote control
until the waveform becomes as shown in Fig. 2-2.
Connect the synchro scope to TP804.
Press the CH DOWN button 3 times to set to
"SUBCONT" mode.
Press the VOL. UP/DOWN button on the remote control
until the red color level is adjusted to 115% of the white
level. (Refer to Fig. 2-3)
Receive the color bar pattern. (Audio Video Input)
Press the TV/VIDEO button on the remote control to set
to the AV mode. Then perform the above adjustments
2~7.
Receive the color bar pattern. (Audio Video Input)
Press the TV/VIDEO button on the remote control to set
to the CS mode. Then perform the above adjustments
2~6.
Press the VOL. UP/DOWN button on the remote control
until the red color level is adjusted to 140% of the white
level. (Refer to Fig. 2-4)
Fig. 2-2
Fig. 2-3
White 100%
RED Level
Fig. 2-4
White 100%
RED Level
2-17: BRIGHTNESS
1.
2.
3.
4.
Activate the adjustment mode display of Fig. 1-1 and
press the channel button (16) on the remote control to
select "BRI".
Press the VOL. UP/DOWN button on the remote control
until the brightness step No. becomes "68"
Press the TV/VIDEO button on the remote control to set
to the AV mode. Then perform the above adjustments
1~2.
Press the TV/VIDEO button on the remote control to set
to the CS mode. Then perform the above adjustments
1~2.
2-18: UNI-COLOR
1.
2.
3.
4.
5.
6.
Activate the adjustment mode display of Fig. 1-1 and
press the channel button (18) on the remote control to
select "UNI COL".
Press the VOL. UP/DOWN button on the remote control
until the contrast step No. becomes "8"
Press the TV/VIDEO button on the remote control to set
to the AV mode.
Activate the adjustment mode display of Fig. 1-1 and
press the channel button (18) on the remote control to
select "UNI COL".
Press the VOL. UP/DOWN button on the remote control
until the contrast step No. becomes "4"
Press the TV/VIDEO button on the remote control to set
to the CS mode. Then perform the above adjustments
4~5.
 Loading...