R
Ronald NewmanJul 26, 2025
How to change display language on Toshiba D-VR4?
- LlukecarpenterJul 26, 2025
To change the display language on your Toshiba DVD VCR Combo, select the appropriate language in the SETUP MENU.
How to change display language on Toshiba D-VR4?
To change the display language on your Toshiba DVD VCR Combo, select the appropriate language in the SETUP MENU.
What to do if my Toshiba DVD VCR Combo has no picture?
If your Toshiba DVD VCR Combo shows no picture, make sure the antenna connection is correct and the antenna cable is properly connected. Also, verify that the video channel is correctly set and your TV is set to video channel 3 or 4. Ensure the unit is connected correctly and the video input selector on your TV is set to VIDEO (or equivalent). Check that the channel is not set to the external mode.
Why my Toshiba DVD VCR Combo does not operate?
If your Toshiba DVD VCR Combo is not operating, ensure the power cord is properly plugged in and try using a different AC outlet. Check your fuse or circuit breaker to make sure power is on. You can also try unplugging the unit and then plugging it back in. Ensure that you have selected either the DVD or VCR mode before attempting to use it.
Why is there no sound from my Toshiba D-VR4?
If you're not getting any sound from your Toshiba DVD VCR Combo, first verify that the unit is connected correctly. Then, check that the input selector on your amplifier is set properly. Also, confirm that the unit is not in a special playback mode.
What to do if recording does not work on Toshiba D-VR4 DVD VCR Combo?
If recording isn't working on your Toshiba DVD VCR Combo, check the disc space using the disc information. Ensure the disc isn't protected and that the video you're trying to record isn't copy-guarded. Also, verify that the number of recorded titles is 99 or less and the total chapters for the recorded titles is 999 or less, using the disc information. If you're using a DVD-RW of Ver.1.0, recording in Video mode may not work, so check the disc type.
What to do if playback doesn’t start on Toshiba D-VR4 DVD VCR Combo?
If playback doesn't start on your Toshiba DVD VCR Combo, confirm that a disc is inserted. If a disc is inserted, it may be dirty, so clean it. Also, note that the unit cannot play DVD-ROMs, etc.
Why a disc recorded using Toshiba DVD VCR Combo cannot be played back in other players?
If a disc recorded with your Toshiba DVD VCR Combo cannot be played back in other players, first check that the disc is finalized. Note that some DVD players will not play the disc even if it has been finalized. Also, if the disc was recorded in VR mode, the other player must be RW compatible to play it.
Warnings about opening the unit and referring servicing to qualified personnel.
Warning against exposing the appliance to rain or moisture.
Information on FCC compliance and measures to correct interference.
Locates required markings and mentions FDA radiation performance standards.
Covers reading instructions, warnings, cleaning, ventilation, and placement.
Precautions for lightning, power lines, overloading, liquid entry, and antenna grounding.
Instructions for servicing, parts, laser safety, disc handling, and condensation.
Reminder for cable TV installers regarding proper grounding of cable entry.
Highlights realistic sound, immediate scene access, title menus, and media compatibility.
Explains timer recording and convenient one-touch timer recording (OTR).
Covers editing titles, adding chapter marks, erasing scenes, and combining titles.
Describes dubbing tapes to discs or discs to tapes using the unit.
Instructions for handling, storing, cleaning discs, and details on DVD-RAM cartridges.
Lists discs that may not play back, cannot be played back, or have playback limitations.
Lists compatible discs for recording and explains VR vs. Video modes.
Details VR/Video recording specifics, finalization, and playback notes for other players.
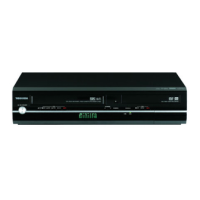
Identifies buttons, indicators, and input/output jacks on the front panel.
Details various audio/video output and input jacks located on the rear panel.
Explains the meaning of various symbols and indicators shown on the unit's display window.
Lists remote control buttons, their functions, operation basics, and battery installation.
Provides common methods for connecting UHF/VHF antennas to the DVD/VCR.
Offers methods for connecting the DVD/VCR to a TV, including splitter usage.
Tips for signal quality, antenna types, and seeking professional help for connections.
Illustrates methods for connecting a cable system with converter/descrambler use.
Shows additional methods for connecting cable systems with A/B switches and descramblers.
Reminds users to set the TV/CABLE menu option and notes on descrambler box usage.
Instructions for connecting to a TV via various video and audio outputs for picture quality.
Guides for connecting to stereo and AV amplifiers, including digital surround and optical cables.
Provides crucial notes on output jacks, audio signal handling, and DTS compatibility.
Basic procedure for navigating and operating the SETUP MENU using remote control keys.
Configures language, parental controls, clock, and disc setup options.
Adjusts screen size, image quality, audio modes, and sound output.
Sets initial recording parameters, auto chapters, and channel management.
Configures JPEG interval for slide shows and other miscellaneous settings.
Steps to insert discs, start/stop playback, and navigate menus and titles.
Covers special playback, instant skip, repeat options, and advanced operations.
Details audio language control, subtitles, CD operations (MP3/WMA/JPEG), and PBC.
Enables high-quality picture playback on compatible TVs using progressive scan mode.
Instructions for inserting, ejecting, and handling video cassette tapes.
Steps to start, stop, rewind, fast forward, and general playback controls.
Covers picture search, still, slow motion, frame advance, tracking, repeat, and status display.
Functions for tape rewinding stop (ZERO RETURN) and locating recorded sections via index marks.
Explains disc types, recording modes, time, and restrictions before recording.
Guides for recording TV programs via manual selection and viewing while recording.
Procedures for setting up timed recordings and one-touch timer recording.
Allows playback during recording and covers stereo recording procedures.
Overview of editing capabilities, distinguishing VR and Video modes.
Creating, managing, renaming, erasing playlists and editing original titles.
Adding chapter marks, combining chapters, and changing disc/title names.
Explains character input methods using the on-screen keyboard for naming.
Steps to record video/audio from a video tape onto a disc.
Instructions for recording video/audio from a disc onto a video tape.
Guides for connecting other VCRs or camcorders for dubbing operations.
Definitions of technical terms and features used in the manual.
Lists language codes and provides a troubleshooting guide for common issues.
Details video head cleaning procedures and explains error/warning messages.
Technical details of the unit's general, VCR, and DVD sections, including inputs/outputs.
Details limited warranties, conditions, and consumer responsibilities for DAV products.
Instructions on how to contact customer service and obtain warranty repair for the product.
| Brand | Toshiba |
|---|---|
| Model | D-VR4 |
| Category | DVD VCR Combo |
| Language | English |