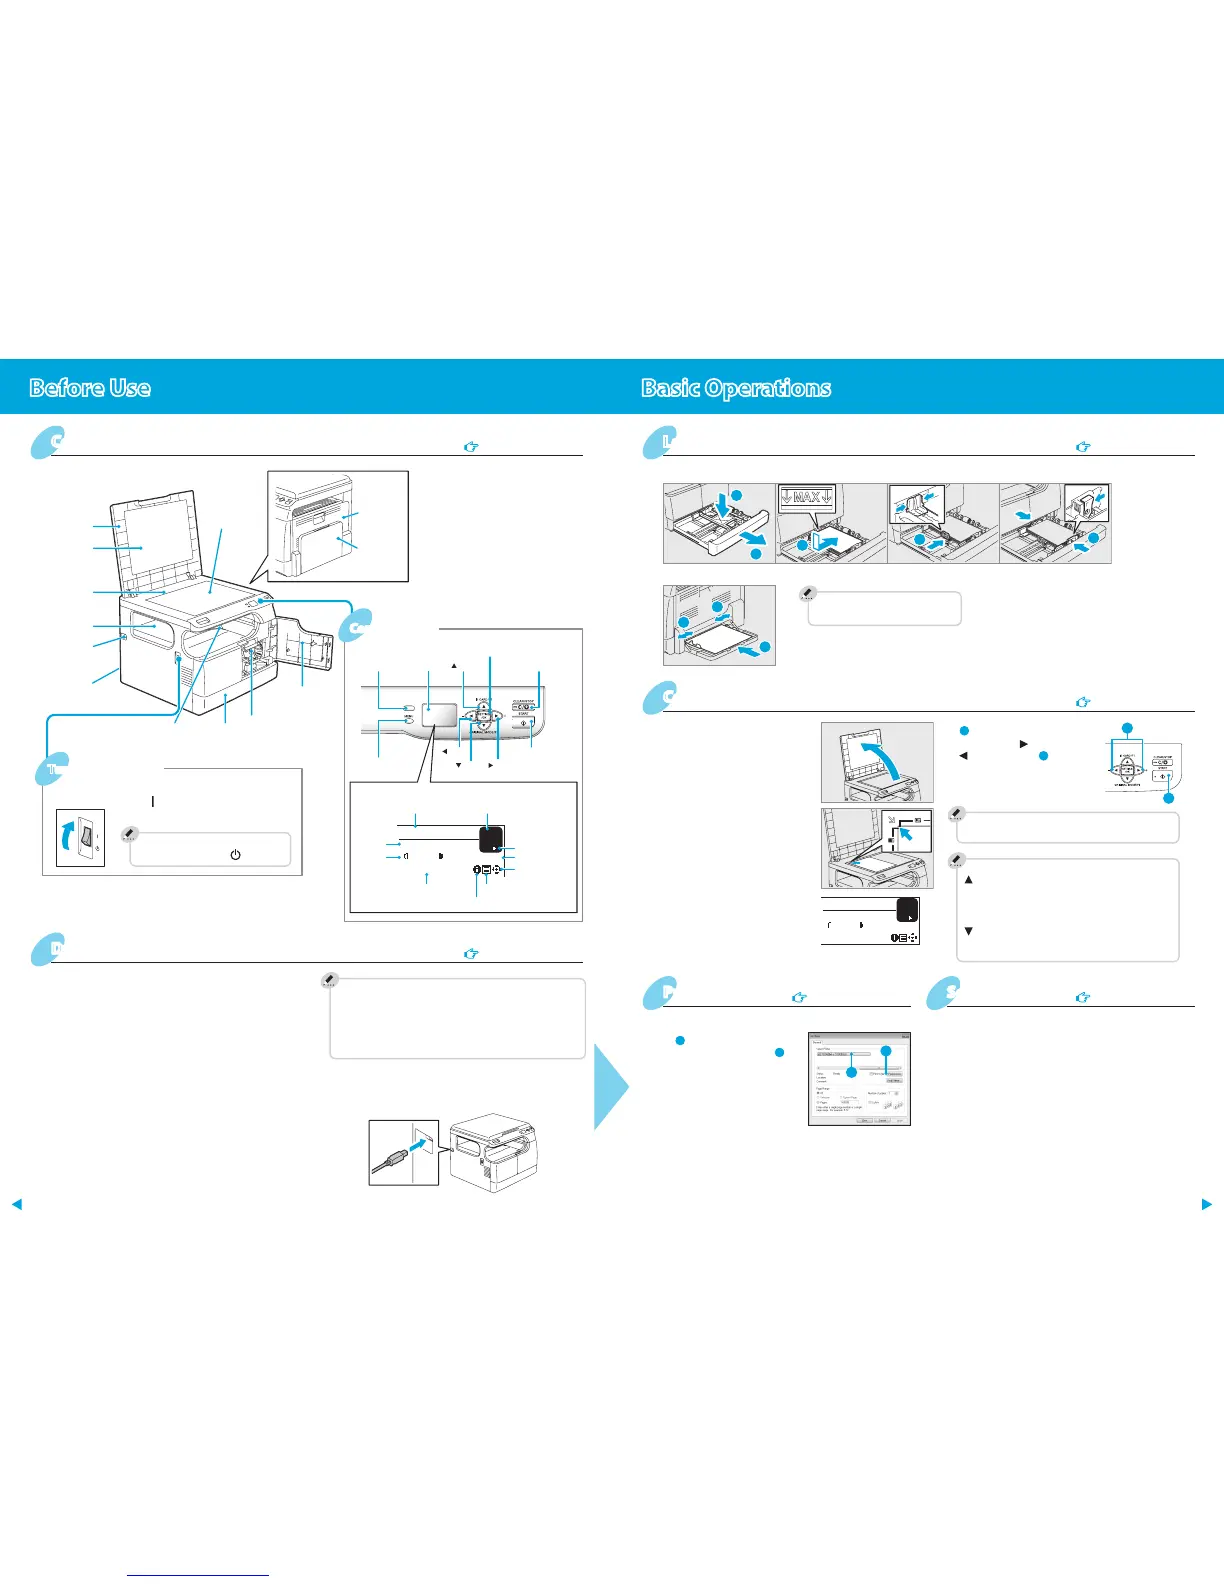
Press the power switch to “ ” (ON) side.
To turn the power o
Press the power switch to “ ” (OFF) side.
Installing the driver requires the administrator authority.
In Windows 7 or Windows Server 2008 R2, be sure to use the
installer to install the drivers.
Using installer
1. Insert the CD-ROM into the CD-ROM drive of the computer.
2. Double-click [Setup.exe] on the CD-ROM.
3. Follow the instructions of the installer.
Using Plug and Play
1. Connect the equipment to the computer using a USB cable,
and then start the computer.
2. Turn on the power of the equipment.
3. Follow the dialog of the operation system.
Note for installing from installer
Do not connect the USB cable to the equipment until the instruction
appears.
Exit all running applications, if any.
If the [User Account Control] window appears, click [Allow],
[Continue] or [Yes] on Step 2.
•
•
•
Bypass tray
To set paper size and paper type
[MENU] button → [PAPER SETTINGS]
1. Raise the platen cover.
1. Select [Print] in the [File] menu of the application.
1. Raise the platen cover.
2. Place the original face down on the original glass and align it
against the left rear corner.
3. Run your TWAIN-compatible application and execute the
image acquisition command from within the application.
4. Click [Scan] to scan the original.
5. Save the scanned image in your application.
Now printer
and scanner
functions are
available.
Drawer
Control panel
Turning power ON
4.
press the
[START] button.
Copying starts.
To stop copying and reset settings and LCD screen
[CLEAR/STOP] button
Shortcut keys
button
Press: Except Europe “ID CARD”, Europe “DENSITY”
Press 1 sec.: “FUNCTION 1”
(Default: Except Europe “DENSITY”, Europe “ID
CARD”)
button
Press: “ORIGINAL MODE”
Press 1 sec.: “FUNCTION 2” (Default: “ZOOM”)
Copier
User's Guide: Chapter 2
2. Place the original with its face
down on the original glass and
align it against the left rear corner.
3. Press the [SETTING/OK] button
and specify the copy setting as
required.
 Loading...


